Transitioning Cedar from Stain to Oil

Transitioning Cedar from Stain to Oil

13 Jul 2023
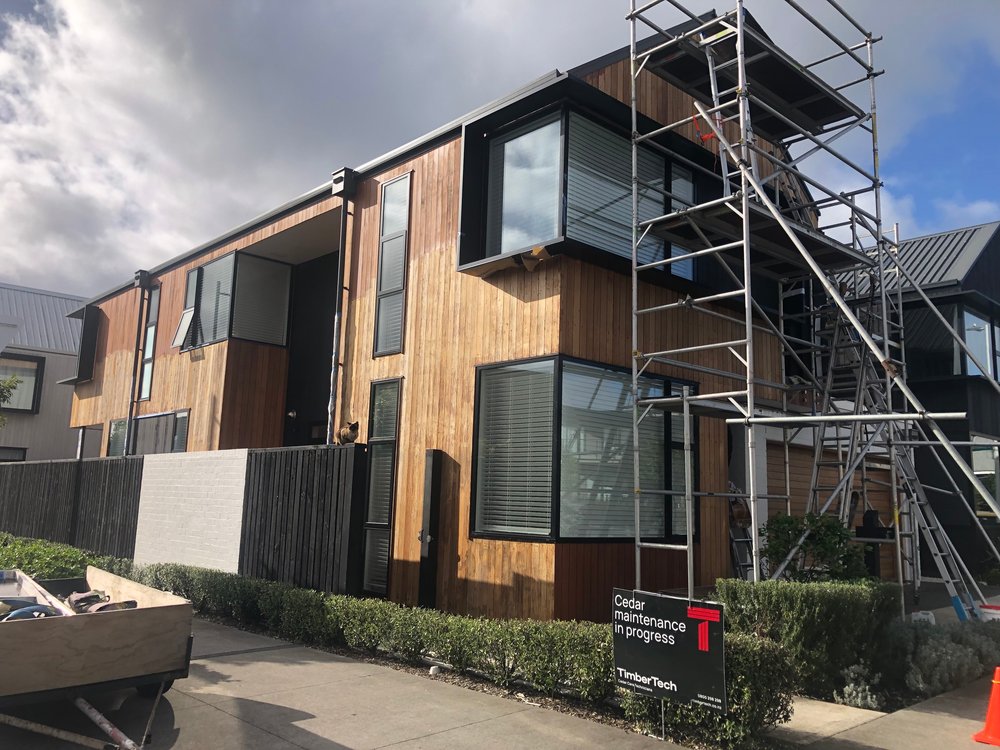
Cedar stain to oil before 1

As Cedar ages, we highly recommend transitioning Cedar from stain to a penetrating oil where possible.

If you want to know more about the pros and cons of each, please read our article The Cedar Oil vs. Cedar Stain Debate.

The simple truth is, no matter how much stain you put on the surface of the timber, 5-10 years of sun exposure on a northern face will deplete the natural oils of the Cedar and cause the boards to dry out, cup, then ultimately split.

This doesn’t just look bad, it threatens the integrity of your home to withstand the elements and if the damage continues, you may need to replace the cladding altogether.

How Stained Cedar Ends Up Looking Unsightly

Treating aged Cedar with stain isn’t usually an informed choice by the homeowner. Often, the previous owner has done a quick fix and used stain to make the Cedar look pretty before selling, or the current homeowner has stained over a poorly prepared stain without stripping back the boards.

Stains are translucent, so even though they have some opacity, you can still see through them and unless the preparation is done well, stains don’t hide imperfections.

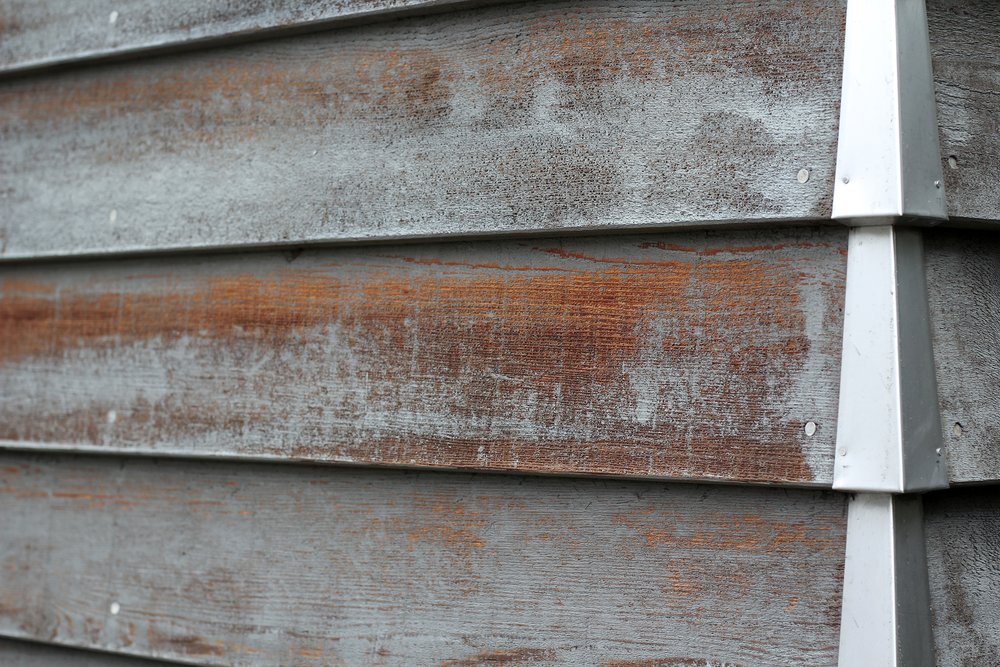
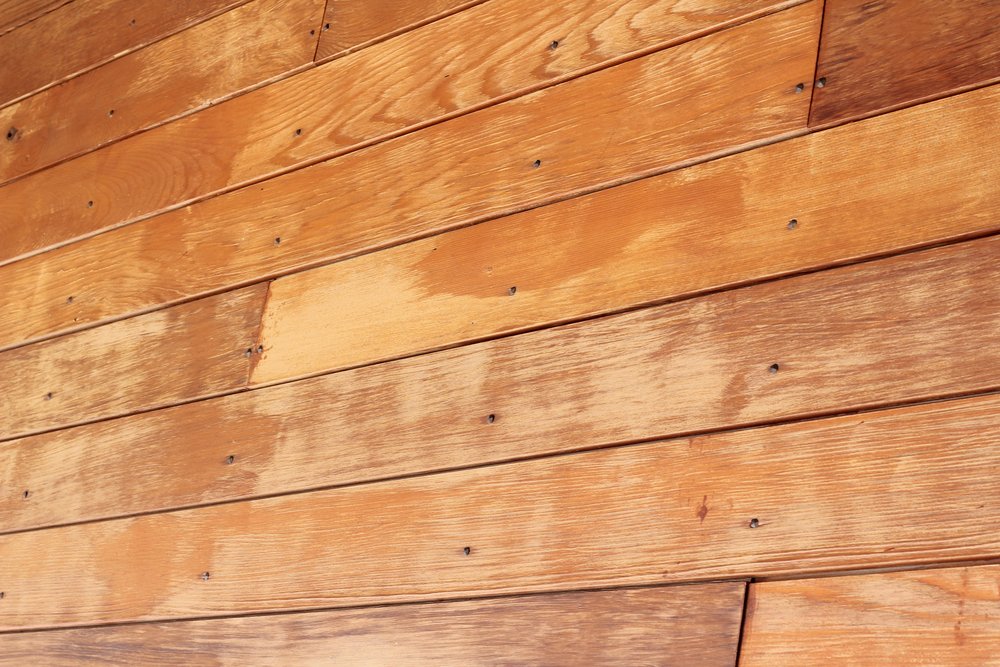
Eventually the stain will delaminate in the harsh UV, giving a camouflaged look with light and dark shades that are often patchy and uneven.

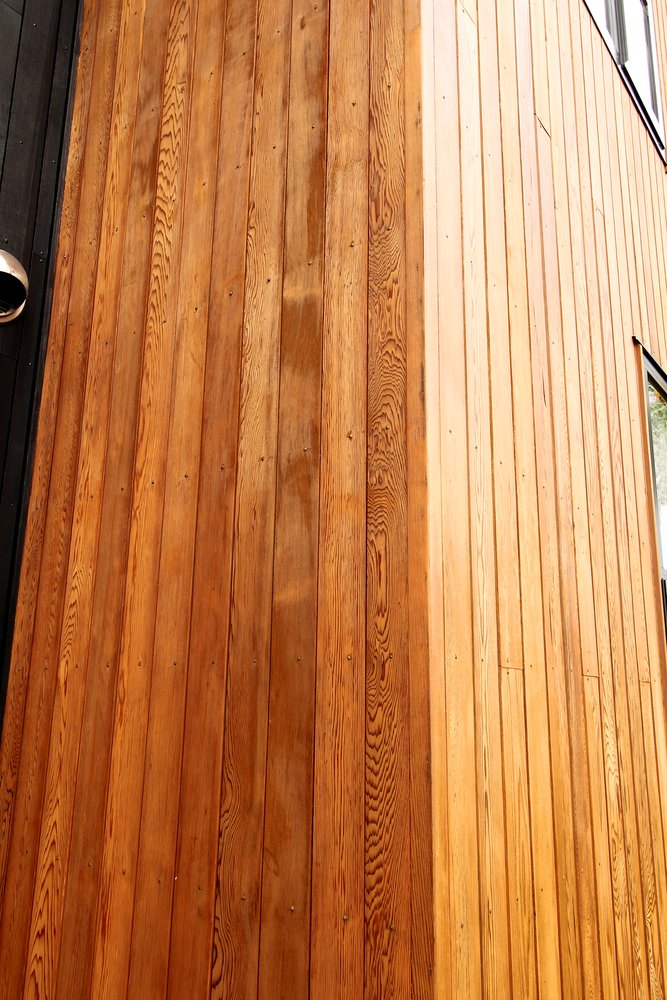
Img 9438 Cc2

The Transition Process from Stain to Oil

First, we will do a site visit to look at the current state of the Cedar boards.

In the best-case scenario, the weatherboards will have had an even exposure to the sun. We then use a strong solution of the oxy cleaner to get in behind any of the oxidised stain which has been broken down by the sun, then use a heavy wash to remove anything which is loose.

The heavy wash will give us a good look at the condition of the boards below. If there is any stain remaining on the surface, we will need to sand or strip the boards back to their virgin state before applying the oil.

Img 9433 Cc2

If the boards have had partial shade cover, such as nearby trees or soffits that have only protected the upper areas, they need to be stripped. You can’t just oil over the top and hope that it’s going to match the weatherboards below.

This adds a lot of cost to the process and if the homeowner isn’t willing to spend that much money, we may recommend applying another coat of stain to provide at least some protection and keep the house looking tidy.

Be Prepared for the Shiny-flat Look

One of the biggest downsides of moving from stain to oil is a 3-9 month transition period where your Cedar will have a shiny-flat-shiny-flat look.

This happens when oil is applied to any surface that still has stain remnants. The oil cannot soak through the stain as it is non-porous, so it sits on top, around the surface area where the oil has soaked in, giving the shiny-flat-shiny-flat look.
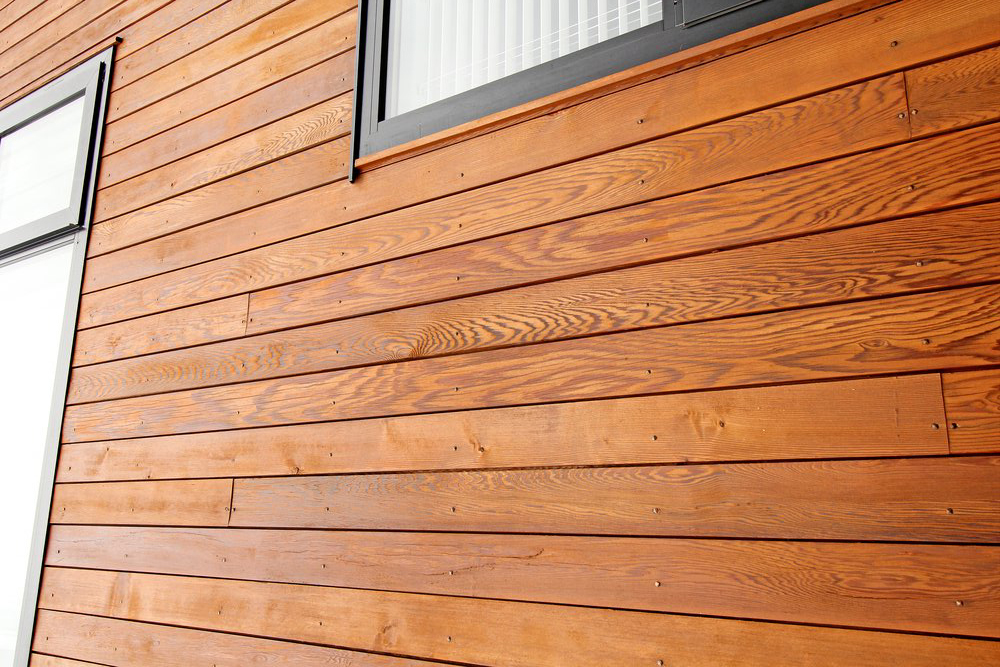
cedar-stain-to-oil-before-1 cedar-stain-to-oil-after-1

In the sunlight, the shiny-flat-shiny-flat look is not pretty. However, this effect is only temporary and after 3-9 months the oil eventually soaks in behind the stain and the stain will delaminate further.

After 3-9 months, we will come back and give the boards another heavy wash, sand back any remaining stain and apply another coat of oil. 9-12 months later we repeat the same process. After 12-24 months the process will be complete and the Cedar will move into a regular maintenance schedule, with sun exposed areas being treated every 2-3 summers.

What Costs Are Involved?

Cost is the final hurdle for many Cedar homeowners. Stripping off stain is an expensive process and if your current home is not your forever home, the costs might be prohibitive.

However, if you are planning to stay in your current home for the foreseeable future, the costs become an investment that will pay for itself. Over time, oil is much easier to apply than stain, provides superior protection against the elements and increases the lifespan of your Cedar.

In broad terms, it comes down to this: do you want to spend the extra 10k to remove the stain and give yourself an easy to maintain finish, or deduct the 10k from the cost of replacing the cladding in the not-to-distant future?

By investing in the health of your Cedar now, you will save money on long-term maintenance, and your cladding will look amazing.

Get An Expert Opinion!

As you can see, there are a lot of variables when considering the transition from stain to oil. This article is intended to educate Cedar homeowners on the general process, but nothing compares to having one of our team visit your house and make a professional assessment.

For a free Cedar Assessment, get in touch by calling 0800 298 298. There is no obligation and our goal is always to look after the best interests of our customers over the lifecycle of their homes.

Read More Articles

14 Mar 2023
Many Cedar homeowners fall in love with the Scandinavian silvered look – minimalist, clean, with a silver sheen that accentuates the beauty of the timber and the natural surroundings.

Many Cedar homeowners fall in love with the Scandinavian silvered look – minimalist, clean, with a silver sheen that accentuates the beauty of the timber and the natural surroundings.

But when it comes to achieving this look, there is a common misconception that all you need to do is leave the Cedar and silvering will happen naturally.

Unfortunately, this is not true, at least in the New Zealand climate, and timber that is left to silver will eventually turn unsightly.

In this article we will cover what silvering is, how you can silver your Cedar safely while still protecting the timber, and some DIY tips for maintaining the silver look of your Cedar until you are ready to oil.

To find out more, read the full article, or watch the video below for a quick summary.

Is Silvering Bad for Cedar? 

Without taking the location and climate into consideration, silvering itself is not bad for the timber. Silvering is caused by exposure to UV rays, which fray and loosen the top cells of the Cedar and cause the surface to become bleached.

silvered-cedar

In colder climates this isn’t a problem as the lower temperatures kill off the bacteria, retaining the beautiful, silvered look. But in a warm and wet climate such as ours, bacteria and mould will get caught in the roughened surface, and quickly turn the Cedar black.

Even if the mould and bacteria are removed, the natural silvering effect will often look patchy and uneven, detracting from the natural beauty of the timber.

Silvering Cedar the Right Way

So, is there any way to have the silver look you love, while still protecting your cladding? The answer is a resounding “Yes!”

Wood-X is a deep penetrating wood oil developed with Resene. It comes in a range of exciting colours – from rich reds and bush greens to a daring indigo blue – and a whole range of wood-protecting silvers. Applying a silver-tinted oil will protect your timber from the harsh UV rays, allow it to silver more quickly and give a more consistent silver look.

After applying the silver-tinted oil, you will need to follow a regular maintenance schedule to keep your Cedar looking its best. We recommend a soft wash every year, followed by recoating exposed areas every 2-3 summers.

DIY Silvering Maintenance

If you are not ready to oil your cladding quite just yet, a more affordable solution is to spray your house with a slow-acting mould and fungal killer such as Wet and Forget. This will remove the organic bacteria from the surface, but it will not replenish the natural oils of the Cedar or protect it against splitting and cupping in the future.

If you do not plan on oiling or staining your house, another option is to leave the silvering on as it provides natural protection to the layer below it. You can then use a slow-acting mould and fungal killer to keep it looking clean. The downside to this approach is that the timber will eventually look aged and tired.

Get Professional Advice You Can Trust

Ultimately, the best approach for protecting your cladding AND getting the silvered look is to oil your Cedar with a silver tinted oil. If you are unsure about the best approach and would like to talk with an expert, call us on 0800 298 298.

There is no obligation and our goal is always to look after the best interests of our customers over the lifecycle of their homes.

We love Cedar and are always happy to help!

15 Feb 2023
The quick answer is: not as often as you might think. On a wall that is not in the intense sunshine, Cedar will practically last forever.

The quick answer is: not as often as you might think. On a wall that is not in the intense sunshine, Cedar will practically last forever.

Apart from being stunning to look at, Cedar is extremely durable, a superior insulator and genius at taking up deep-penetrating oil. Cedar’s worst enemy is not rain, or wind, or city grime; it’s the harsh New Zealand sun. 

Left unprotected, UV rays will eventually dry out the timber, leading to fine cracks and roughening of the surface. This creates a toehold for mould, mildew and lichen to get established and make the timber look unsightly.

Regular oiling will prolong the beautiful look and weather resistance of your Cedar by penetrating deeply through the Cedar’s open cellular structure and replacing the natural oils lost over time.

Keep reading to learn how often you need to maintain your Cedar, or watch the video below for a quick summary.

What Does Regular Maintenance Involve?

For most Cedar homes, regular maintenance will consist of a light rinse once per year at the end of winter, then a recoat of exposed areas every 2-3 summers.

Cladding only needs to be maintained on a face that is exposed to the UV rays. The remaining faces will also benefit from recoating, but this might only be 2 or 3 times over a 15-year period. The treatment that is required is very dependent on the level of UV exposure and other environmental factors.

exposed-cedar

Think of it like washing your car. If you don’t wash your car for 12 months, all the dust, debris and contaminants from the road will stick to the body. It’s the same for your house, but not as easy to spot as houses are usually flat colours compared to a shiny paint job.

How Much Will Regular Maintenance Cost?

It’s a misconception that owning a Cedar home means you will be burdened with expensive maintenance bills. Compared to houses that require regular painting, Cedar works out far more economical.

The cost will depend on the unique requirements of each house. The main factors will be the size of the house, how many stories it has and ease of access. A single-story bungalow with good access might cost $2-3k every 2-3 years. For a multi-level property with difficult access, you might be spending $8k on scaffolding before you even start looking at the timber.

Regardless of the cost, regularly maintaining your Cedar will always be cheaper over the long run than painting, or the worst-case scenario, having to reclad due to the timber cupping and splitting.

Having a regular maintenance plan can help to spread out the cost and give you peace of mind that your investment is protected – and will look beautiful for years to come.

New Builds vs Older Houses

Newly installed Cedar has a reservoir of natural oils and tannins, and it will take longer for the cellular structure to start to move. You may not have to do anything for 5 years, but eventually the Cedar will start to dry out and you will need to slow that process down with regular oiling.

New Cedar will most likely be pre-coated, or coated on-site before it gets installed. There will usually be a booklet that comes with the house telling you how the Cedar has been treated and what kind of maintenance it needs.

For a pre-existing Cedar home, the new homeowner will need to ask the previous owners what kind of maintenance plan they had in place, or what products they have used in the past. If the Cedar has been stained and the stain is in good condition, then it requires a light rinse every year and a recoat every 2-3 years, depending on the level of UV exposure.

If you are unsure about the status of your Cedar, one of our team can come around and advise you on what treatment it has received in the past, and what is required to maintain the Cedar over the lifetime of the house.

Make Your Cedar Look New Again

TimberTech are NZ’s #1 choice for Cedar protection, maintenance and restoration. Our unrivalled expertise and craftsmanship have been developed and proven over 20 years throughout New Zealand.

We will diagnose your Cedar and put together a 10-year maintenance plan, customised to your unique situation, with a maintenance schedule and a full breakdown of all the costs. There is no obligation and our goal is always to look after the best interests of our customers over the lifecycle of their homes.

To find out more, call us on 0800 298 298.

Read More Articles

Showing 1 - 10 of 15

Subscribe

Sign up to our quarterly newsletter for all the latest Cedar tips and expert advice.