
Best Cedar Products – Our Top Picks

Best Cedar Products – Our Top Picks

15 Jul 2024
Best Cedar Products

Mark has been in the business for over 30 years and has seen a lot of Cedar products come and go. The products recommended here are based on his personal experience maintaining thousands of Cedar homes across the country.

These are the products we actively use today, or have used in the past, and all have been tried and tested across a range of locations and conditions.

If the product you are considering isn’t mentioned below, that doesn’t mean it’s unsuitable, only that we don’t have enough experience with the product to recommend it either way.

Always follow the manufacturers guidelines and choose the best Cedar product for your specific circumstances.

Lastly, if your Cedar has already been treated with a specific product and is still in good condition, it’s a good rule of thumb to use the same product for the best colour matching and application. If the product is starting to fail, look at the best solution for the timber regardless of what was used previously.

Best Cedar Cleaning Products

Preparing Cedar before applying an oil or stain is the key to achieving a smooth and consistent finish.

Over time, organic matter such as dust, moss and lichen will build up on the Cedar. As oils and stains are semi-transparent/translucent, any product or organic matter left on the surface will show up and look unsightly.

Which cleaning product you use depends on the current state of your Cedar.

  • Hit The Deck

Cedar that has no oil or stain on the surface will only require a gentle wash using an oxy cleaner or percarbonate solution to kill off any built-up organic matter. Hit The Deck by Wet & Forget works very well and doesn’t contain any bleaches or chlorine.

  • Dryden LiquidTimberClean

If your Cedar has been affected by the sun and started to age, you may need to brighten it back up. Dryden LiquidTimberClean is an oxalic acid-based cleaner that is effective at lightening stains and brightening timber. Be careful using this product around windows and joinery as it can tarnish the surface if not rinsed properly.

  • Resene Timber and Deck Wash

For general cleaning, Resene Timber and Deck Wash is very effective for cleaning hardwood and softwood timber surfaces. This wash only has a small amount of bleach and is effective at killing off anything organic. An excellent product, we use it all the time.

  • And avoid…

We do not recommend any products that contain a heavy solution of sodium hypochlorite, commonly known as bleach. This often comes with the benefits of “spray and walk away” or “done in 30 seconds”. It will certainly clean the Cedar and kill off anything that’s on the surface, but it can damage the cellular structure of the timber.

Quick Note About Stains

Stains are like white paint. You can buy white paint from 20 different paint manufacturers and each one will tell you why theirs is the best.

Which stain you use is much less important than when and where you use it.

Stains perform best out of the harsh UV, on areas sheltered by trees and other buildings, south-facing, or under soffits.

If used on areas exposed to the sun, they will eventually break down. If a stain cracks, water will get in behind and delaminate the stain, lifting it from the surface.

When stains fail, it takes a lot of work to make the stained surface look good, even more than with oil. Just remember, when choosing your coating, the sun will ALWAYS win. Make sure the stain is out of the sun, and you should be fine.

Best Cedar Stains

  • Resene Woodsman Waterborne Oil Stain

Resene Woodsman Waterborne Oil Stain is our stain of choice. This stain is a penetrating water-borne wood oil stain that is designed to erode, rather than form a film on the surface, which is what you want. As the stain is very thin, it gives a chance for the oil to get into the timber. This stain has been around for 15+ years and we have a lot of confidence in the product.

  • Cabbots stain

Cabbots stain, by Dulux, is another product we regularly use. Cabbots is an excellent stain, with the slight reservation that this is a film-forming product, and it can get brittle if over applied.

  • Coating Remover Sea to Sky by Resene

If you need to remove a previous stain before application, use a coating remover that uses organic or citrus based compounds. Avoid methylene chloride products, which are very aggressive.

Coating Remover Sea to Sky by Resene is an organic stripping compound that contains no harsh chemicals, and is very effective at removing paints, coatings and residues.

  • Be careful, it’s a messy job…

Mask or cover the areas adjacent to the areas you are working on and make sure you get all the product out of the timber. Use a water blaster at the correct pressure to remove any latent product sitting on the timber’s surface.

Quick Note About Oils

Unlike stains, not all oils are made equally. As oil is the base ingredient in these products, the quality of the oil can affect the speed of penetration and dry to touch time, and the final look and feel.

Choose an oil from a reputable manufacturer that has been formulated for the specific conditions in New Zealand.

Other factors to consider include the biocide package (to keep away nasties), available colour range and the degree of transparency. depending on how much you want the Cedar to come through.

All that said, it’s always better to apply oil to your Cedar than not. You are looking to protect the surface of the timber from the harsh sun, and anything is better than nothing.

Best Cedar Oils

There are 3 different products we can recommend. Before getting to our top pick, we need to cover a little history to better understand the evolution of Cedar oil products.

  • CD50

CD50 (now known as CUTEK Extreme CD50) is the original Cedar oil and has been around for 40 or 50 years. The product has since been bought by an Australian company and reformulated for the Australian market. We don’t use this product much as the alternatives listed below are better suited for New Zealand conditions. Regardless, this is a quality penetrating oil with a long and storied history.

  • Dryden WoodOil

Dryden WoodOil is owned by Dulux and specially designed for our conditions. 20 years ago, CD50 was sold off and the manufacturers reformulated Dryden WoodOil from the old CD50 chemical makeup. Dryden WoodOil is water-repellent, non-filming, and a true migrating oil that gets deep into the timber. We regularly use this product and can recommend it without hesitation.

  • Wood-X

Wood-X is our top pick and the oil we recommend for most of our customers. Wood-X is made by Resene and specifically formulated for New Zealand conditions. Wood-X is a non-film forming, viscous mineral oil that is designed to penetrate exterior hardwood timbers and improve dimensional stability. 

Wood-X also has an excellent biocide package, high quality and proven tints (colour tones), and uses high grade oil content that speeds its penetration and ‘dry to touch’ time.

Full disclosure: TimberTech helped to develop Wood-X and Mark has a small shareholding in the business. We are proud of our association with Wood-X and wouldn’t recommend it if it wasn’t the absolute best product for our customers.

Need Help or Advice?

If you have any questions about the products we covered, please get in touch with our team. We are more than happy to give advice and point you in the right direction.

Does Your Cedar Need Help?

Our Free Cedar Assessment will assess the health of your timber and give expert advise on how to keep it looking beautiful for years to come.

Read More Articles

17 Oct 2023
Many Cedar homes that were built before the 2000s have a distinctive red colour than now looks dated. At the time, the red/brown tint was all that was available, but now we have access to a wide range of tinted oils and stains.

Most Cedar homeowner aren’t aware that they can change the colour of their Cedar. It usually comes about in our initial conversation with new customers who have just bought their home and want a more contemporary look.

Many Cedar homes that were built before the 2000s have a distinctive red colour than now looks dated.

At the time, the red/brown tint was all that was available, but now we have access to a wide range of tinted oils and stains.

What colours we recommend depends on the unique circumstances of each house: the existing colour of the Cedar, levels of UV exposure, whether the Cedar is treated with an oil or a stain, and when the Cedar was last maintained.

Before talking colours, it’s useful to understand how Cedar works in relation to oils and stains.

How Cedar Works

Raw Cedar can be a myriad of colours, anything from light pine to mahogany red.

There is a lot of red Cedar around. If you cut it in half, the inside is a deep red colour. Add oil to that and the red pops out, making it a difficult base colour to compete with. But more on that later.

Once the Cedar has been used in construction, an oil or stain is applied to protect it from the elements and give a cosmetic finish.

A tint is a pigment added to an oil or stain. This is like how pigment is added to paint. To create a pastel colour, you start with a white base, add the pastel pigment and blend it together to get the final colour.

It’s the same principal for stains and oils.

Assessing Your Colour Options

The more drastic the change of colour, the more difficult the process will be.

If you have a natural Cedar colour, which is less red and more of a brownish hue, it can be covered with a dark brown or black quite easily.

If you have deeper colours such as dark red, changing the colour becomes more difficult.

For a lighter or muted finish, you would need to scrub off some of the deep red. If you are going for a brown or black finish, you need to put on more of the next coat to hide the red that is underneath.

Changing from dark to light will also be more expensive, as the initial colour will need to be stripped back and is a much more intensive process.

Changing Colour with Oils

When an oil has already been applied, the tint will often need to be stripped from the surface using a degreaser. Because oils are translucent, they work with the colour underneath, which is generally the red Cedar.

If you don’t use a degreaser, you are working with the already pigmented Cedar and no matter how many coats you put on, it won’t make a difference.

The extent of this process depends on how much UV the treatment has been exposed to.

If the oil has been exposed for 4 or 5 summers, the tint will have oxidised and broken down, and will most likely come off with a heavy wash. If it’s only been on for 1 or 2 summers, chances are the sun hasn’t broken it down and it will need a degreaser.

If there are parts of your house that are protected from the UV, such as under soffits, we treat those areas separately to achieve an even finish.

Changing Colour with Stains

The underlying principle behind changing the colour on an oil or a stain is basically the same: you first need to remove as much of the original finish as possible to create the best results.

If any of the original colour remains, the oil or stain highlights whatever is left on the board.

Stain is opaquer than oil and hides a lot more. If you are going from light brown to dark brown, or red to dark brown, you can probably get away with a standard wash and 2-3 coats of stain. For more drastic colour changes, you will need to use a paint stripper.

Modern paint strippers are less potent than in the past and are made from organic compounds that are brushed on the surface, then scraped off and put in the rubbish bin.

Want a Modern Look for Your Home?

As you can see, there are a lot of different factors that need to be considered when looking to change the colour of your home.

To learn about your options, give us a call on 0800 298 298. One of our Cedar experts will visit your home and assess your timber.

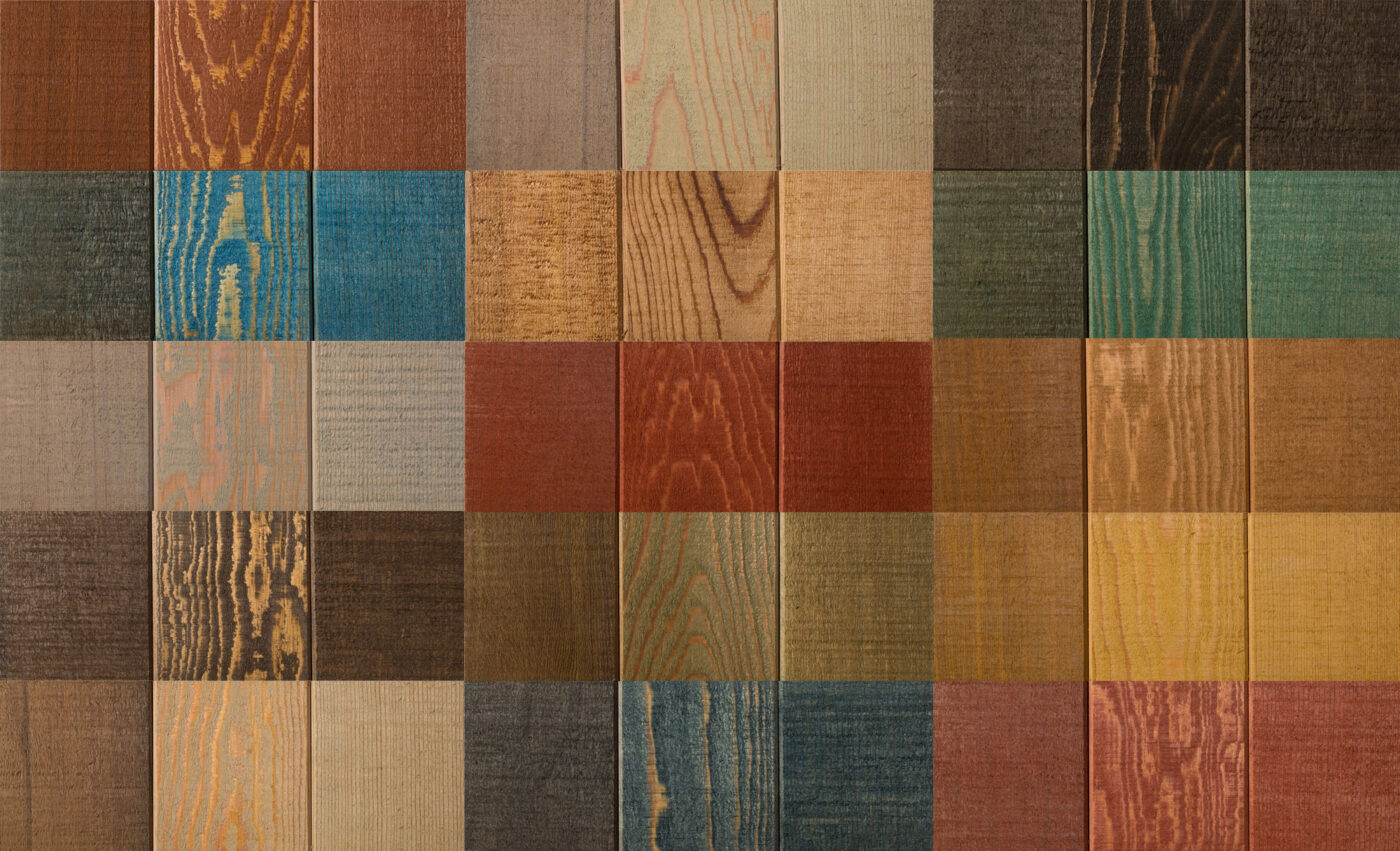
If you want to browse colours, please visit our Colour Range page and look at some swatches.

12 Aug 2023
What debate? Oil is the way to go when it comes to cedar, no contest. While stain only coats the surface of the wood, oil works in partnership with one of cedar’s basic features. You see, cedar is a naturally oil-rich timber itself – it soaks up rejuvenating oil deep into its cells for up to a year after it’s applied.

“Should I use oil or stain on my Cedar?”

This is by far the most common question we get from Cedar homeowners and a source of some debate on the internet.

In our opinion, there is no debate (with a few caveats). For nearly all situations, treat Cedar with a penetrating oil such as Wood-X.

Oil works like moisturiser for Cedar, deeply replenishing the natural oils and keeping the Cedar protected – and looking great – for many years to come.

So, there we have it, debate closed. Oil is the way to go when it comes to Cedar, no contest. But if the answer is so clear cut, where does this debate come from in the first place?

To find out, read the full article, or watch the video below for a quick summary.

With Cedar, Location Is Everything

If we were having this conversation in the northern hemisphere, the answer would be the opposite: use a stain. Stains last longer and you will have a lot less maintenance over the lifetime of the Cedar.

In New Zealand, the situation is very different. We have some of the harshest UV rays in the world which extract the natural oils from the Cedar and dry out the boards. Over time, the boards will cup and eventually crack, leading to a costly replacement of your cladding.

Stains protect the boards from moisture and look great, but unlike penetrating oils, they do not replenish the natural oils extracted by the sun. They are designed to erode over time, often unevenly, and leave the timber unprotected and unsightly.

Caveats For Using Stain on Cedar

While oil is recommended for Cedar in nearly all cases, there are some situations where stain is more suitable.

If the Cedar has considerable shade with little to no UV exposure, using a stain instead of an oil might be appropriate. This is usually when a house is shaded by dense tree cover or has wide soffits, such as villas where the roof extends over the porch.

The soffits stop the weatherboards from being degraded by the sun. These well protected areas can be treated with a stain and will look great forever.

If in doubt, get in touch, we are always happy to give an expert opinion on which treatment is best for any given job.

Comparing Costs Between Cedar Oils and Stains

Over the long term, there isn’t much difference in maintenance cost between oils and stains. The real savings come when looking at the longevity of the Cedar boards over the lifetime of your home.

Stained Cedar will dry out in the sun, causing the boards to cup and warp faster, and increase the likelihood you will need to replace your boards. A costly solution to an avoidable problem!

The difference shows up when we’re preparing Cedar for restoration. Sanding stain may reveal unsuspected insect, sun or moisture damage. With an oil recoat on a well-maintained property, it’s just a gentle clean with a bio-degradable wash, a short drying period and the re-oiling itself.

Have any more oil vs stain questions? Send us a message or use the Live Chat below!

14 Jun 2023
Cedar is a miracle timber if ever there was one: durable, long lasting, rot resistant and a superior insulator – warm in winter and cool in summer. Not to mention it looks stunning.

Congratulations on purchasing your newly built Cedar home! 

Cedar is a miracle timber if ever there was one: durable, long lasting, rot resistant and a superior insulator – warm in winter and cool in summer. Not to mention it looks stunning. 

But like any outdoor timber, Cedar will require maintenance to stay in optimal condition.  

New Zealand’s UV rays are some of the harshest in the world and they will eventually dry out the Cedar, leading to fine cracks and a roughening of the surface. This can commonly be seen in Cedar houses that have been left to “silver off”. 

By starting Cedar maintenance early, you can get ahead of costly maintenance further down the line and keep your cladding looking just as beautiful as the day you moved in. 

When To Start Cedar Maintenance

We recommend starting Cedar maintenance after two summers. 

At this point, you may be wondering why we are talking about maintenance for a house that has just been built two years ago? Fair question! 

While fresh Cedar boards do have a reservoir of natural oils that will keep them protected for longer, the boards have now been exposed to the sun for two summers and the natural oils are already being depleted. 

It’s also worth noting that although you just recently moved, the Cedar may have been installed up to 3-6 months before that, so this process is well underway. 

What Does Cedar Maintenance Involve?

For most new Cedar homes, maintenance consists of a soft wash and a recoat of sun exposed areas. 

Our soft wash is an oxy-wash solution that removes any built-up organic matter – dust, pollen and spores – and leaves the Cedar fresh and vibrant. 

Applying a recoat of oil will replenish the Cedar’s natural oils, fortify existing anti-fungal properties and enhance the colour tone, retaining the vibrant look of freshly installed Cedar. 

After the initial treatment, sun exposed areas need to be maintained every 2-3 summers. The rest of the house may not need any maintenance for 5-7 years, apart from a light wash to remove built-up organic matter. 

How Much Does Cedar Maintenance Cost?

This depends on the house size, ease of access and if scaffolding is required, but as a rough guide, the initial treatment of a single-story house with good access can cost anywhere between $4-5k.  

A larger house with multiple stories can cost anywhere between $8-9k, plus you may need to include the cost of scaffolding on top of that. 

However, after the initial treatment of the whole house, the cost of regular maintenance drops by 40-50% as only the sun exposed areas need maintaining. 

If you have bought a Cedar house in a new development, chances are you are in the same maintenance schedule as the houses around you. By pooling together with your neighbours, we can often spread fixed costs (such as a cherry picker) across the all the involved parties. 

Protecting Your Investment

A new house is an investment, possibly the most expensive investment you will ever make.  

By regularly maintaining your Cedar, you are protecting the long-term value of your property and investing money now to get a higher resale value if you decide to sell. 

Regular maintenance is also more cost effective than undertaking restoration just before you are ready to sell – and you will get to enjoy the beautiful look of freshly maintained Cedar while you are still actually living there! 

Read More Articles

Showing 1 - 10 of 19

Subscribe

Sign up to our quarterly newsletter for all the latest Cedar tips and expert advice.