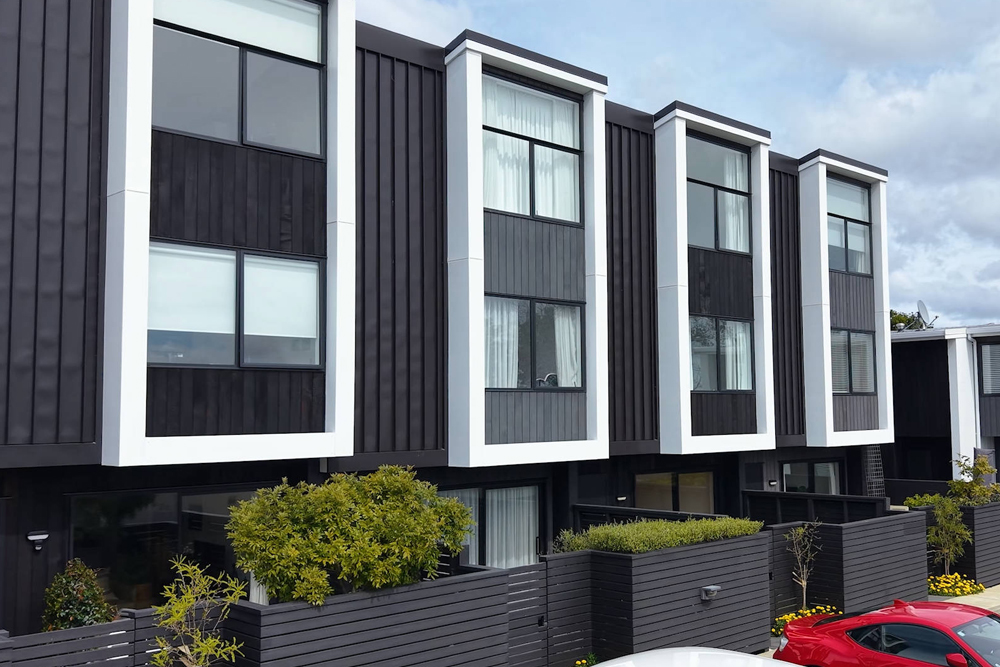
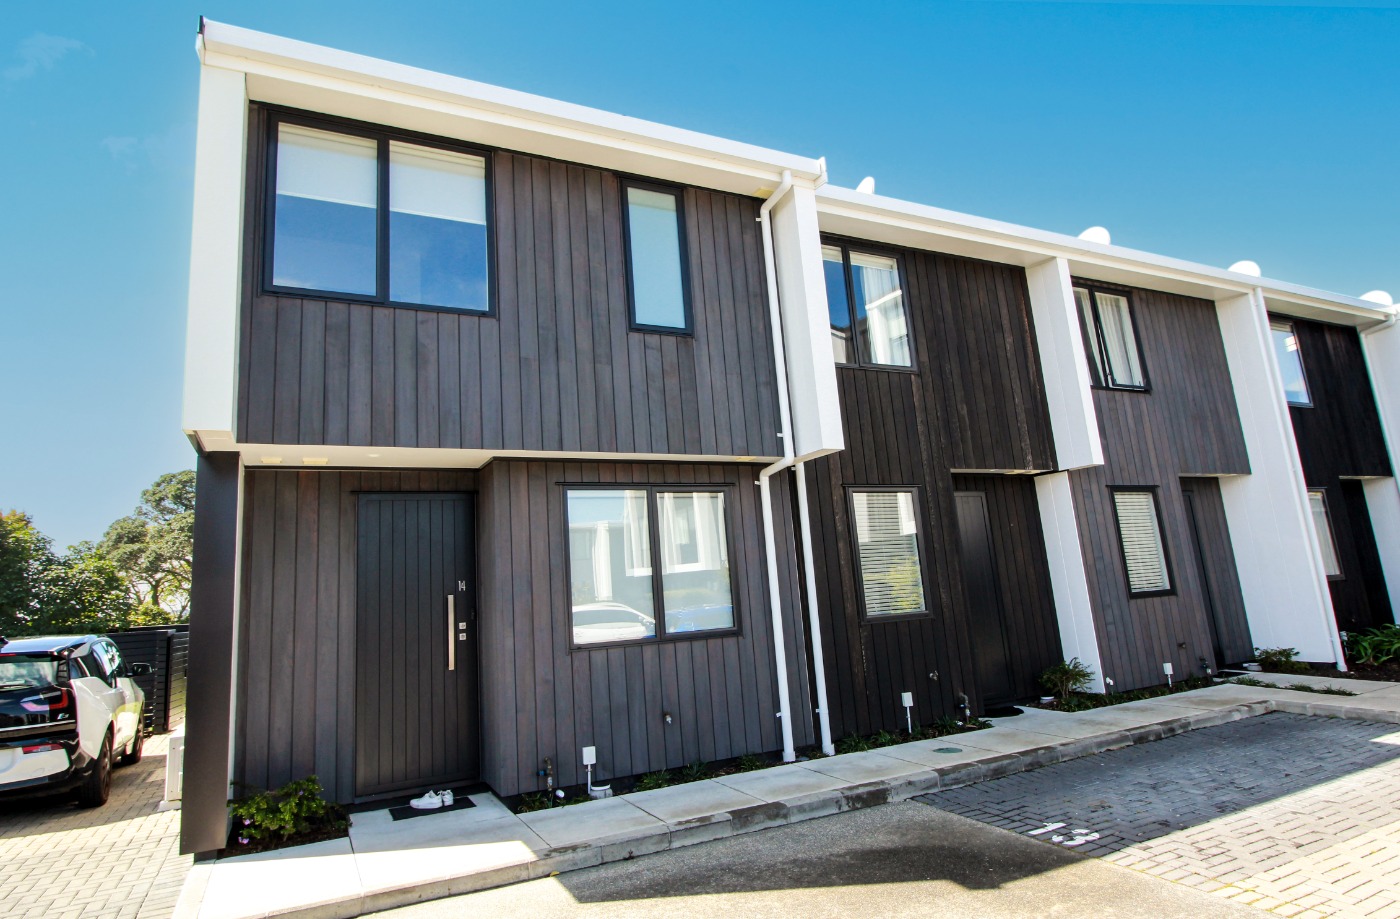
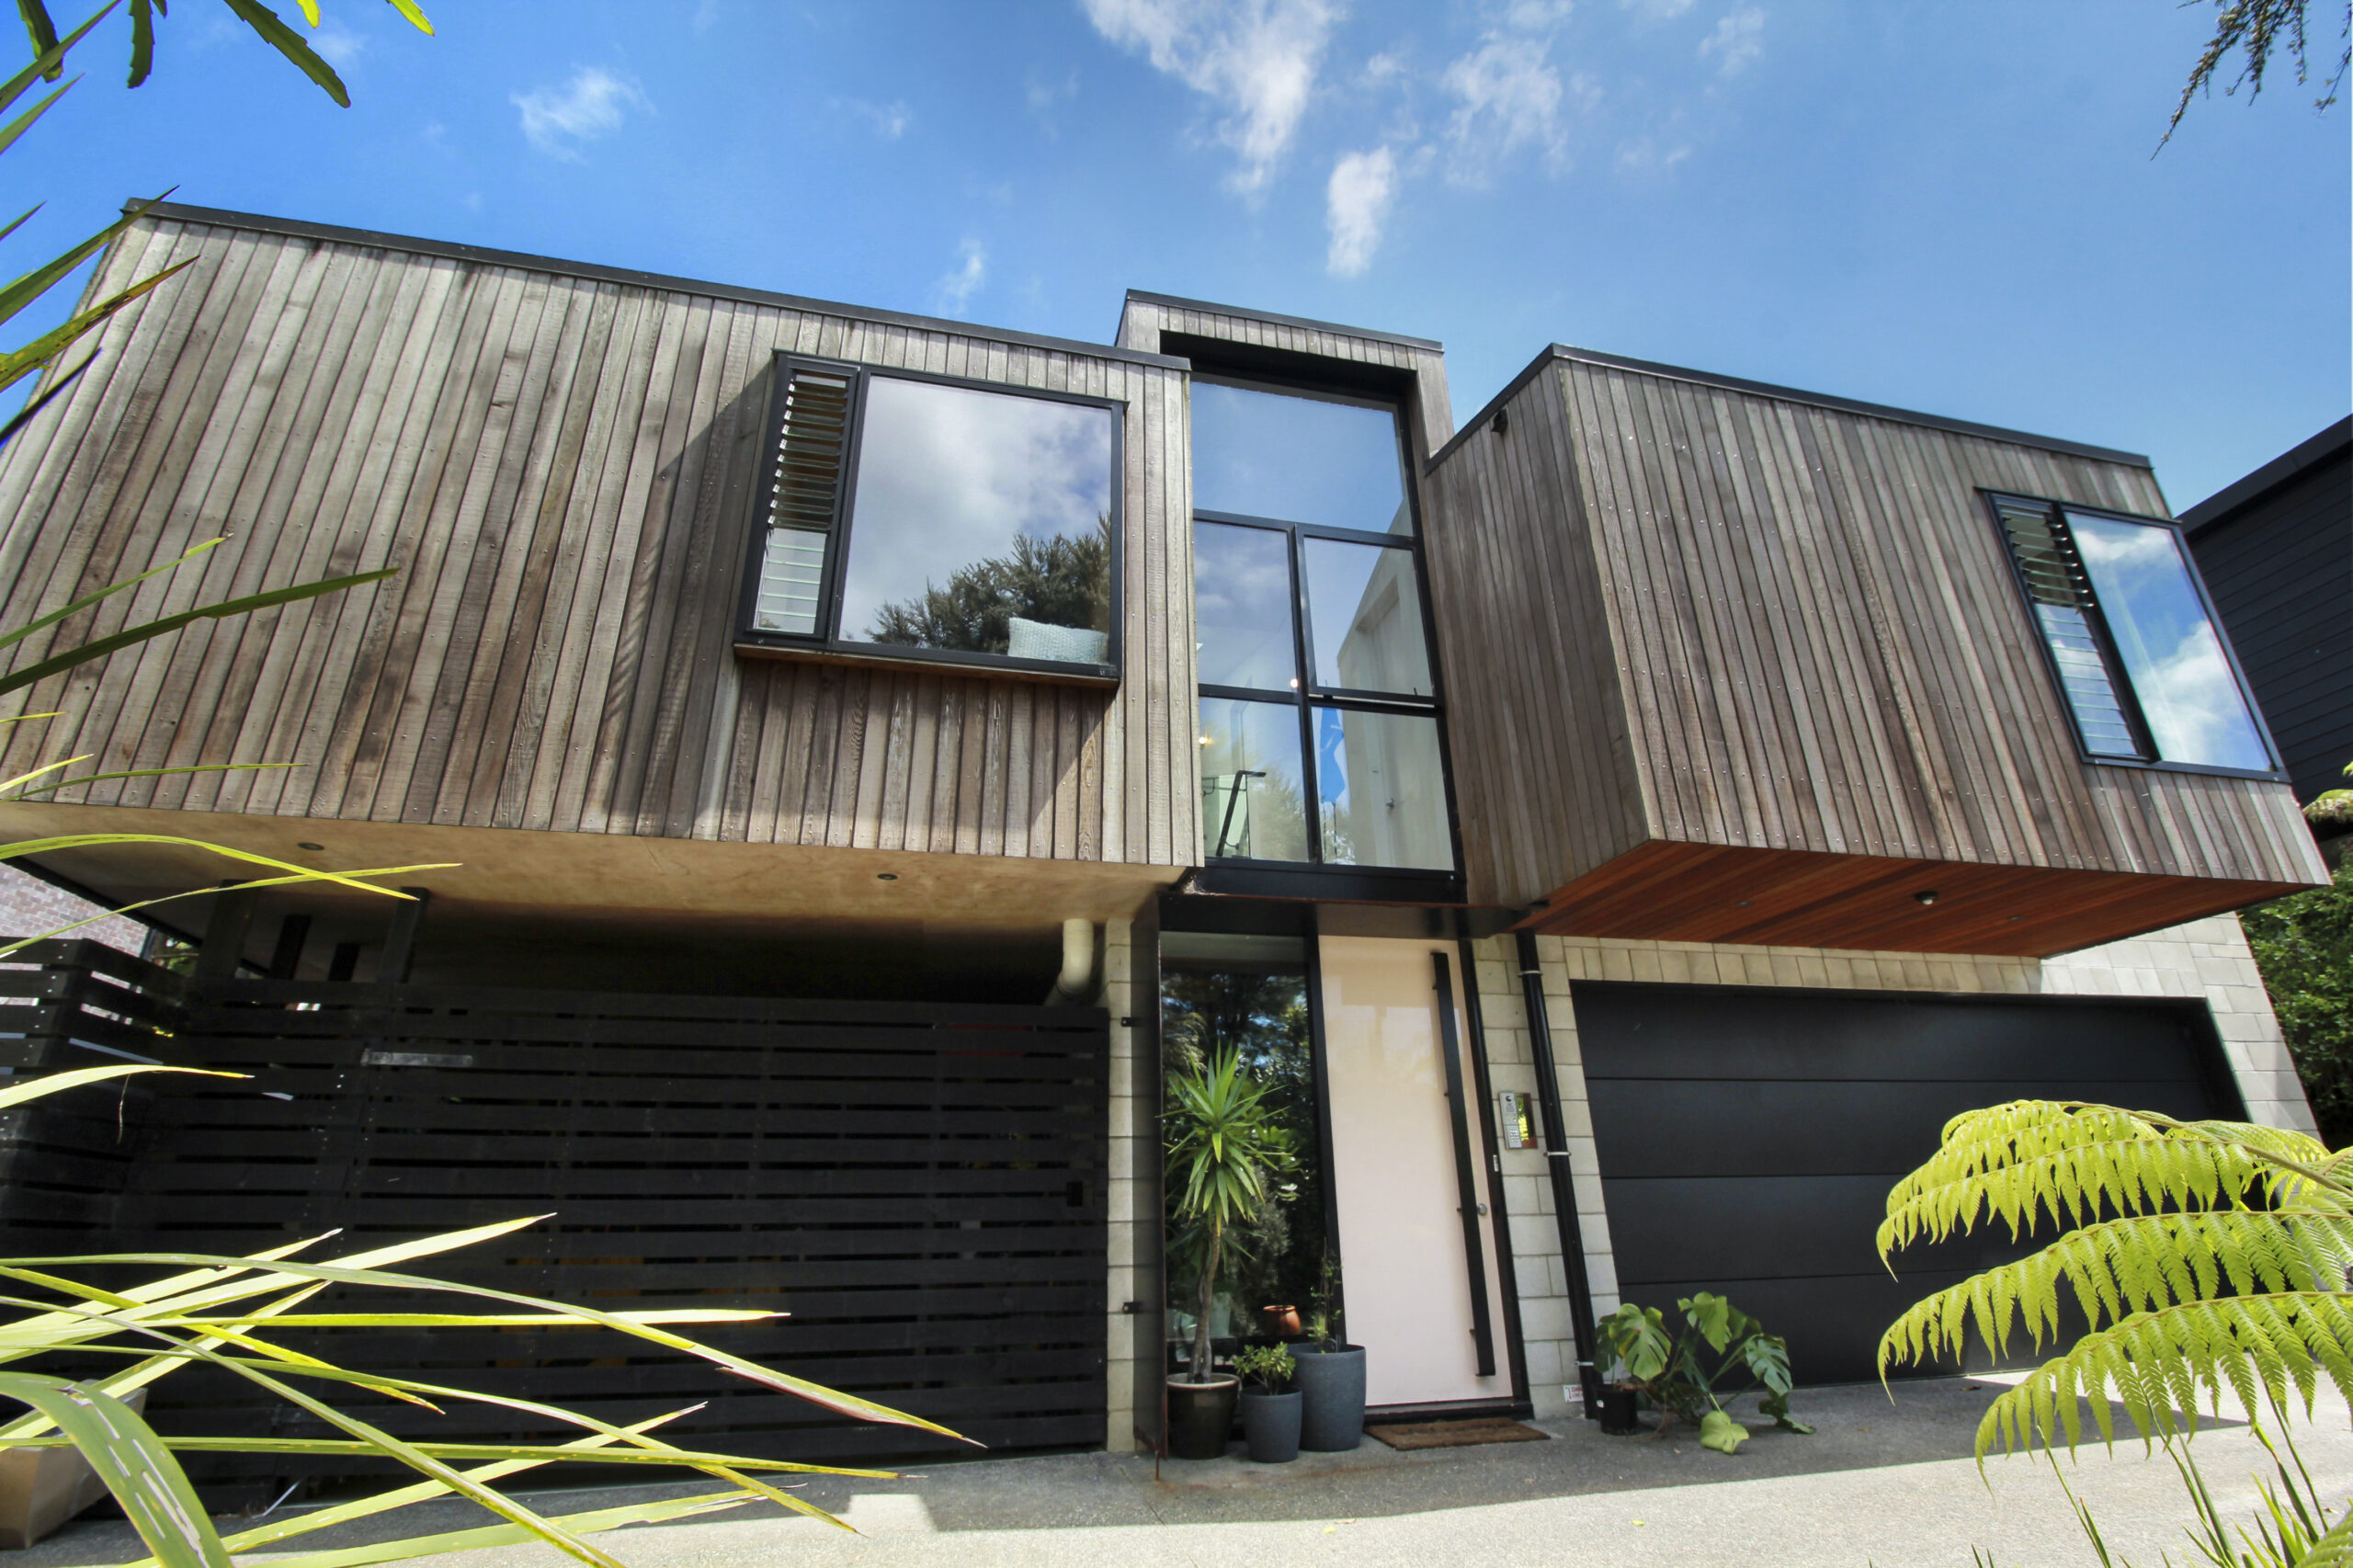
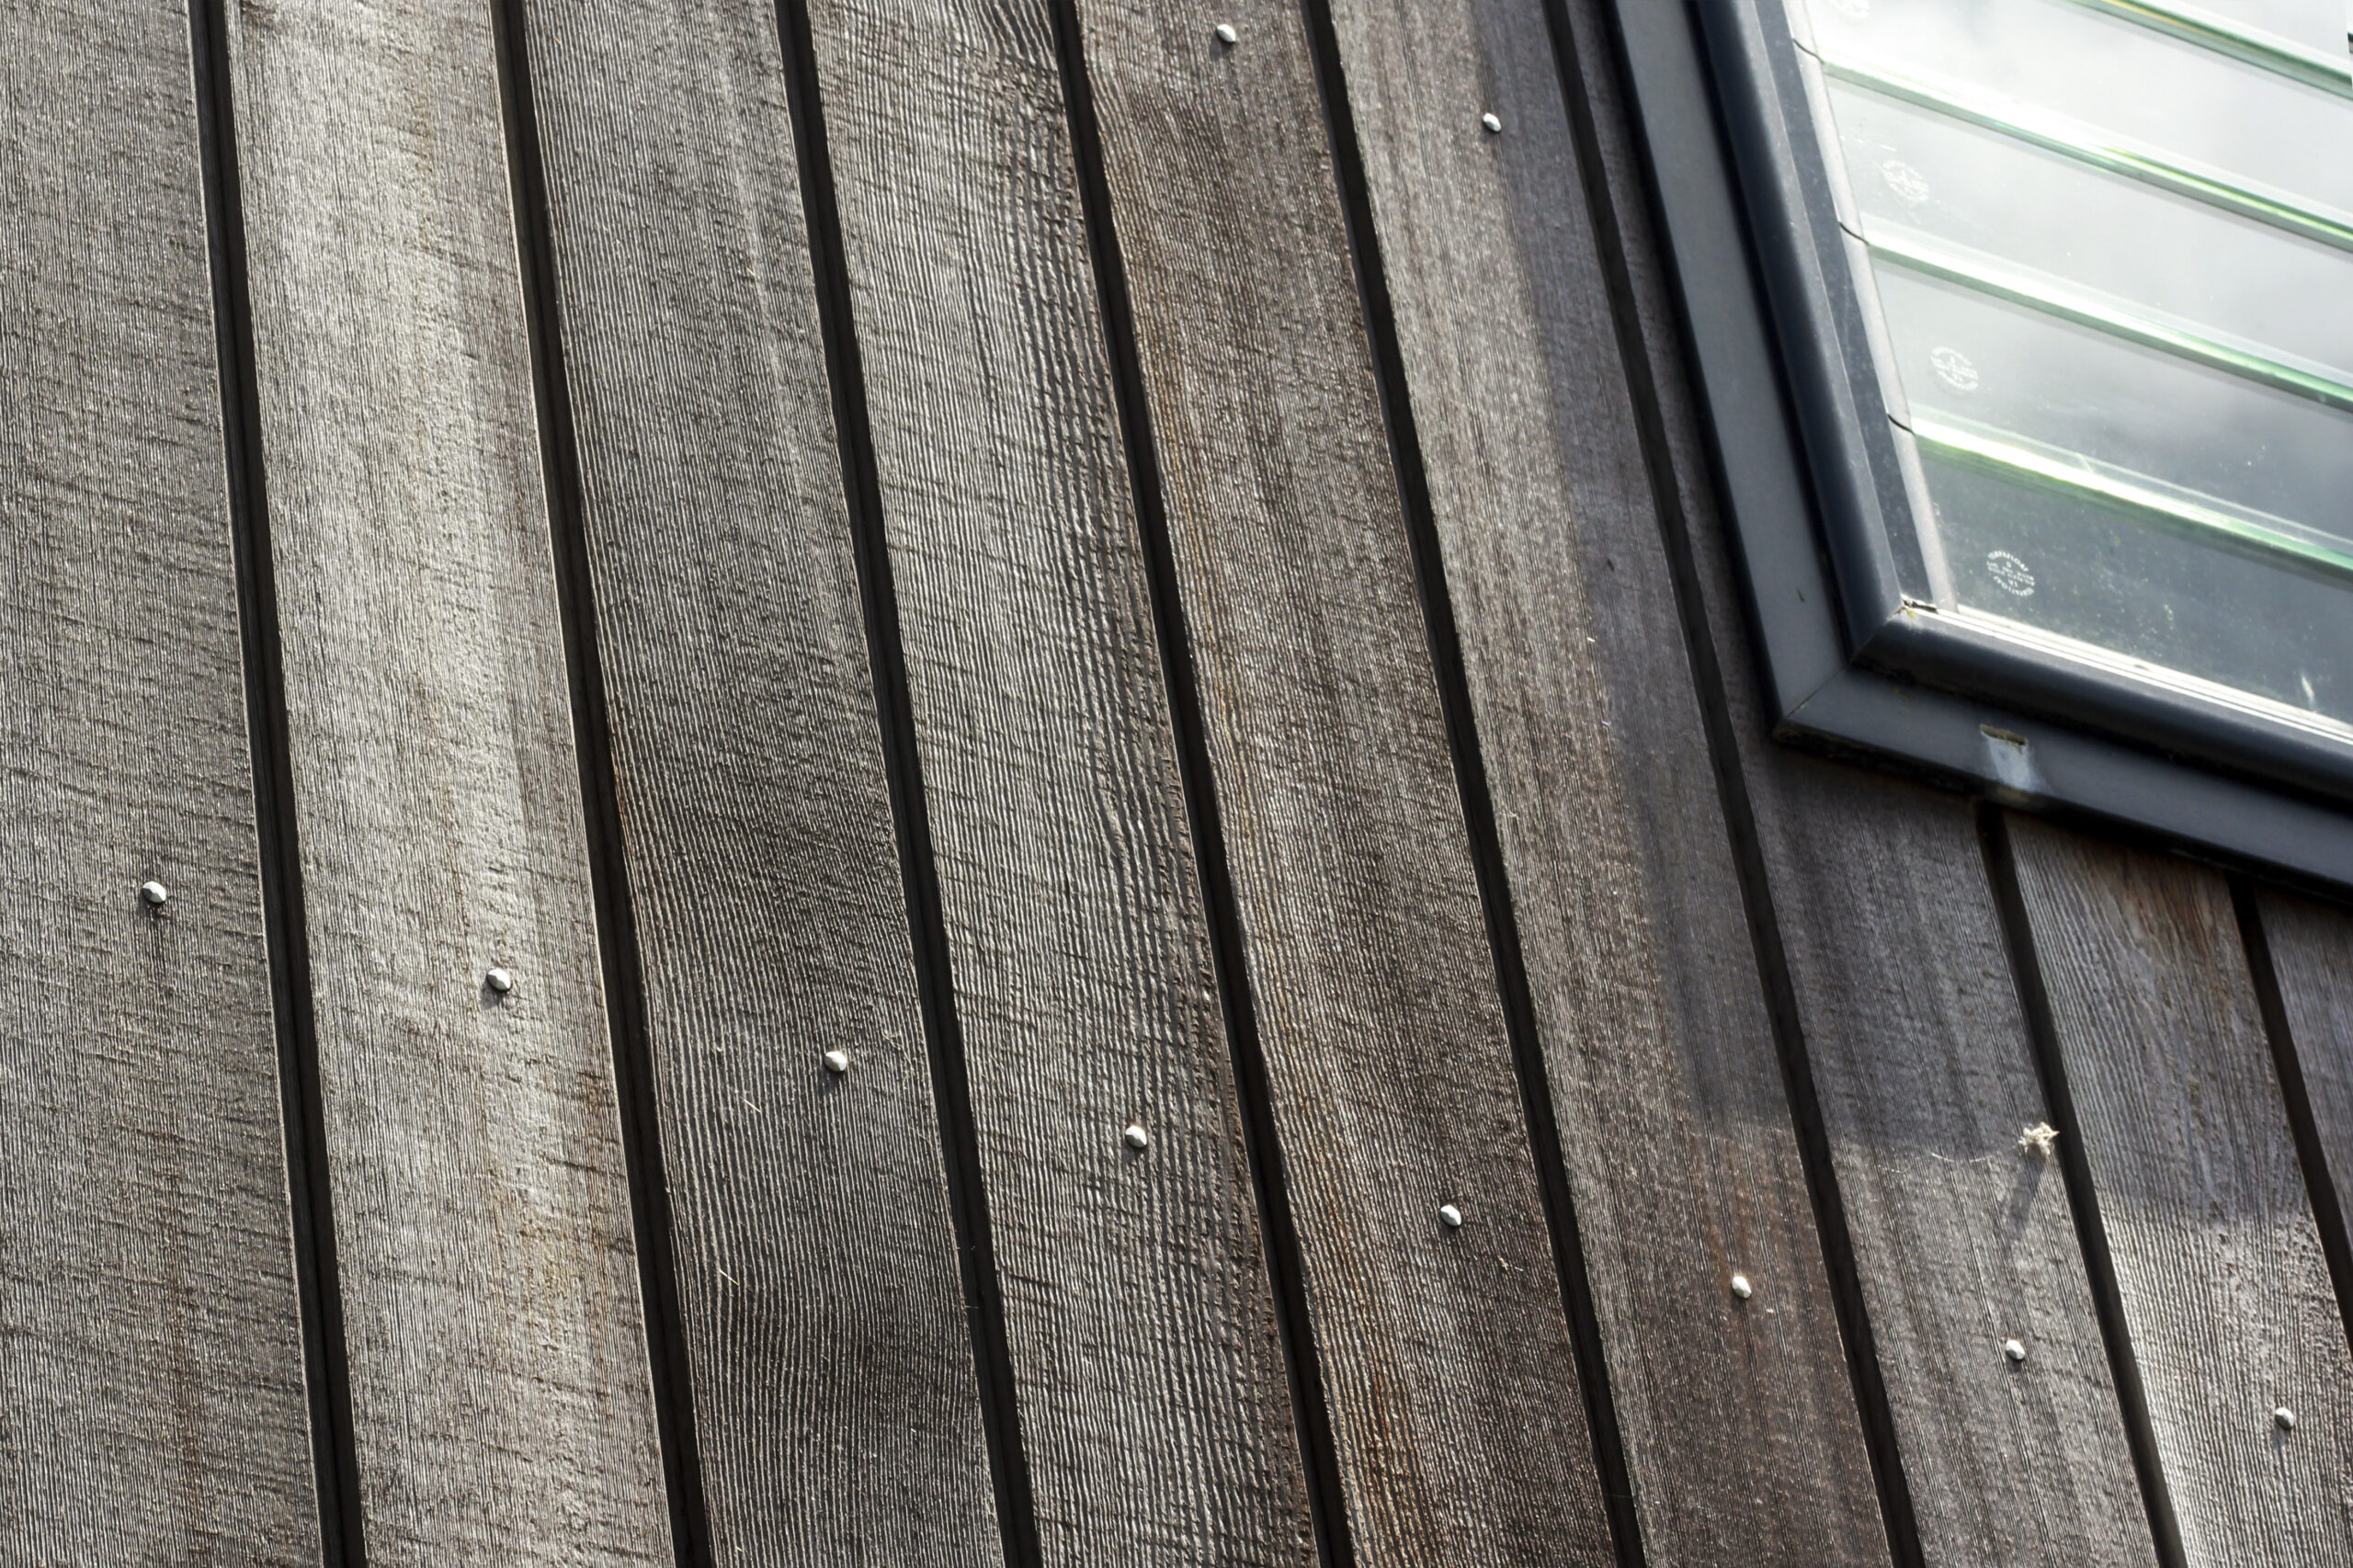
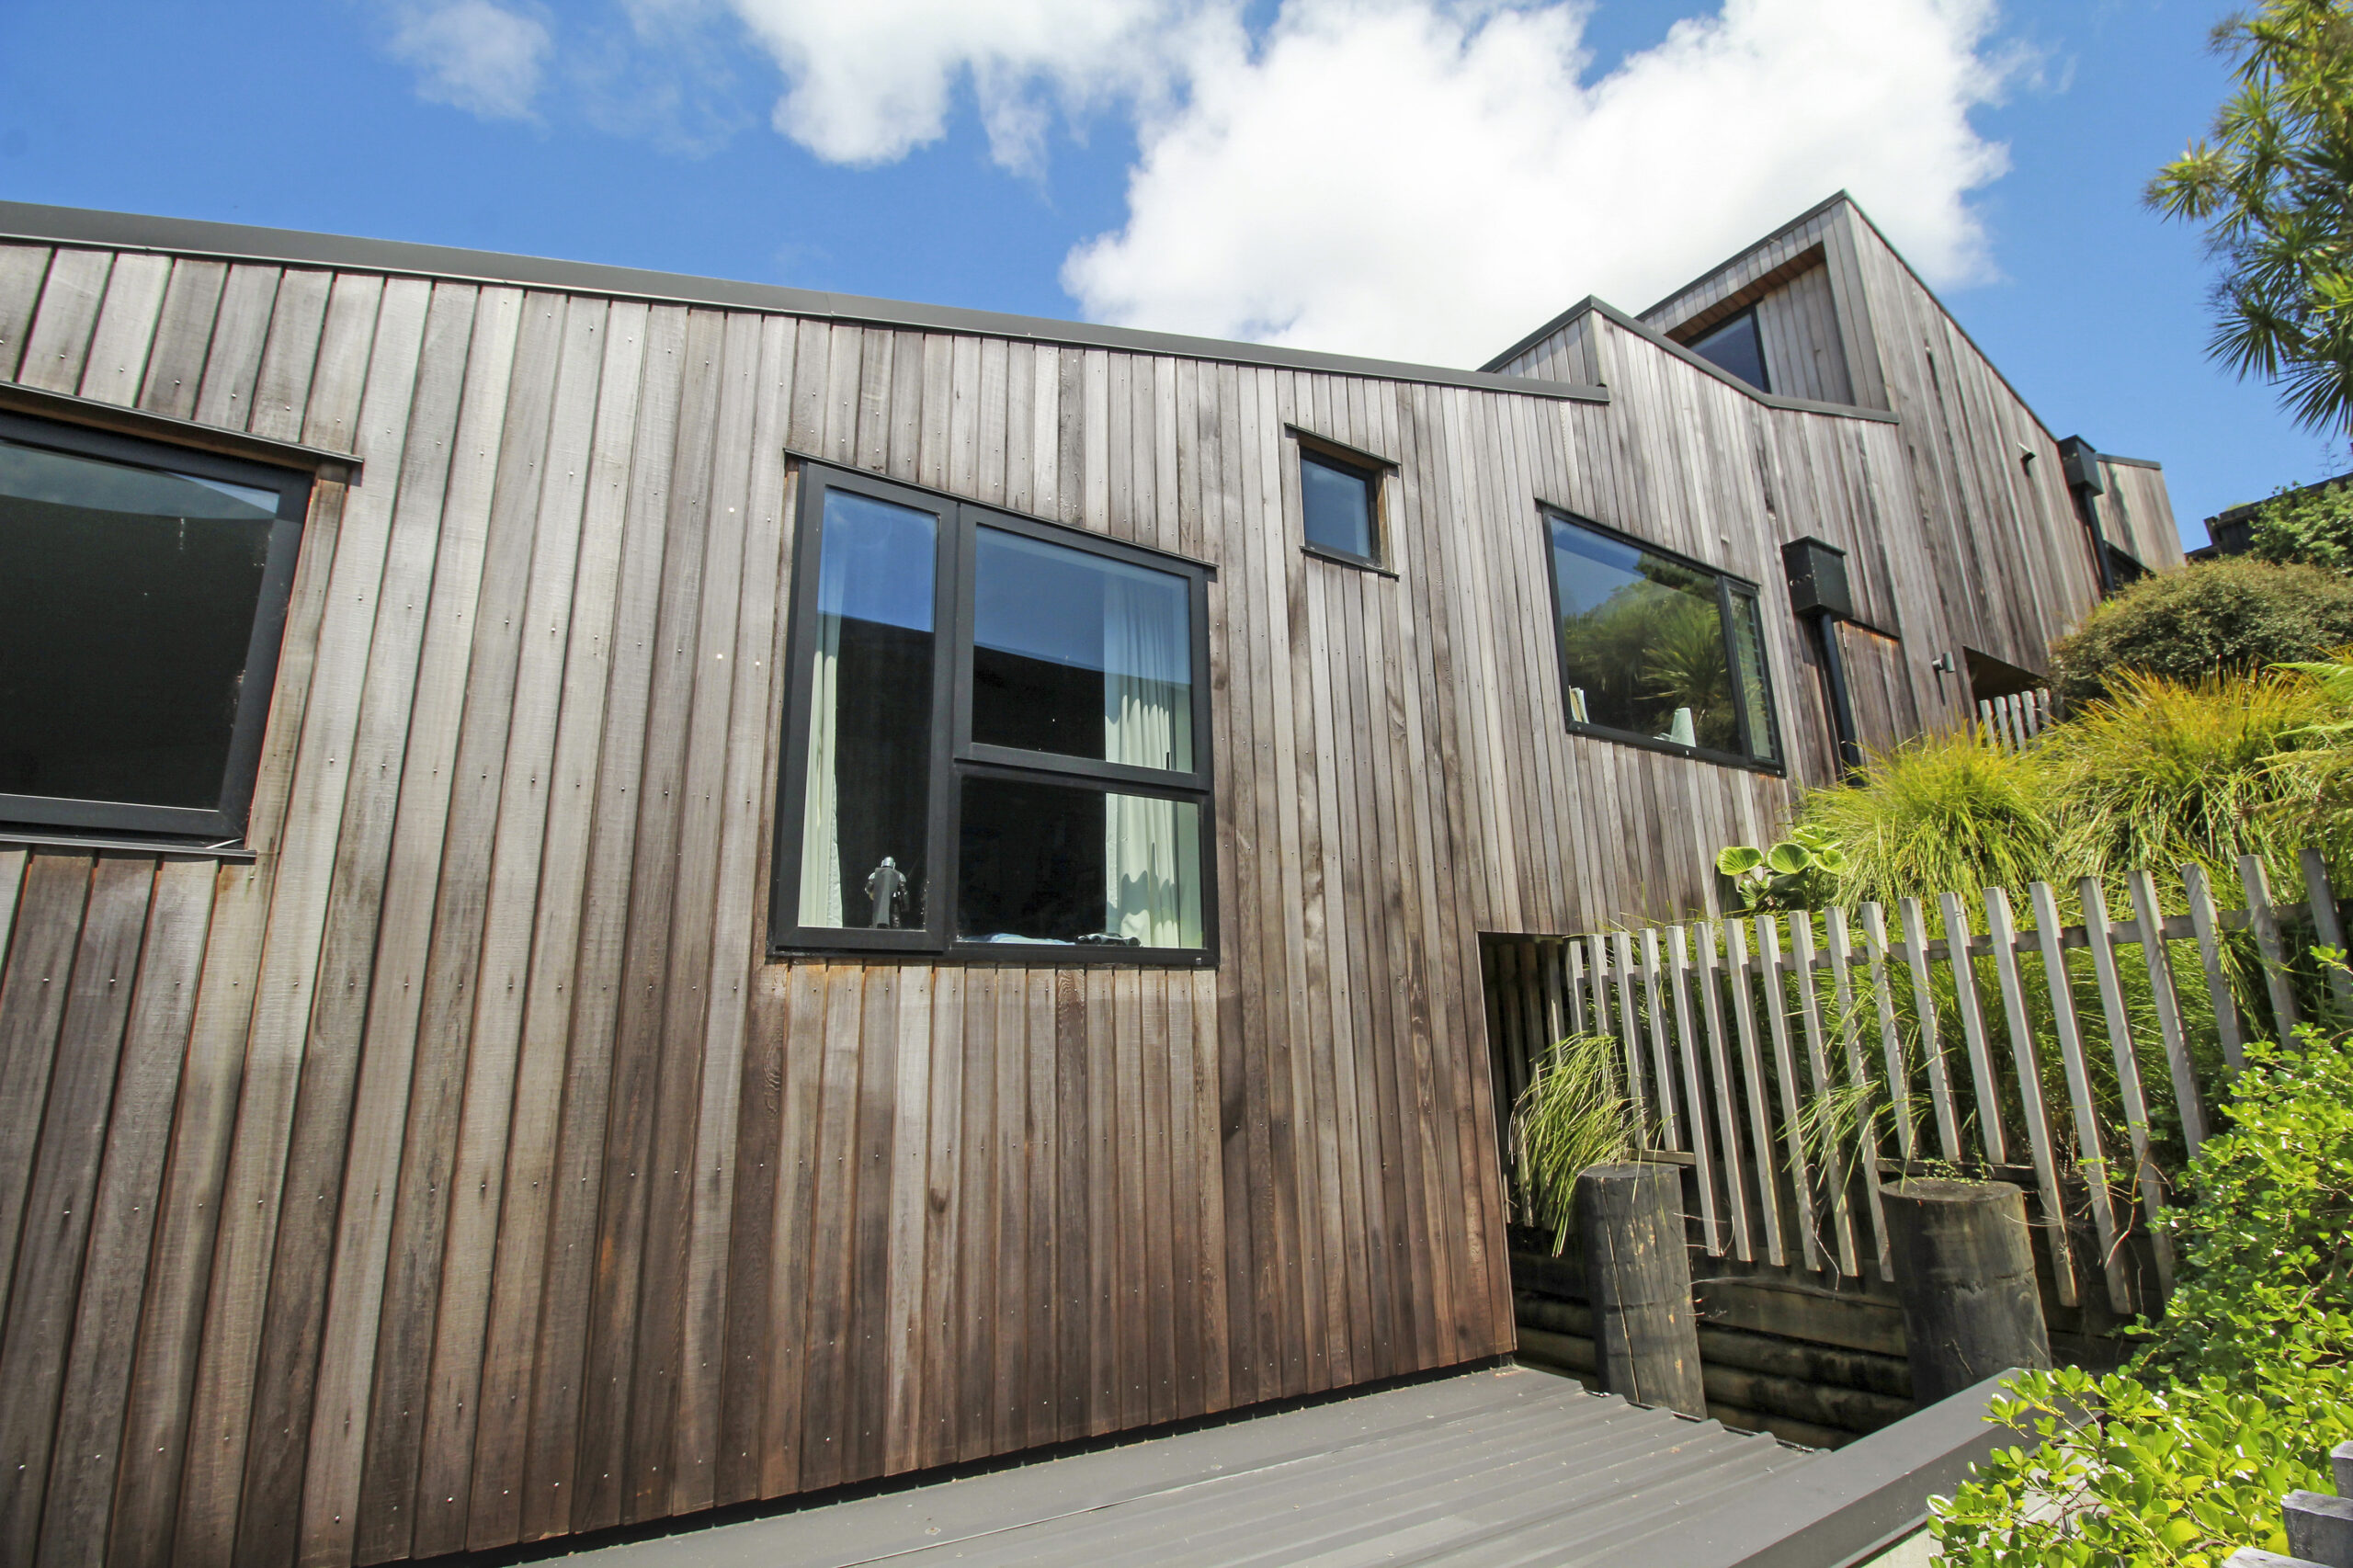
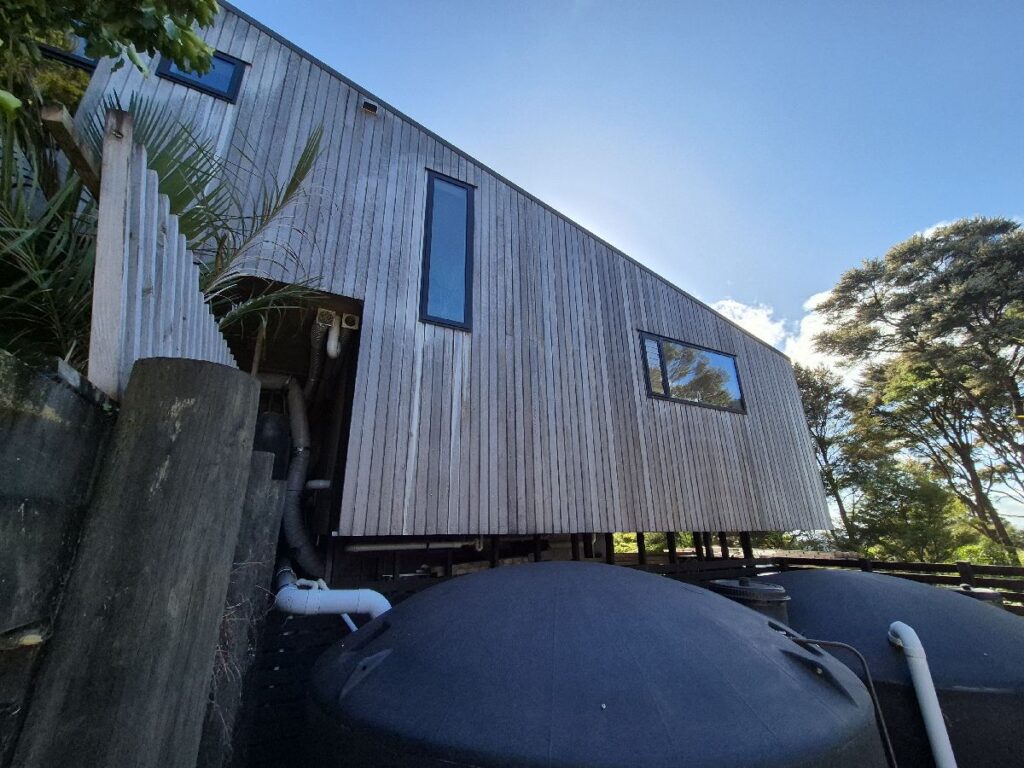
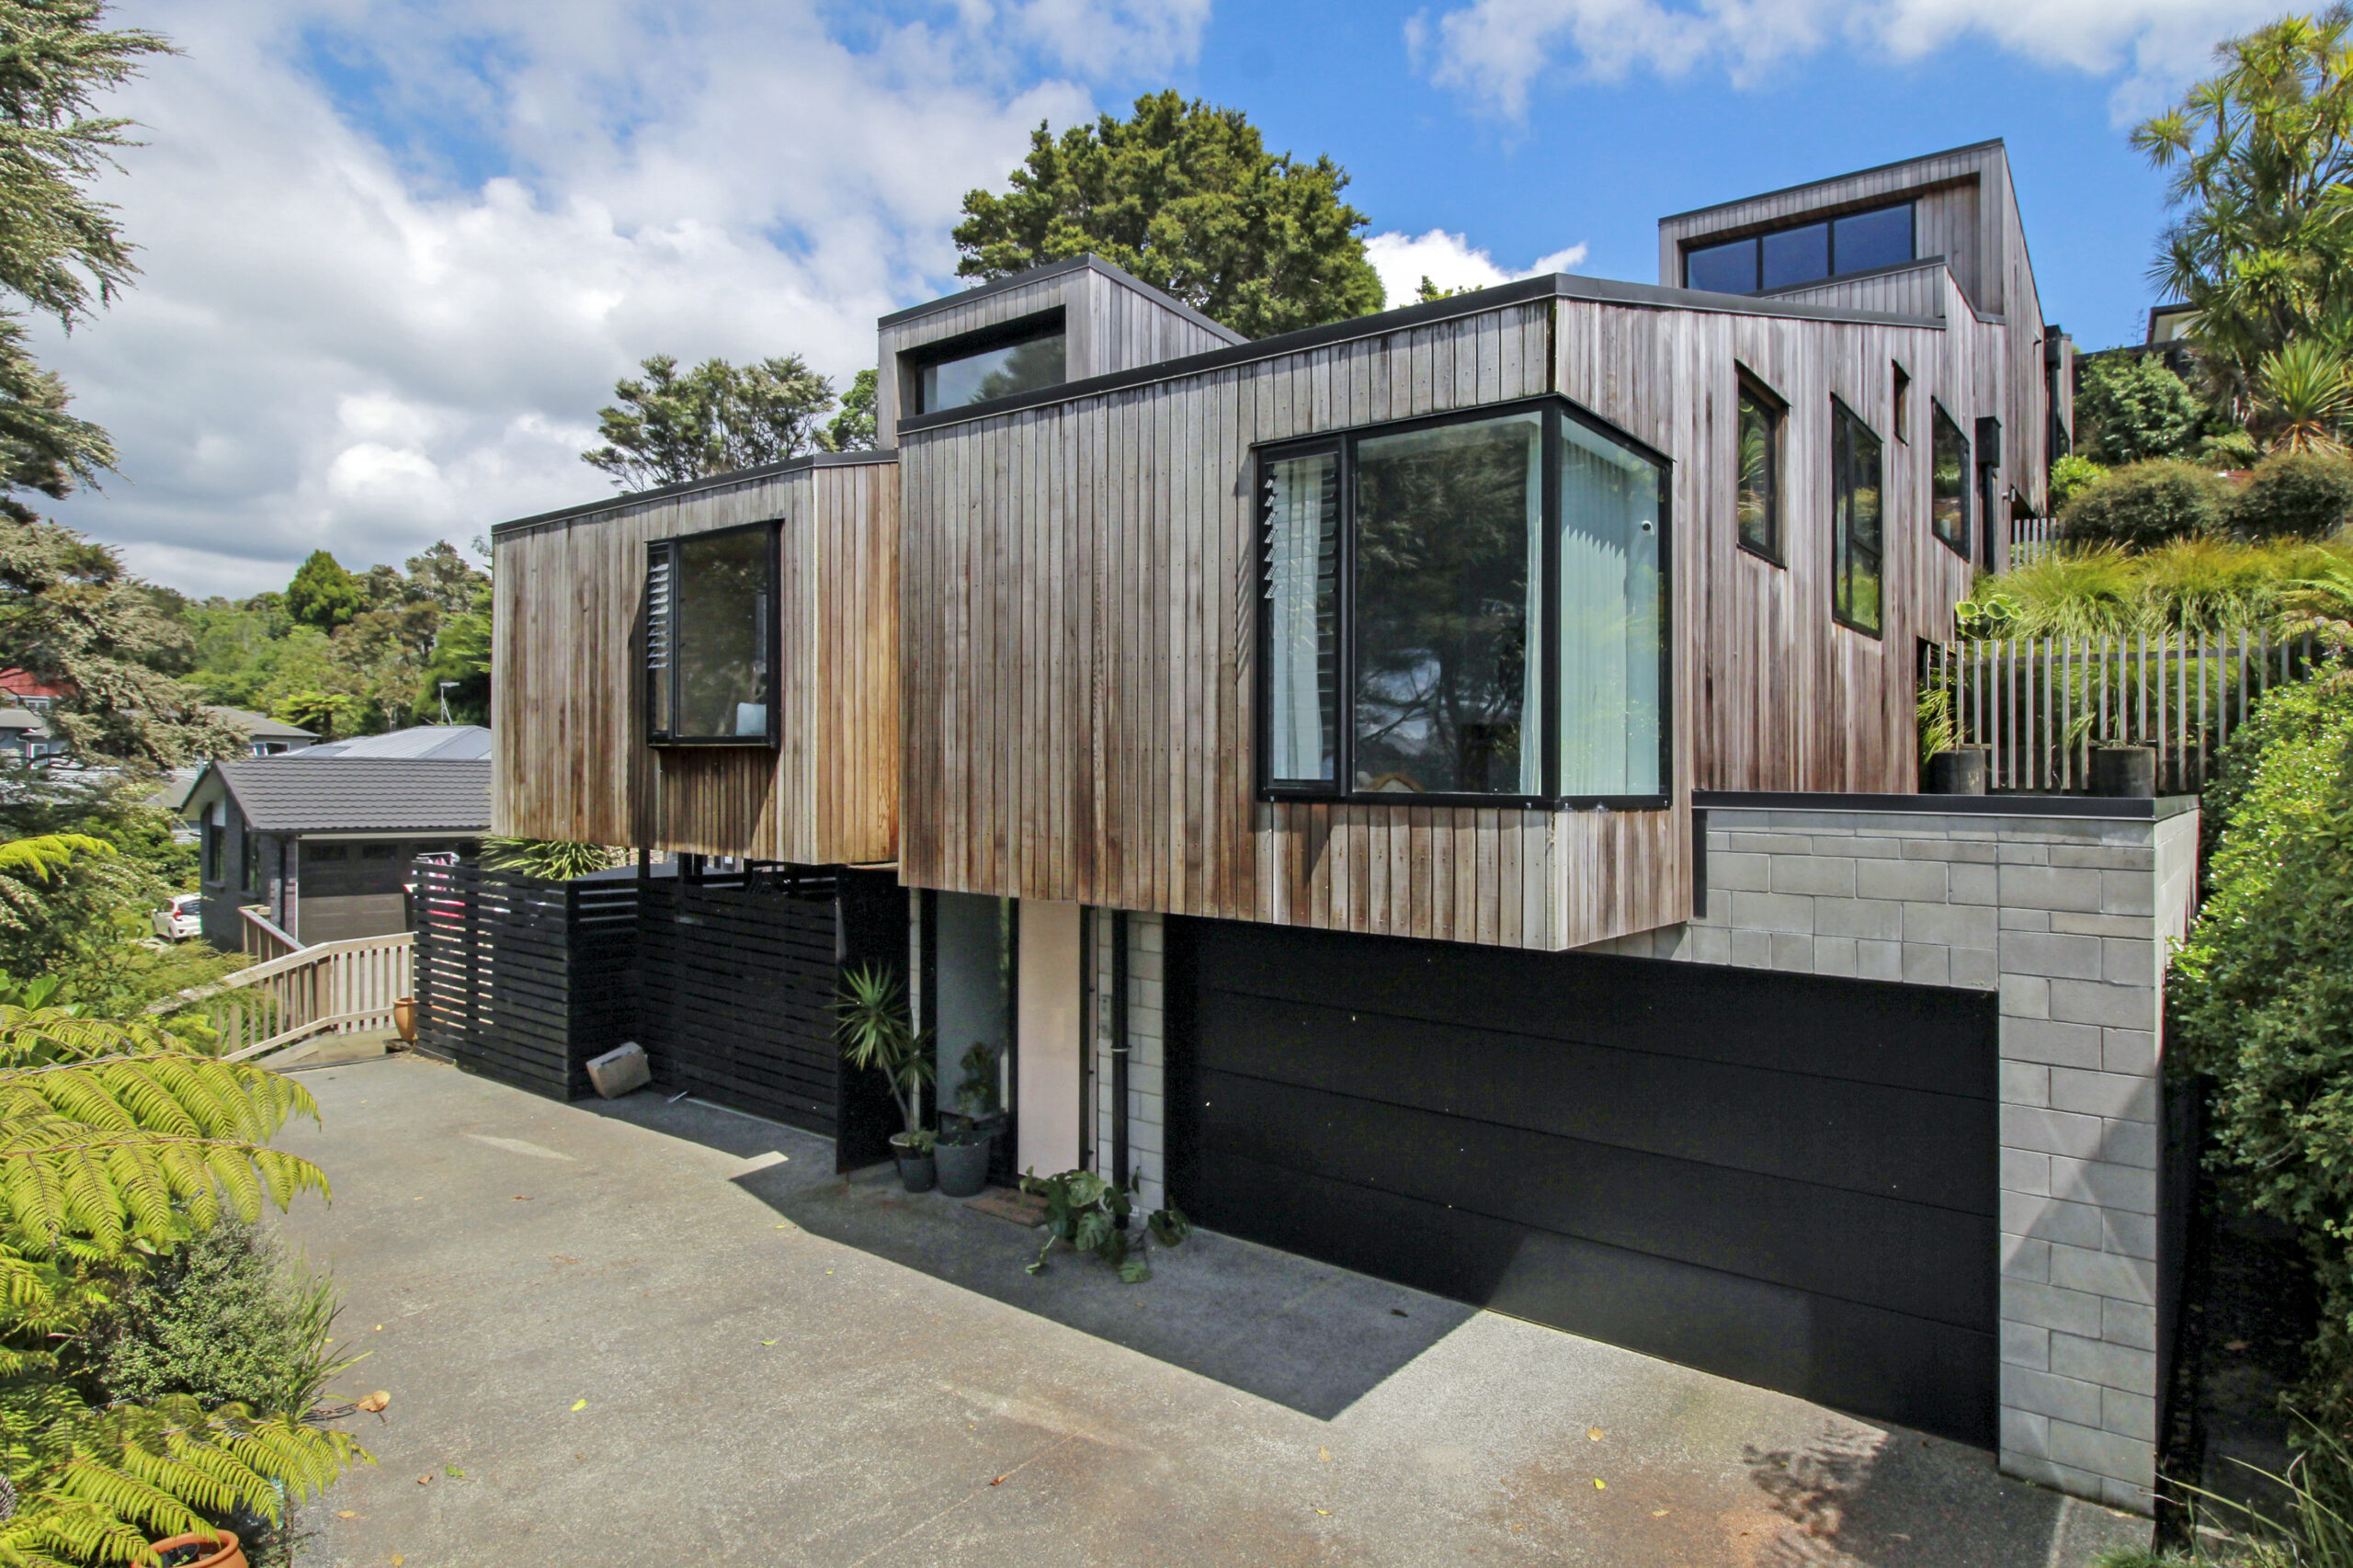
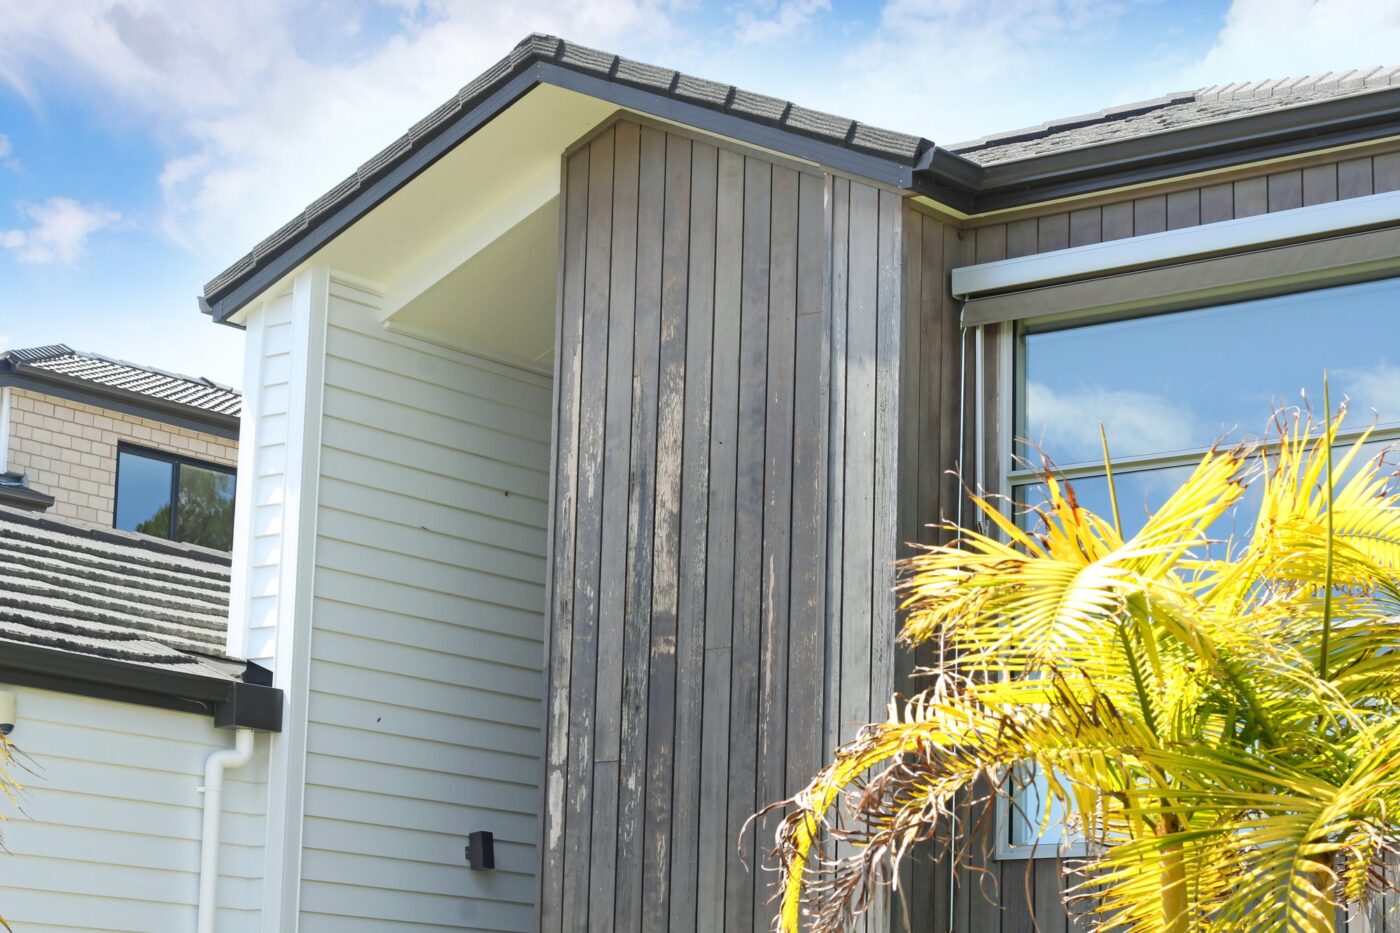
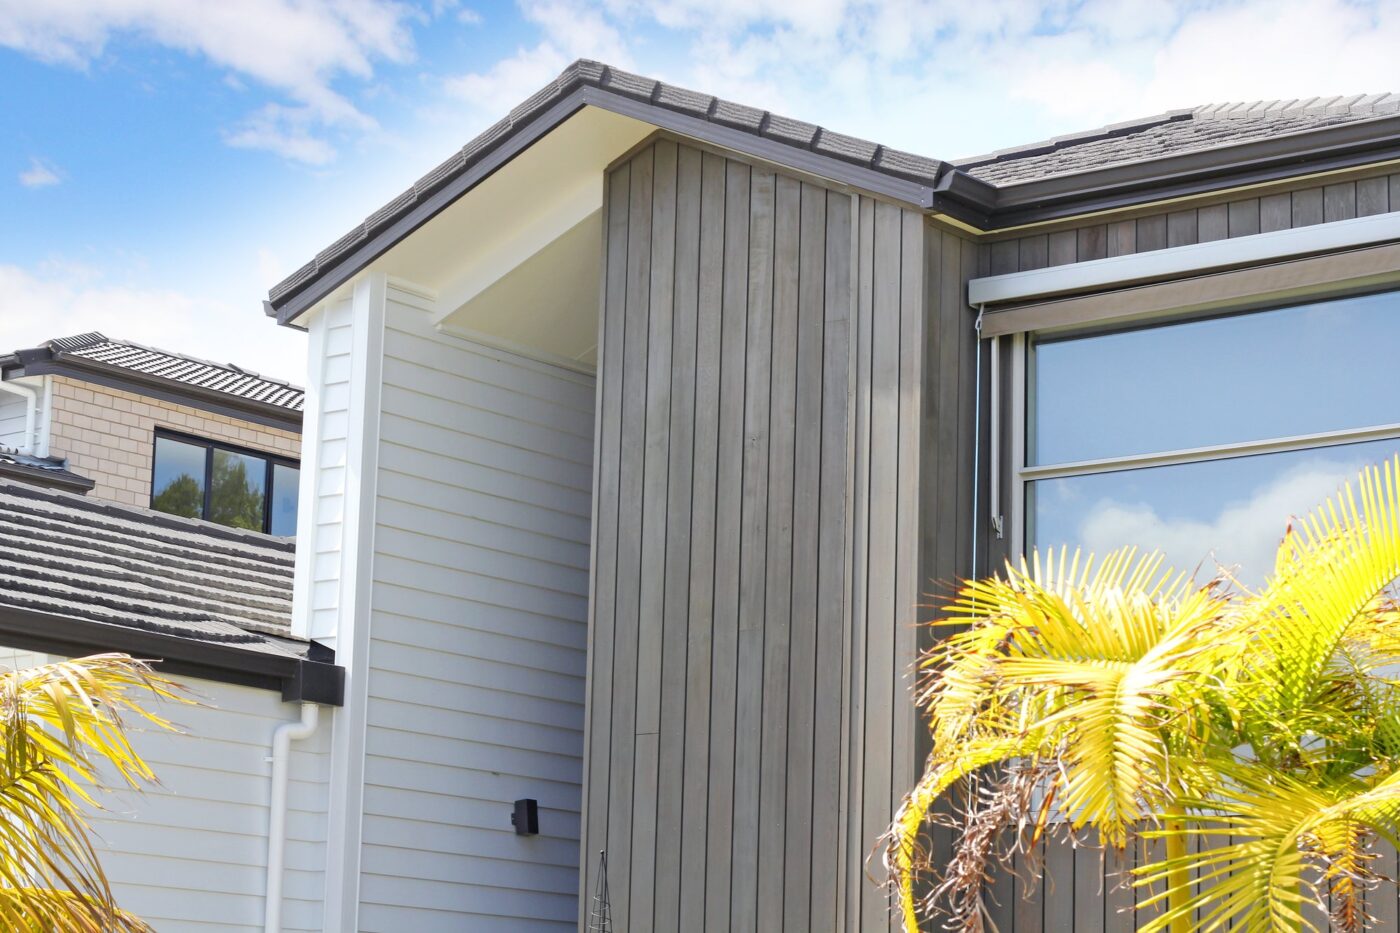
This stylish, modern home in Swanson was built in 2016, but soon ran into problems with the appearance of the Cedar.
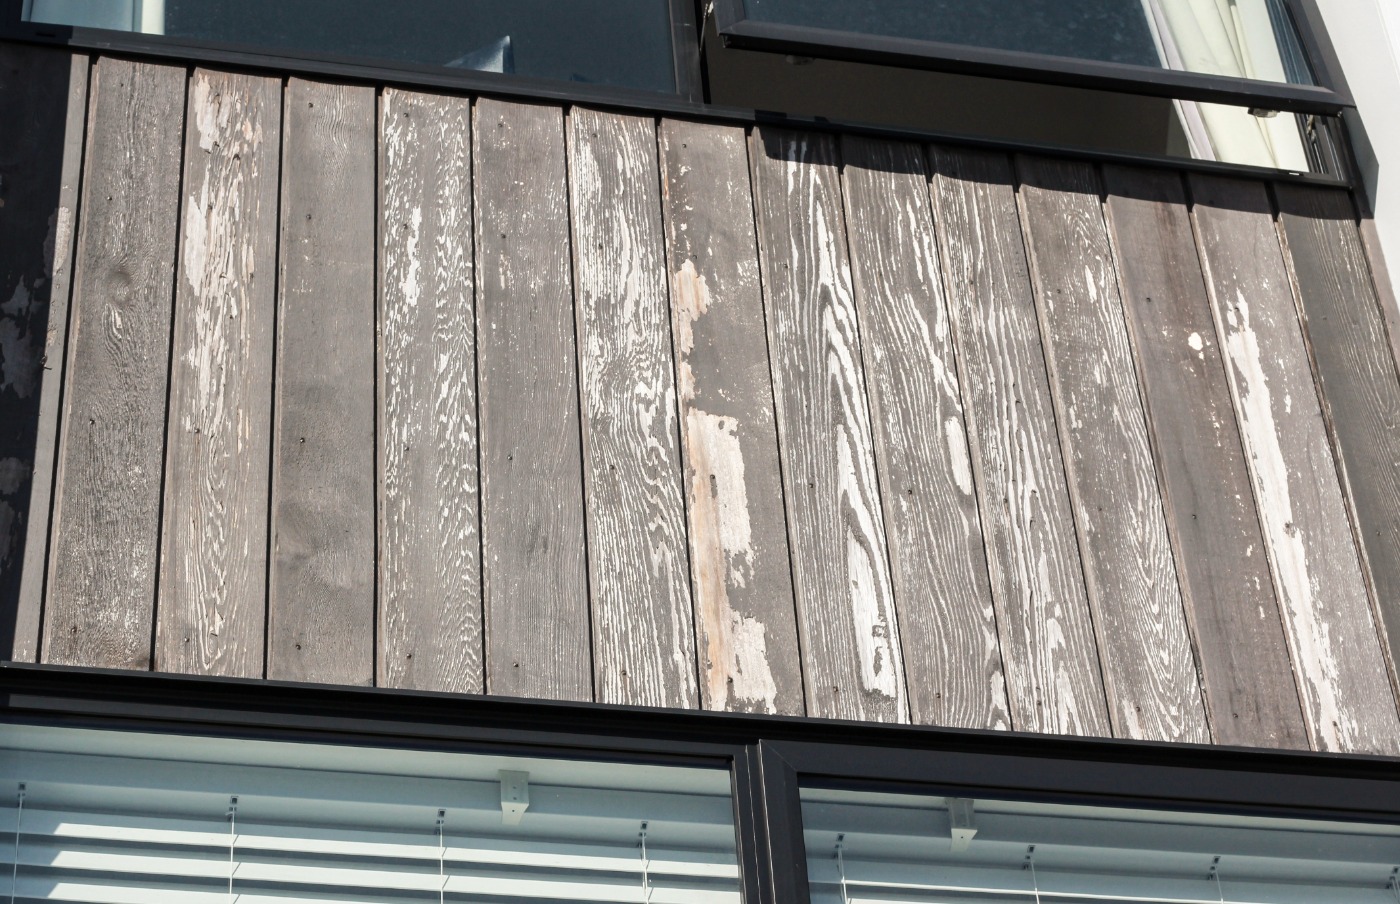
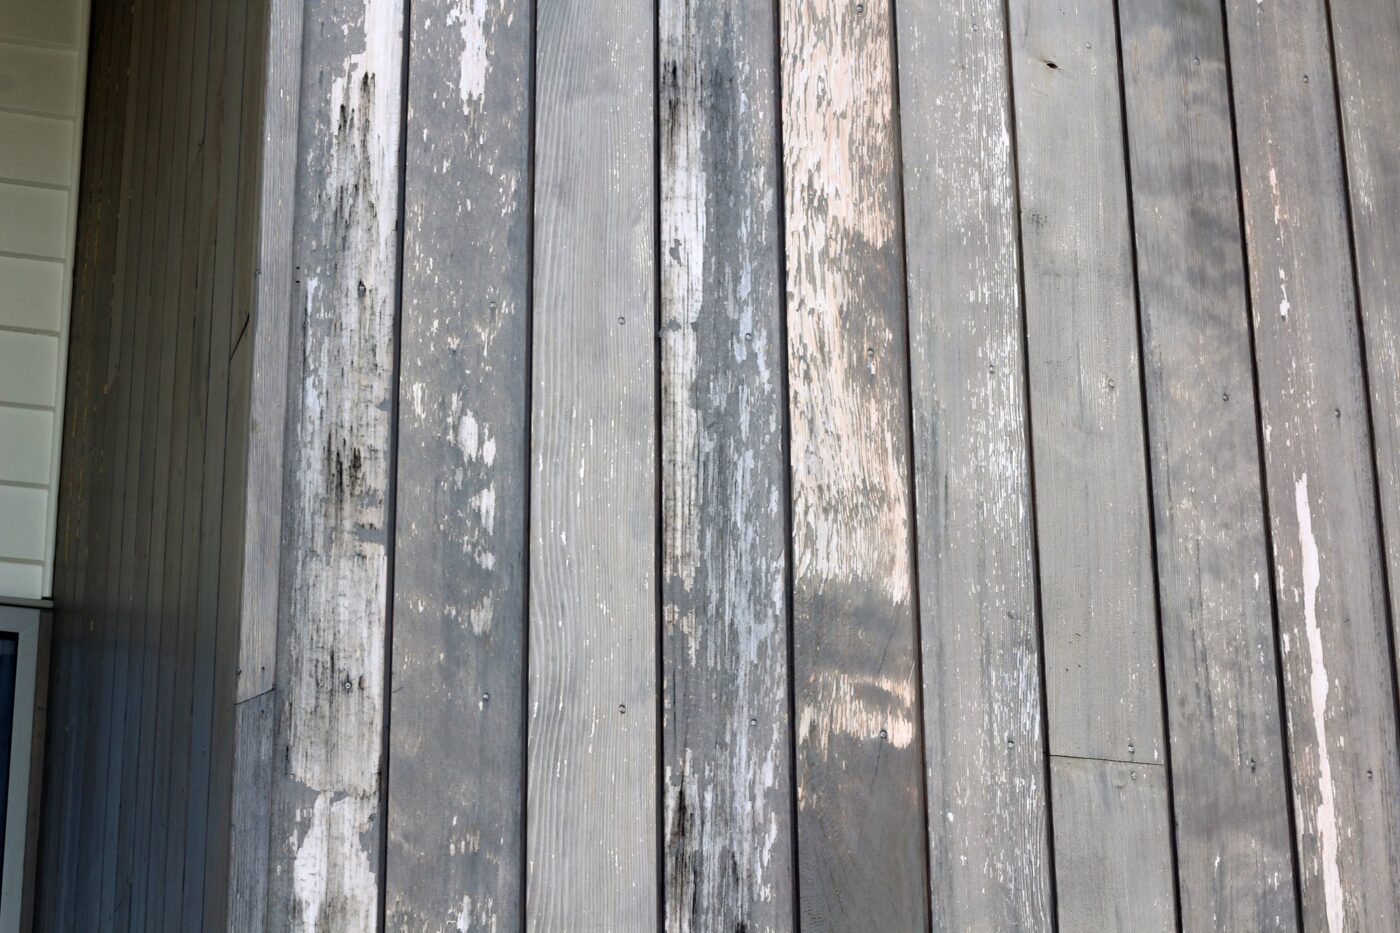
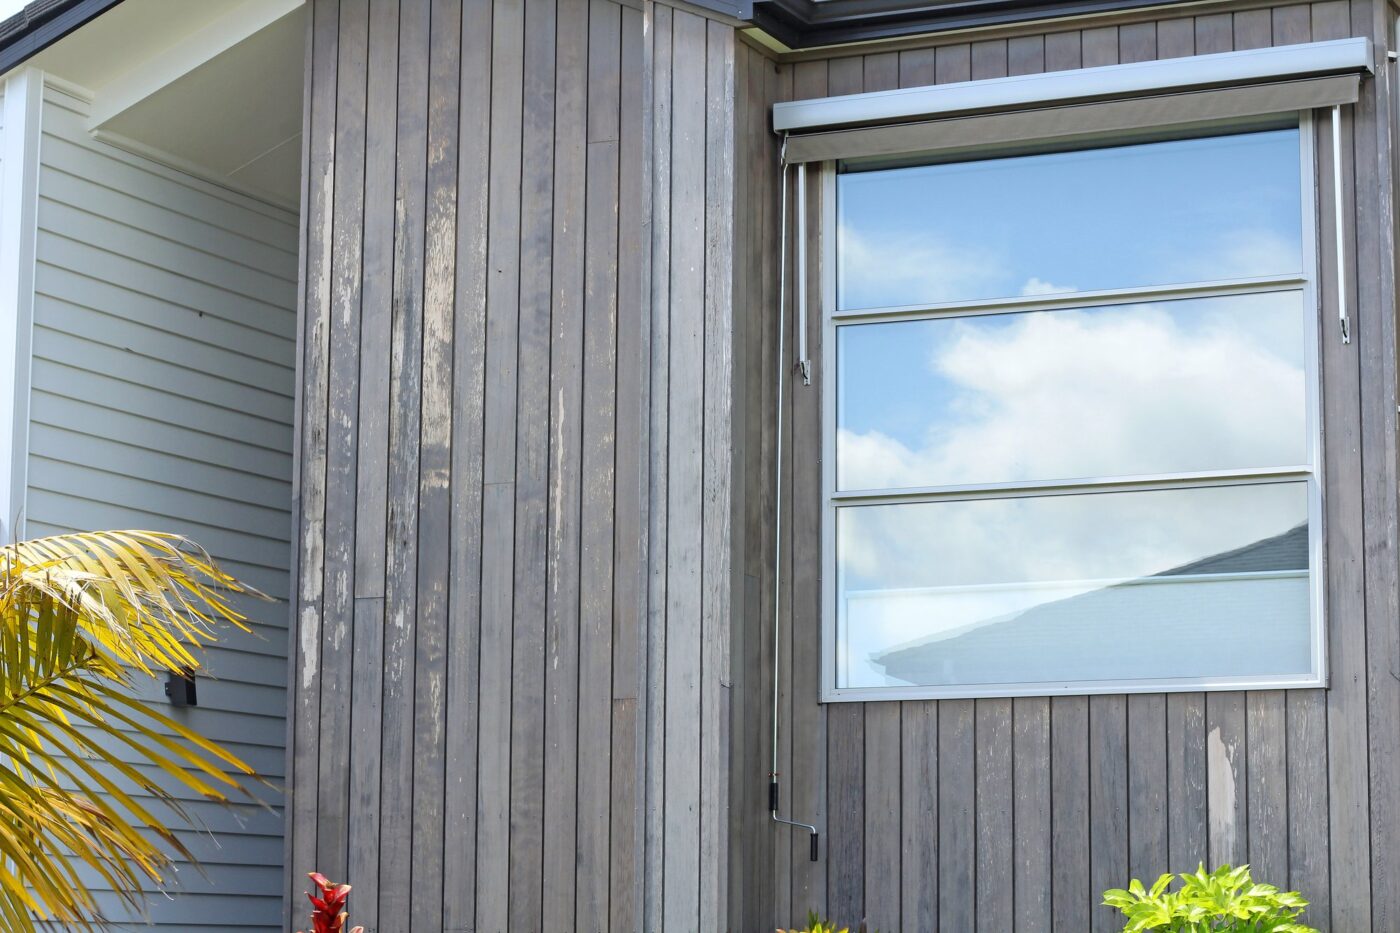
The building company had used a stain product that wasn’t tested in New Zealand conditions and soon deteriorated in the harsh UV rays, becoming porous and exposing the Cedar to the elements. Air borne mould took root in the timber and quickly spread once the moisture got in.
As the house was relatively new, the homeowner was understandably upset. Thankfully, the building company did everything to make things right – including bringing in TimberTech to give our expert advice.
Maintenance Timeline
The building company first approached us on the 23rd of September, 2020.
- 27th September, 2020 – Onsite Cedar assessment completed.
- 29th September, 2020 – Quote sent.
- 14th December, 2020 – Team arrived onsite to start the job.
- 25th January, 2021 – Job completed.
The job took 3 weeks in total, with some time off over the holiday period.
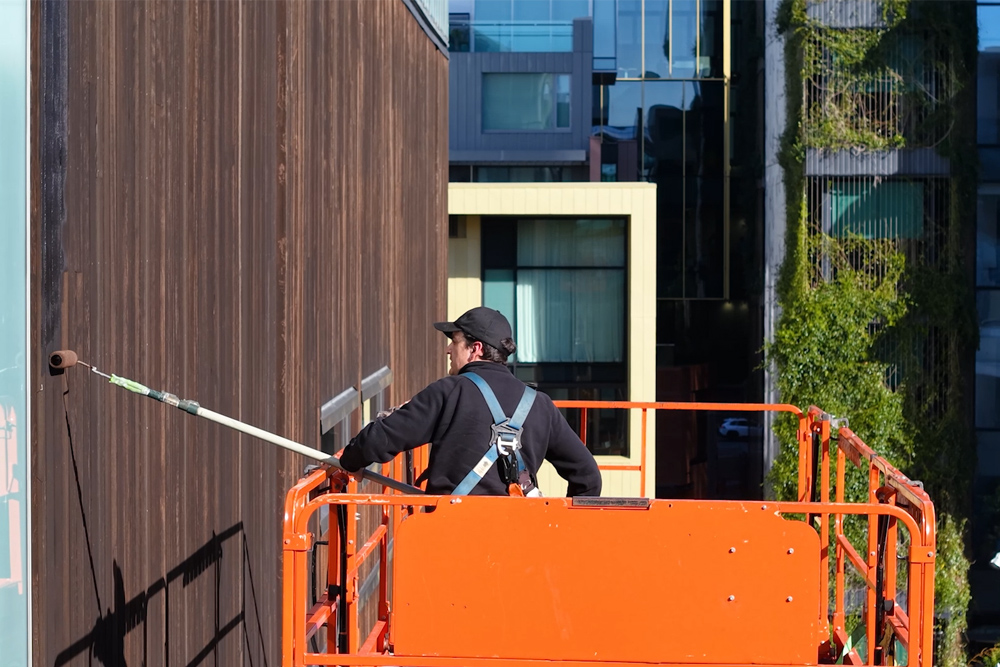
Cedar Maintenance Process
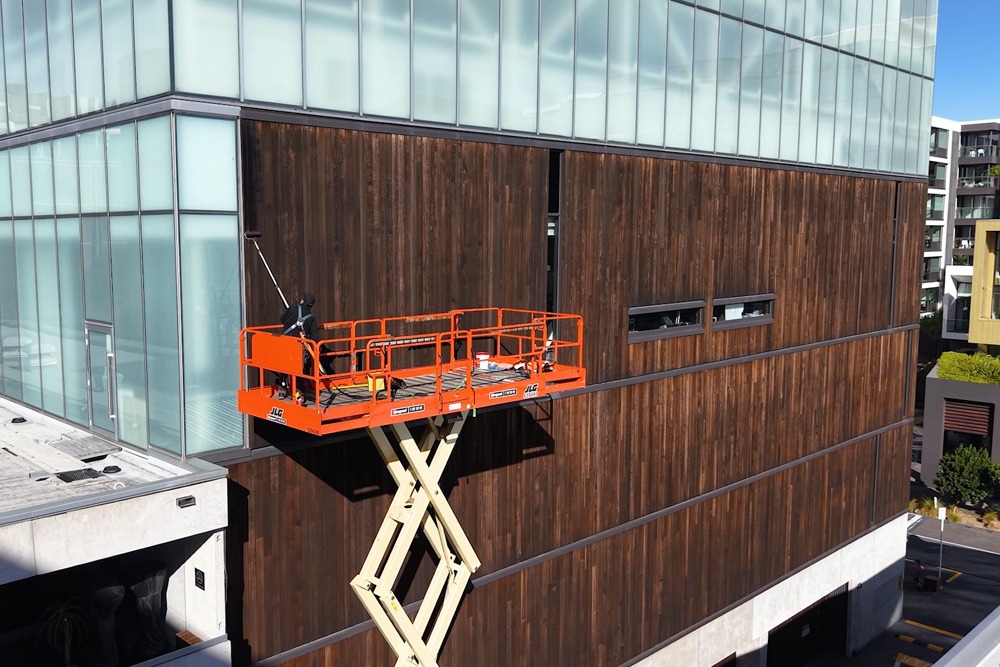
We first masked all the areas that were adjacent to the cladding and stripped off the old stain using a paint stripper.
Modern paint strippers are less potent than in the past and are made from organic compounds, which are harmless to gardens and more environmentally friendly.
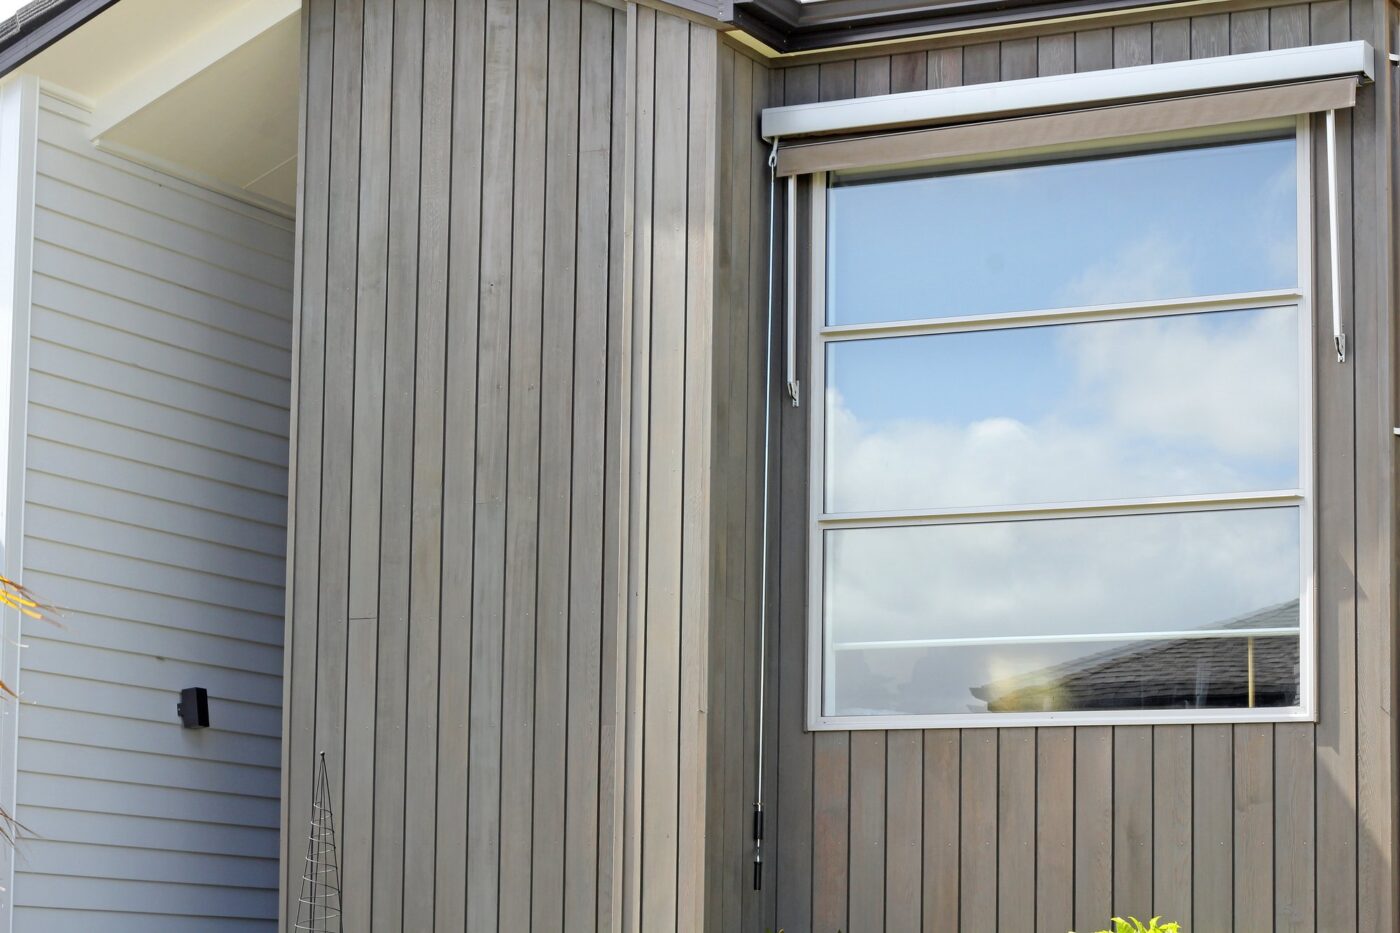
Once the paint stripper had been applied, we scraped the weatherboards and removed all traces of the old stain and stripper. To prepare for the new treatment, we lightly rinsed the surface with a water blaster to remove any remaining dust and organic matter, then sanded the boards to take away any of the furring.
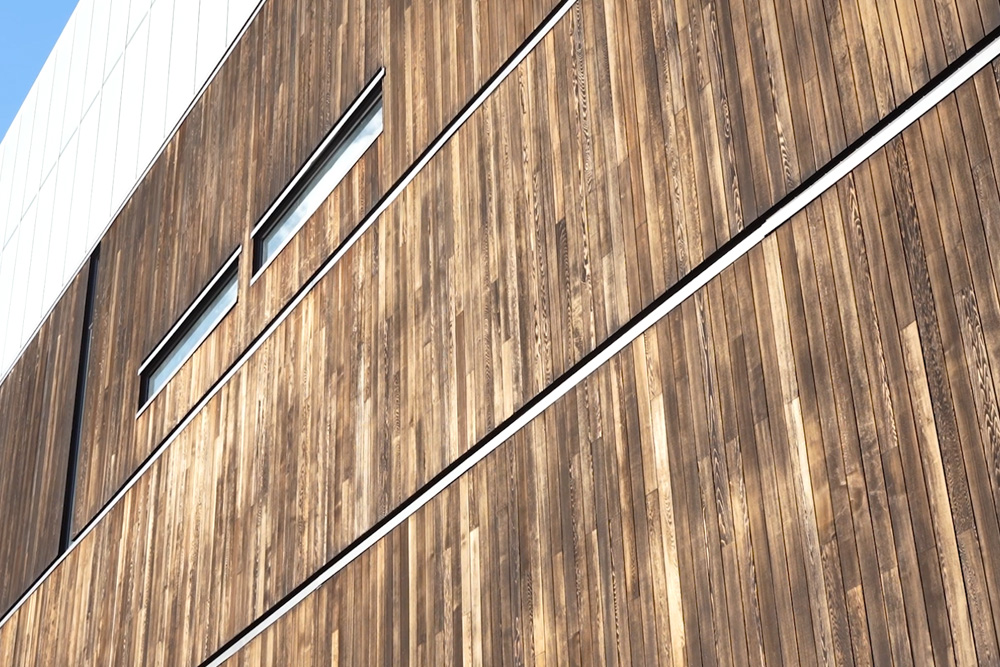
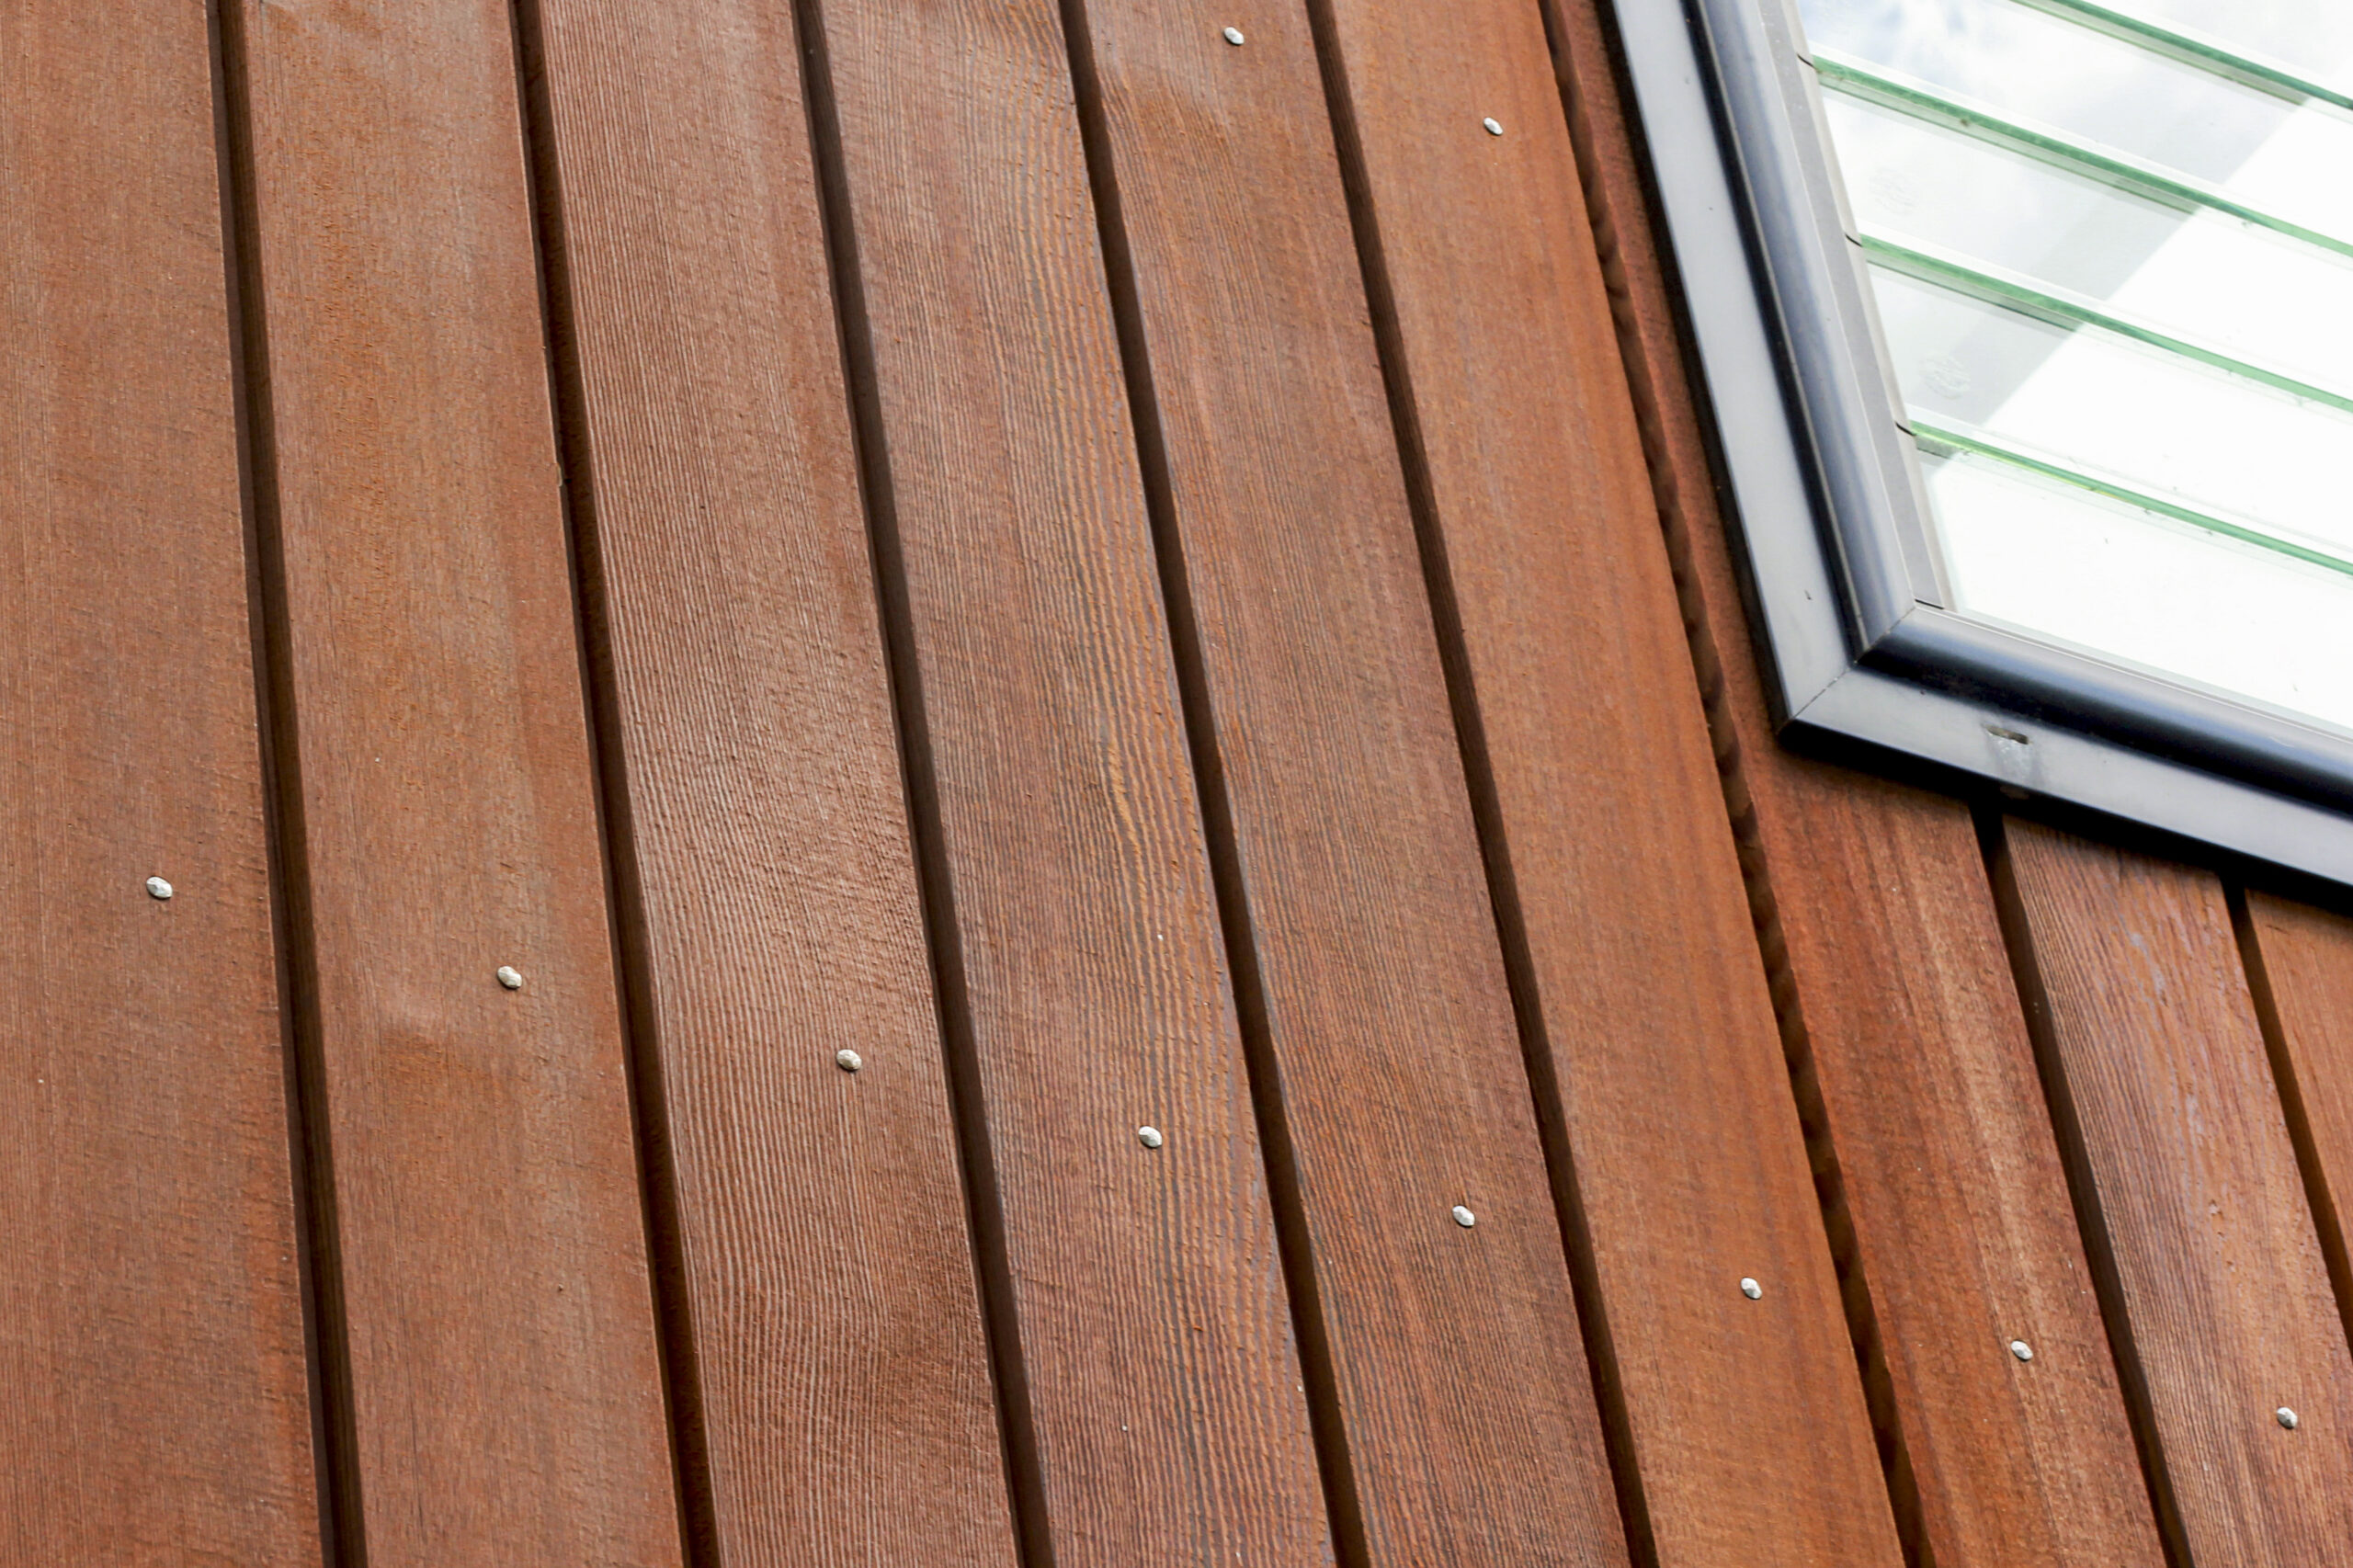
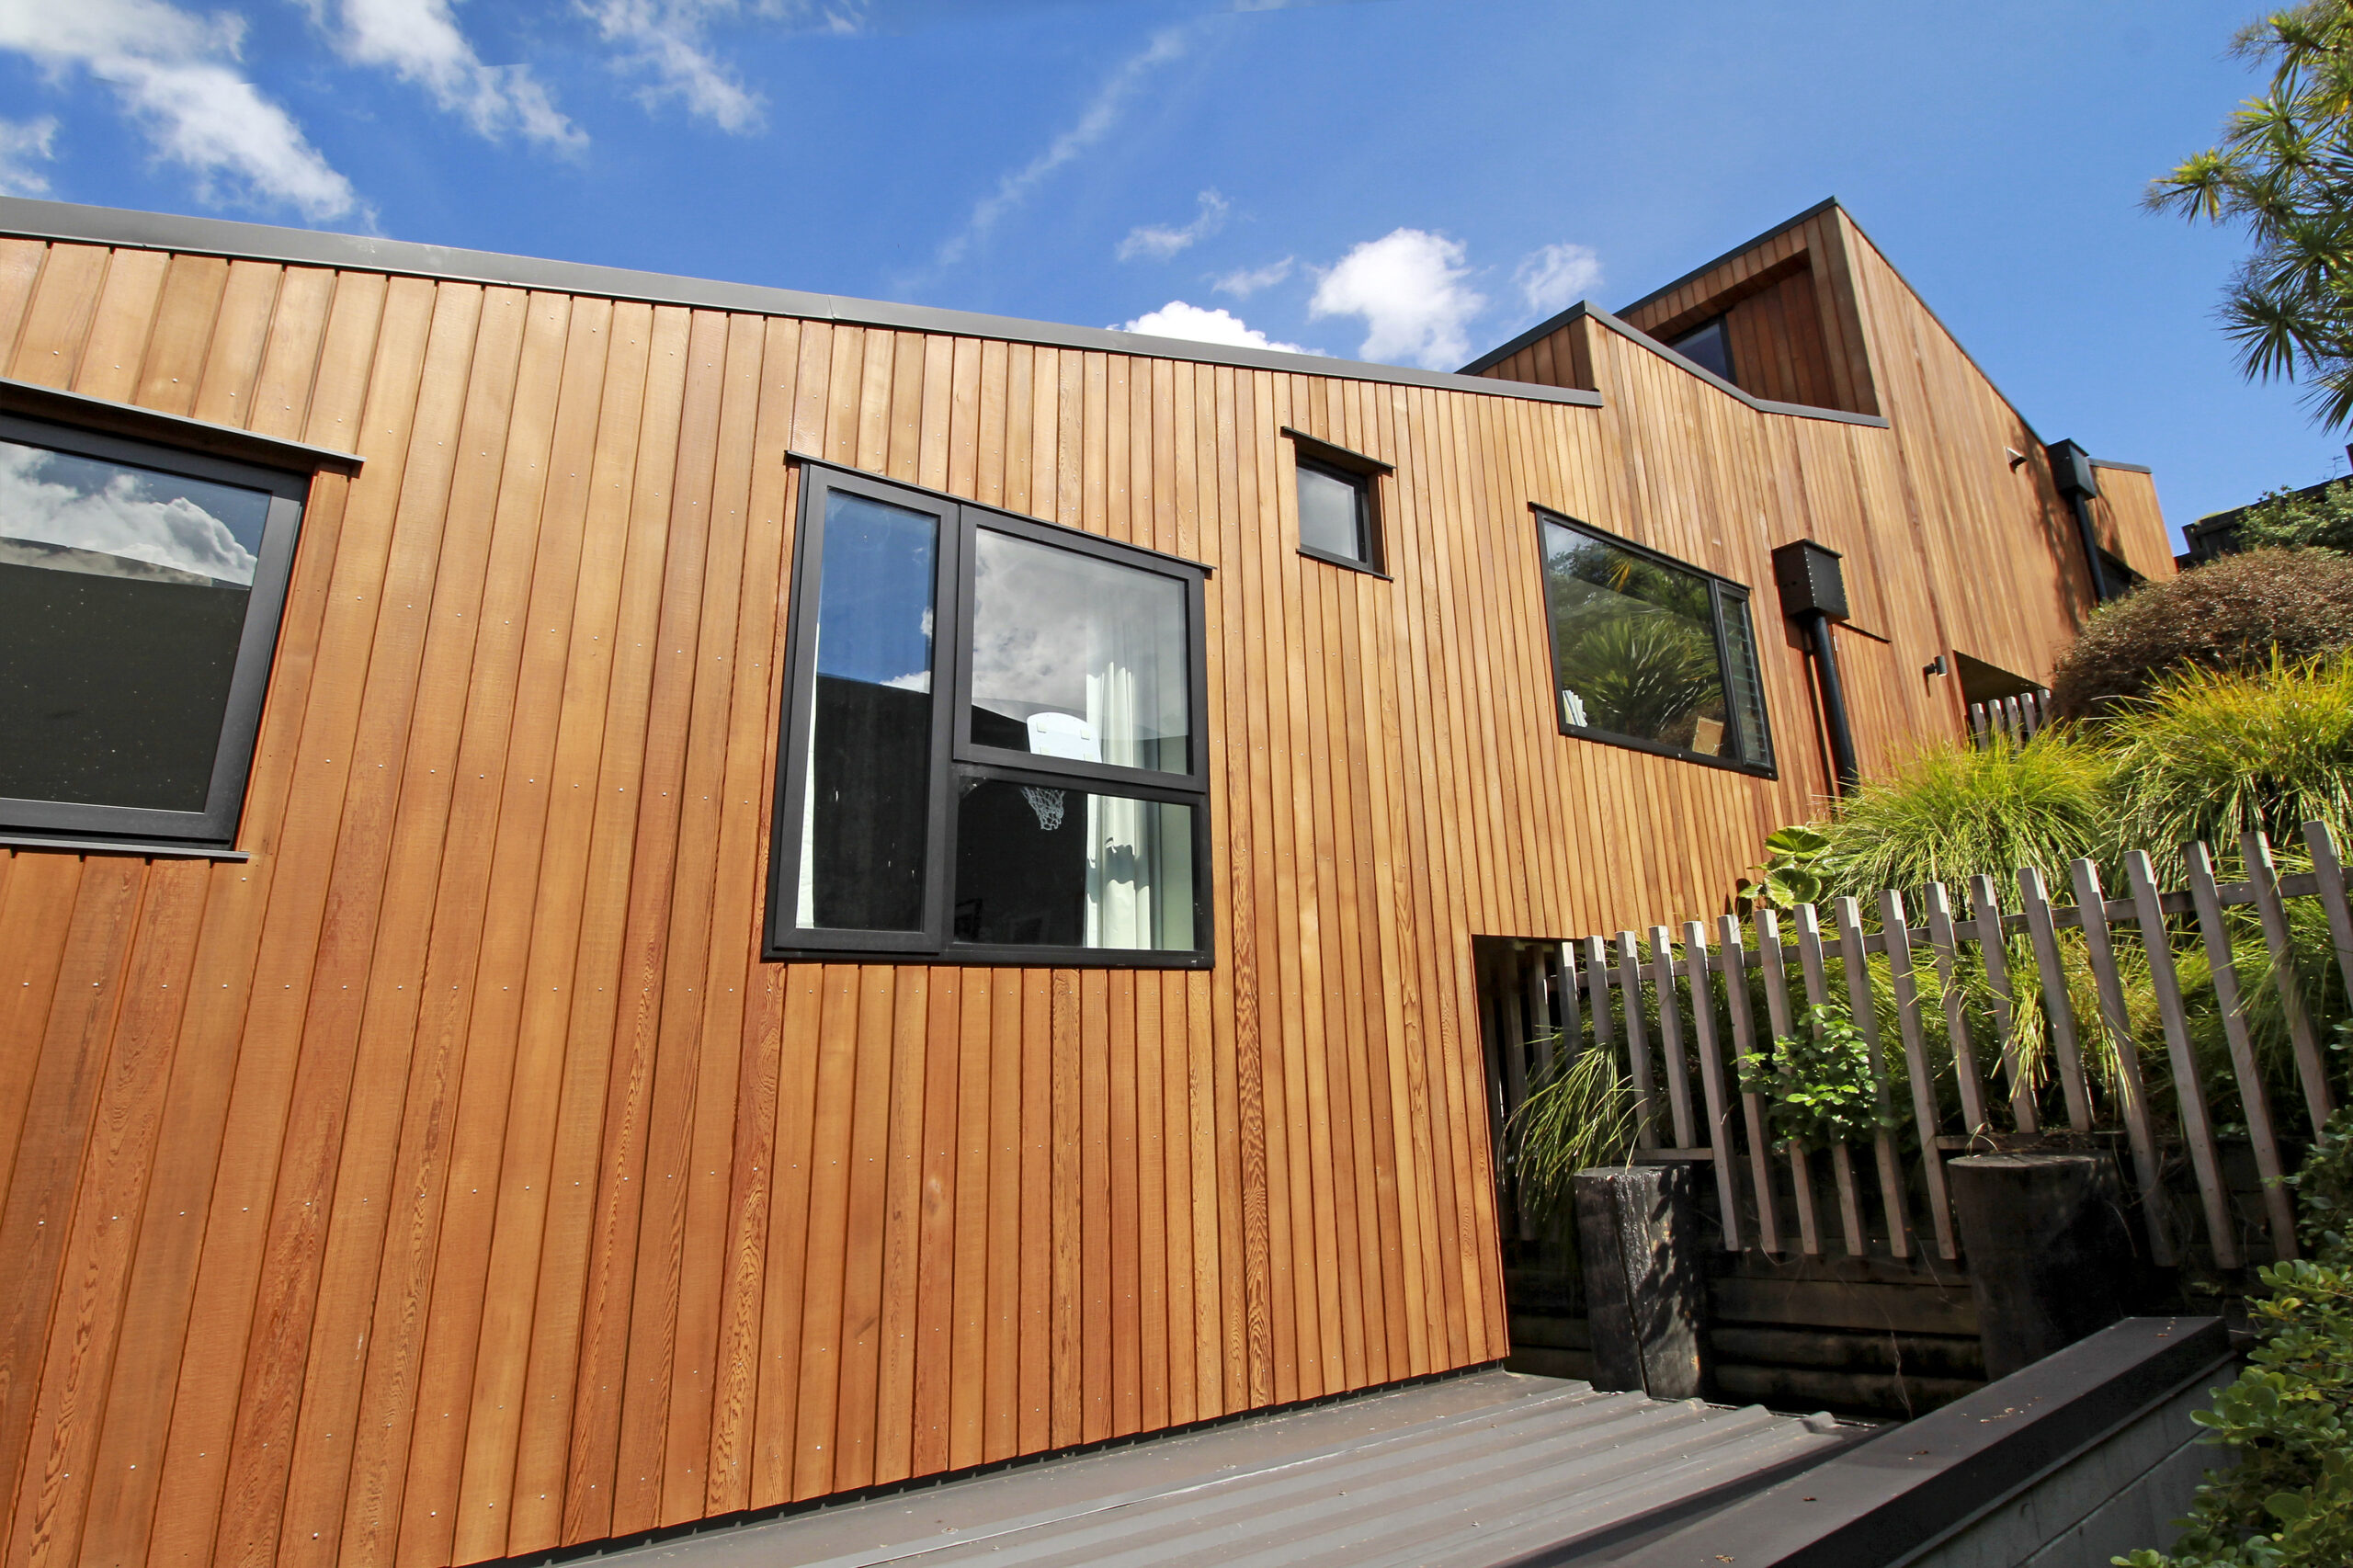
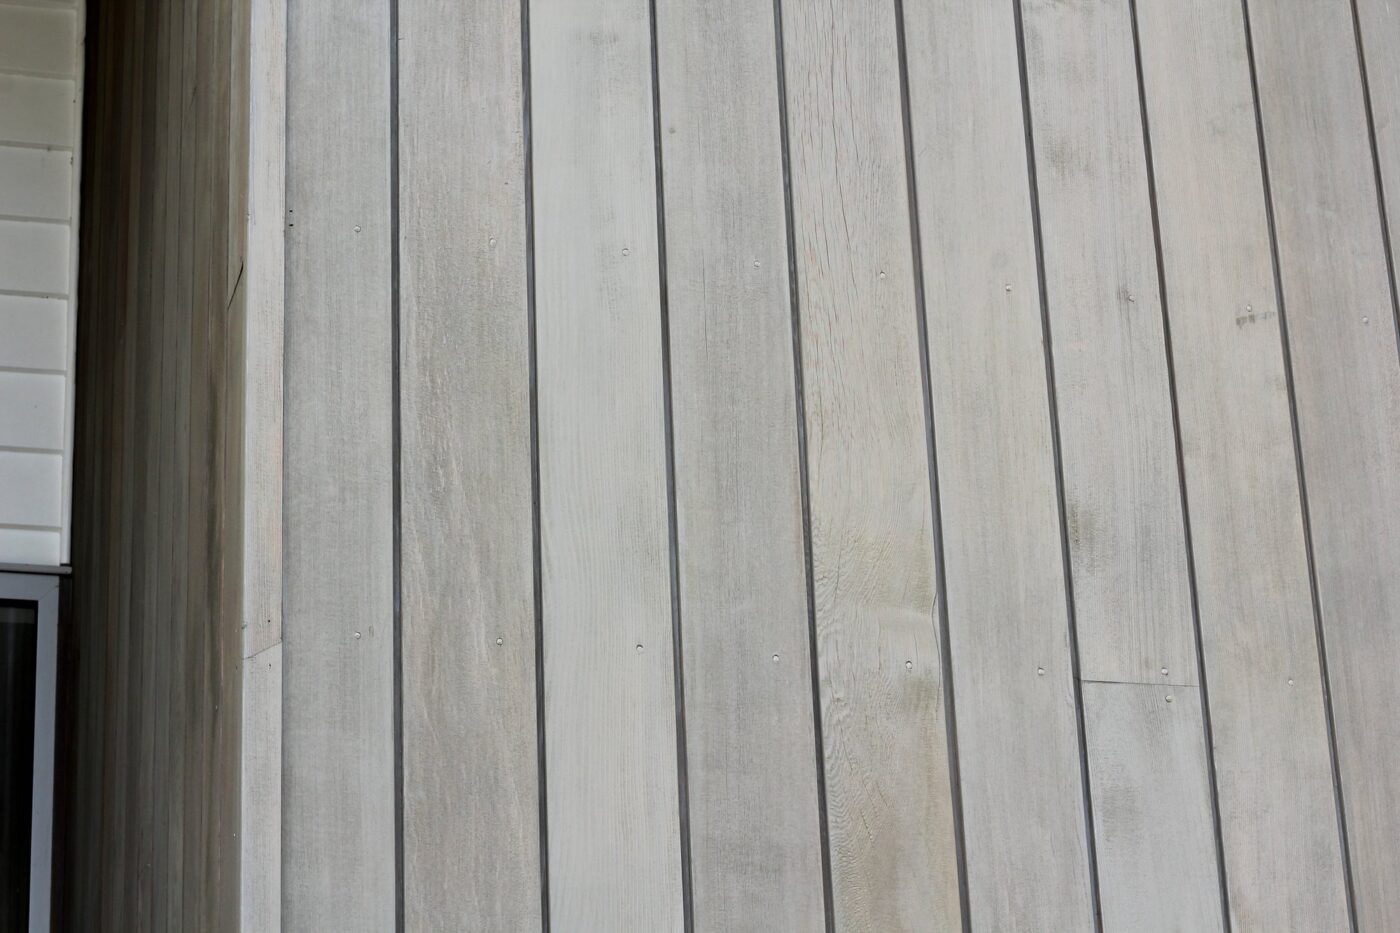
The final step was to apply 2 coats of an oil stain. Oil-borne stains are oil mixed with solvents that evaporates upon application, allowing the stain to cure. These types of products are not used as much these days as the market has shifted to waterborne products that are more environmentally friendly.
Solvent based products give a much flatter finish that absorbs the light, giving a less shiny, more natural look.
Cedar Maintenance Challenges
As the house was basically new, we had to take special care masking around the edges of the timber to ensure the oil stain didn’t come into contact with the joinery, or the established gardens.
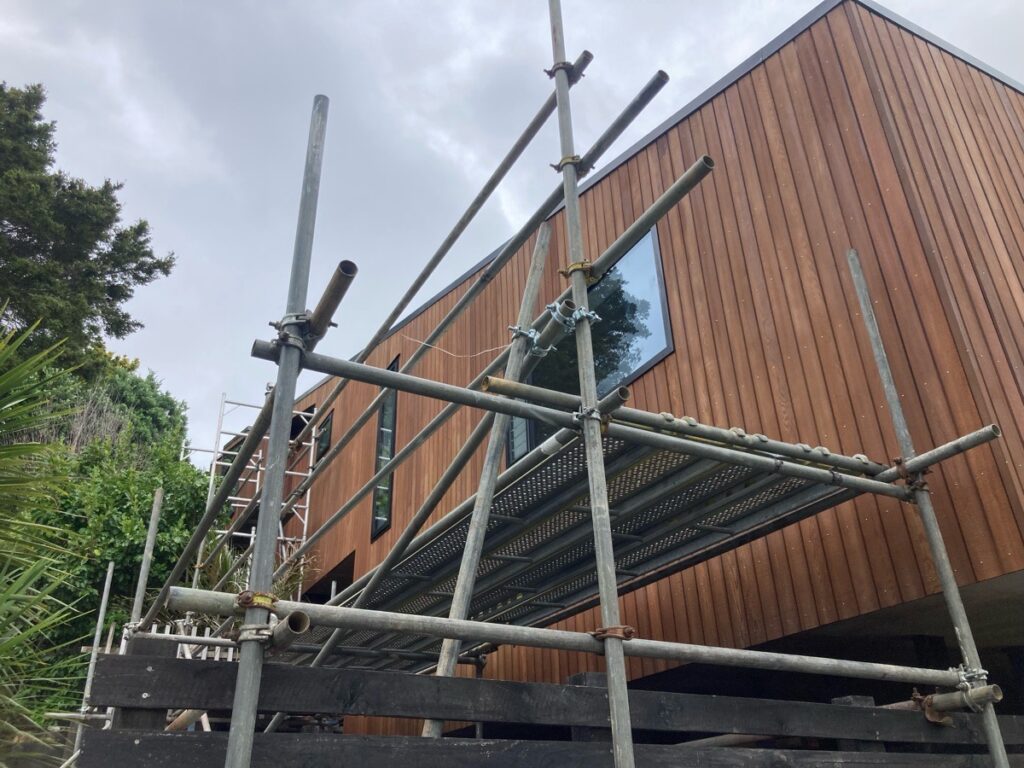
The awning on the front face of the house also had to be removed. We supplied and erected mobile scaffolding to give the builders access to the awning.
Another challenge for this particular property was liaising between all the concerned parties to achieve a satisfactory outcome. This included the customer, the building company and the company that supplied the initial product.
TimberTech has the staff and the experiencing to manage jobs of all sizes and we gladly took on the management of this project – which proved to be a great relief for the customer.
Ongoing Maintenance Requirements
To keep the Cedar looking beautiful for years to come, all it needs is a light wash once every few years and a recoat of exposed areas every 2-3 summers.
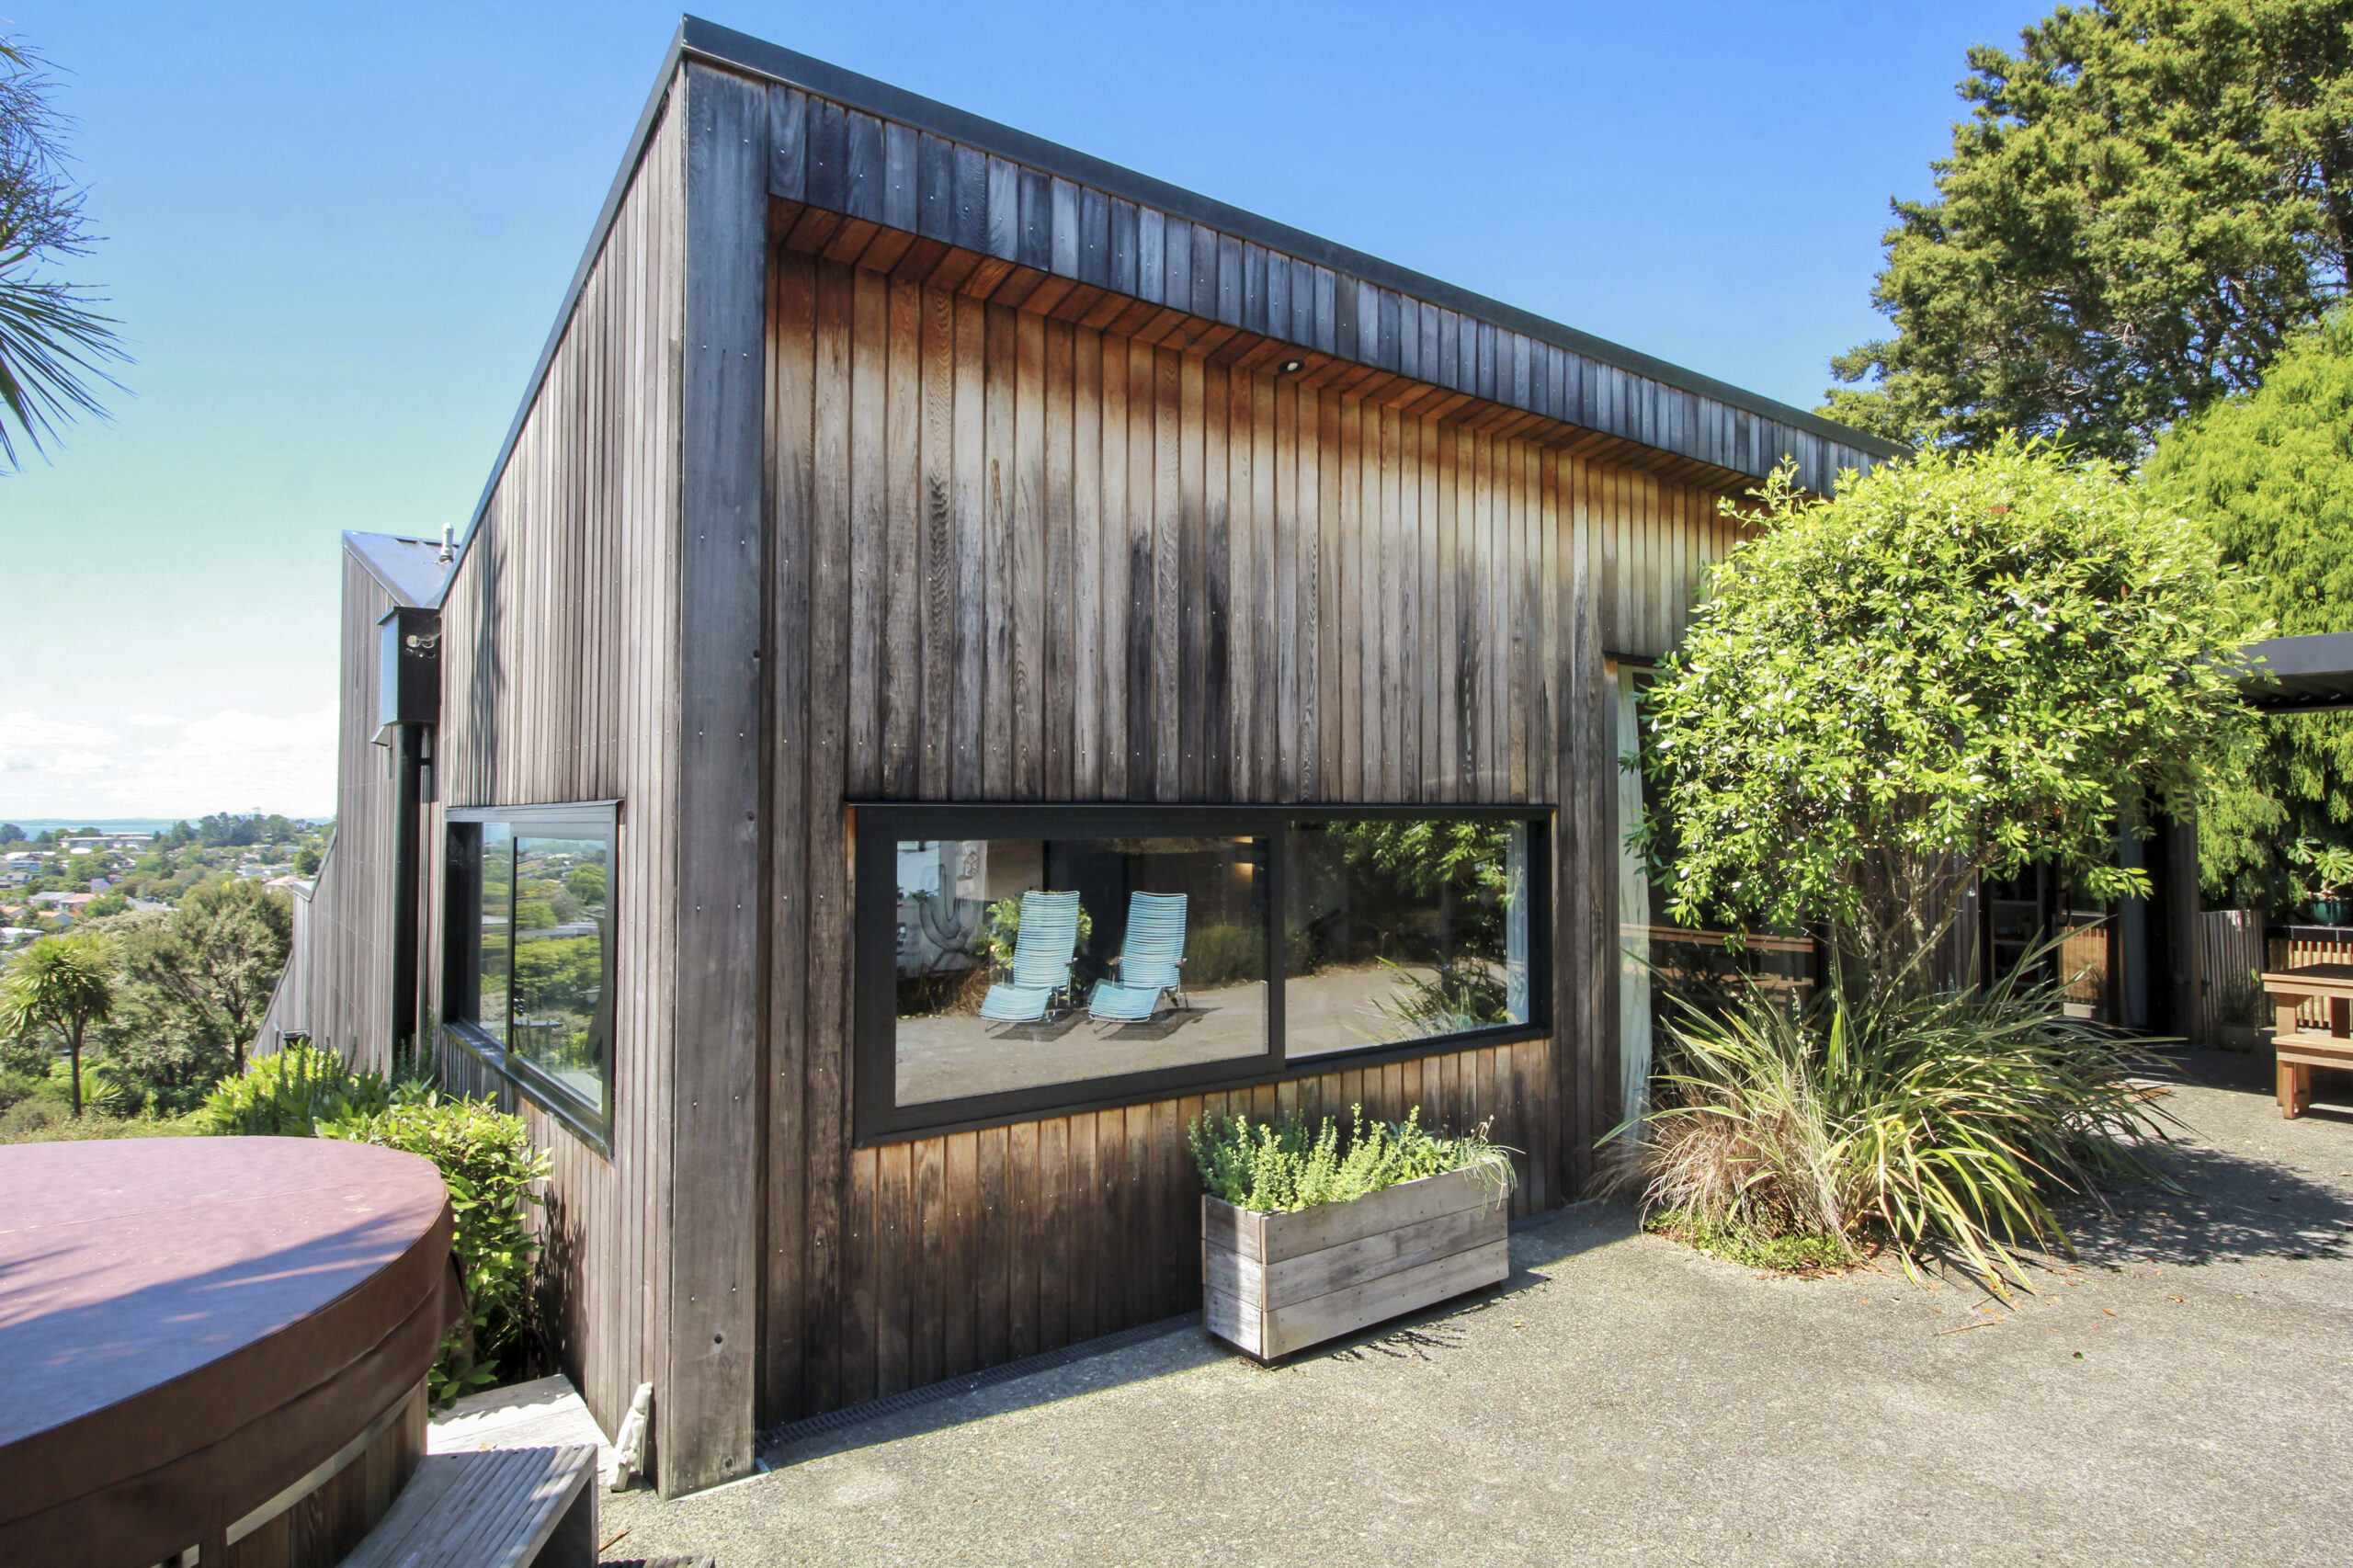
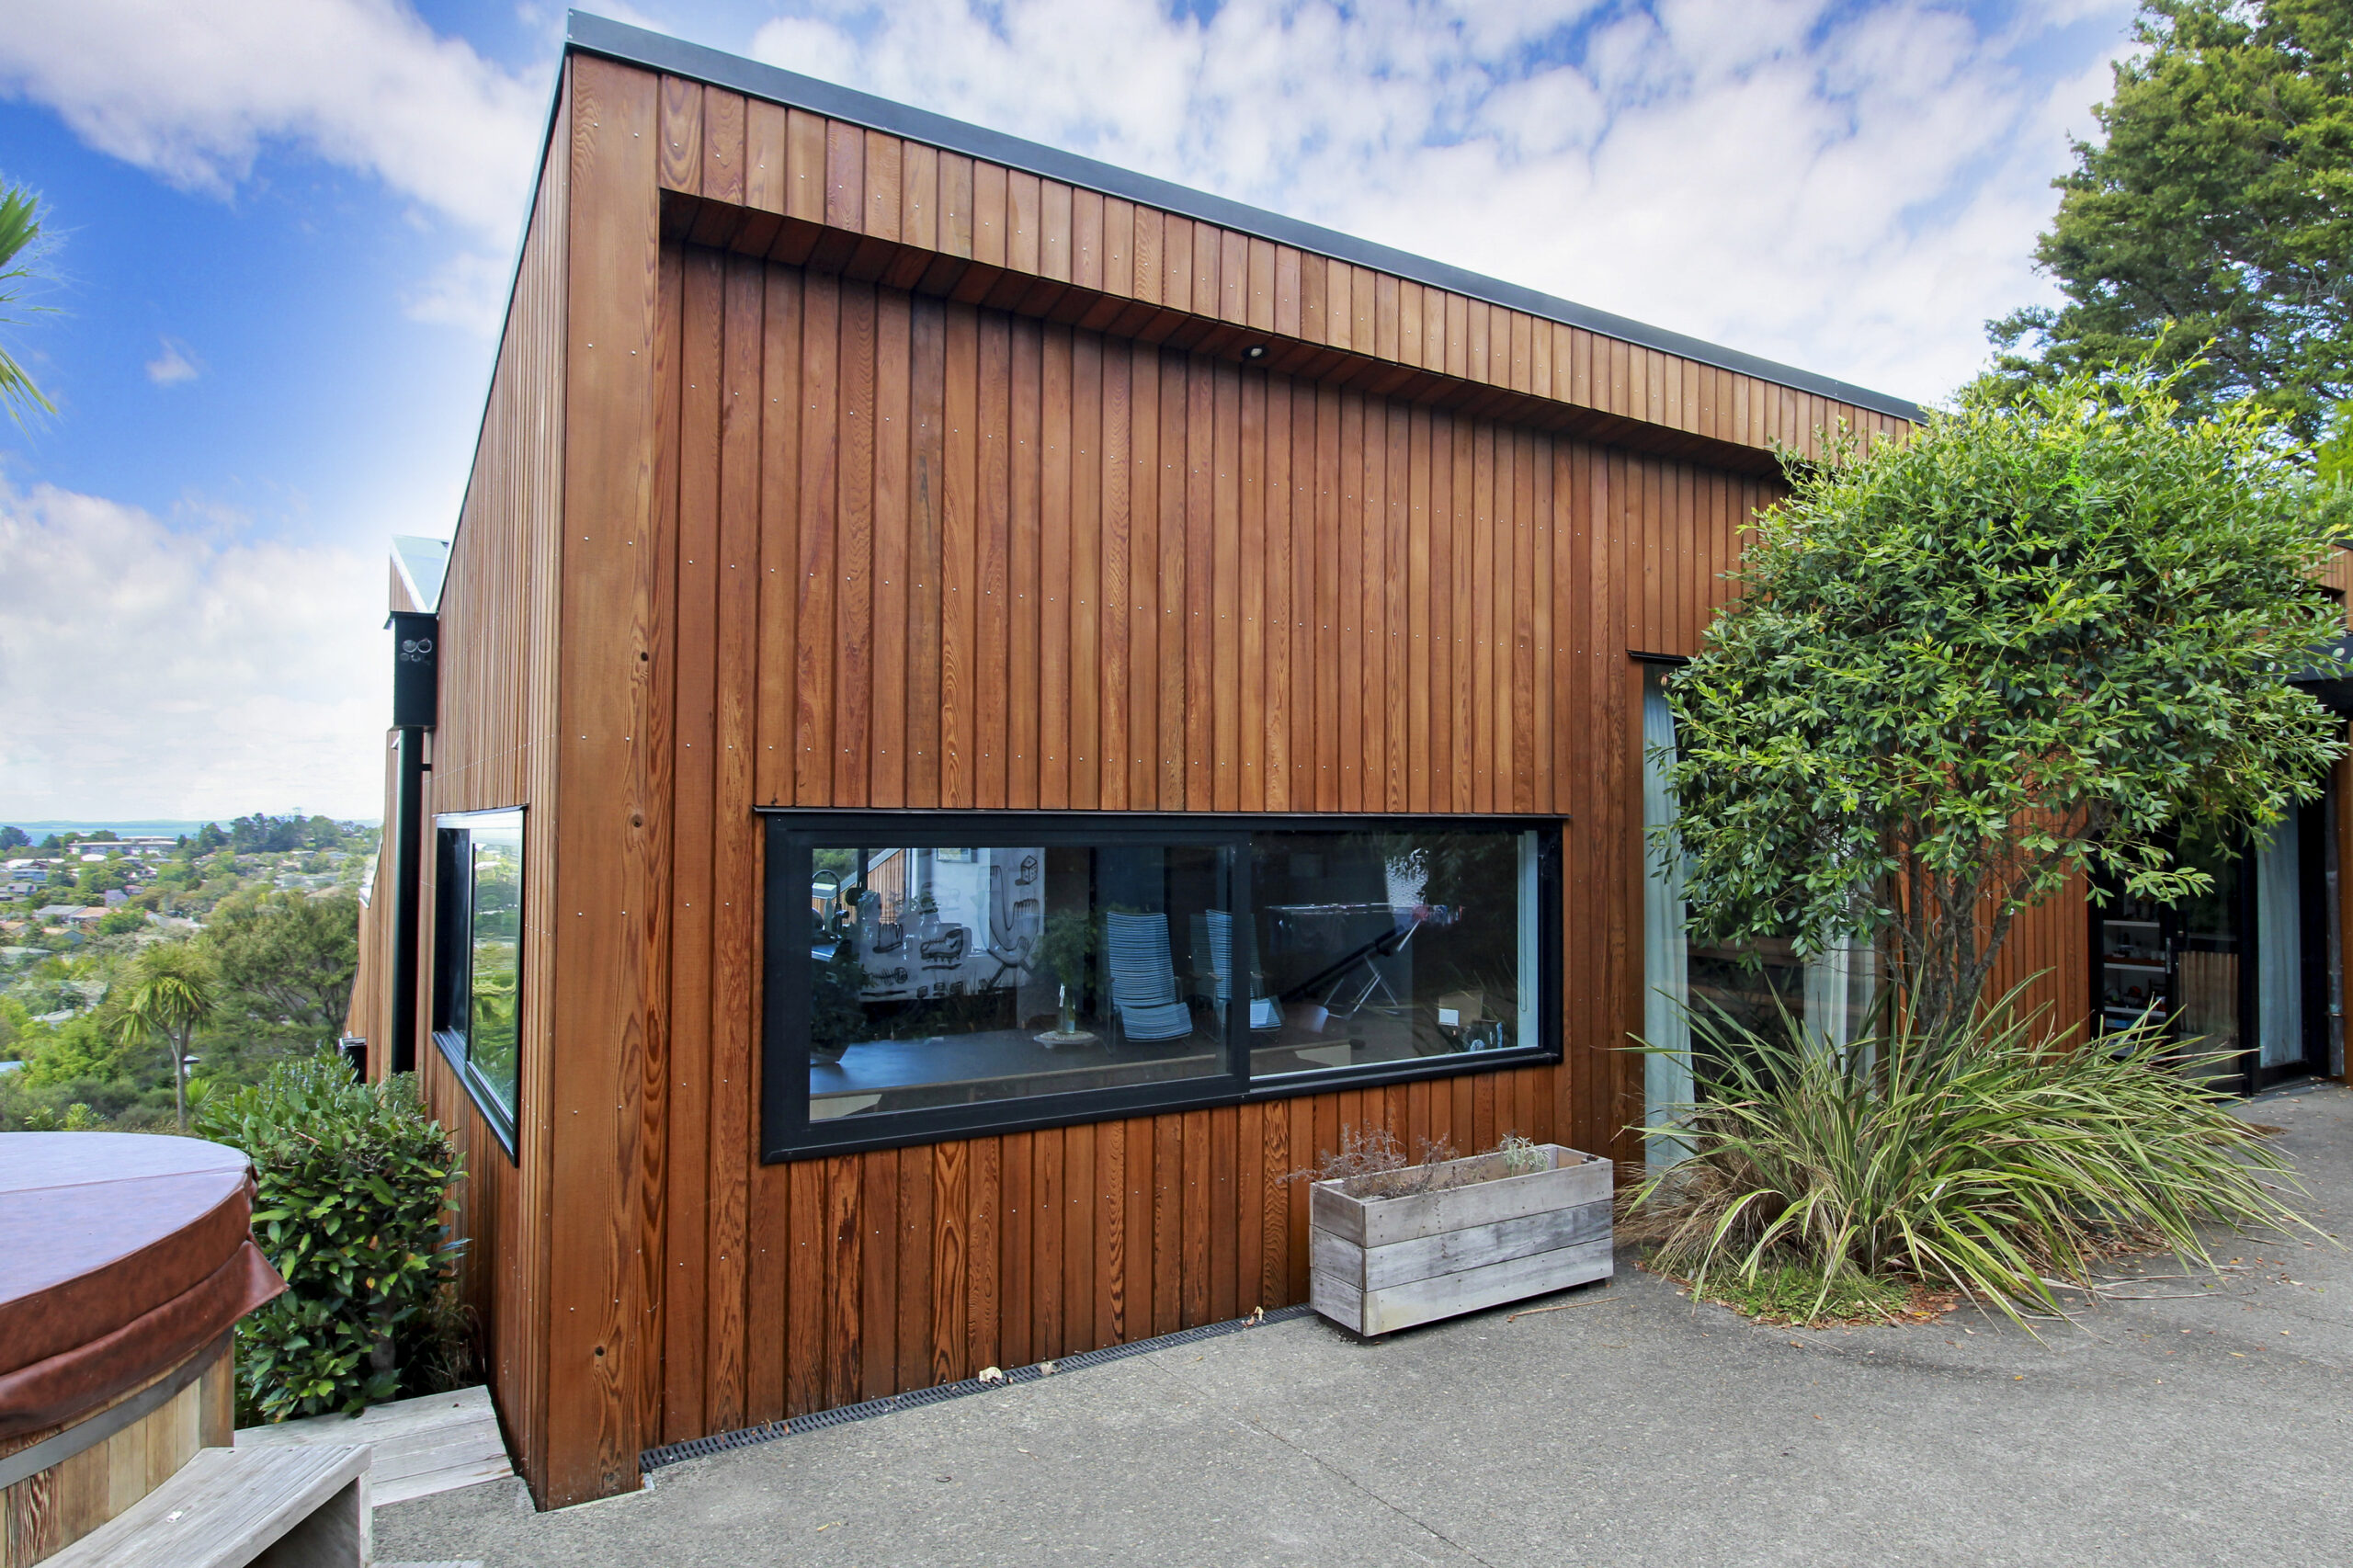
The Final Outcome
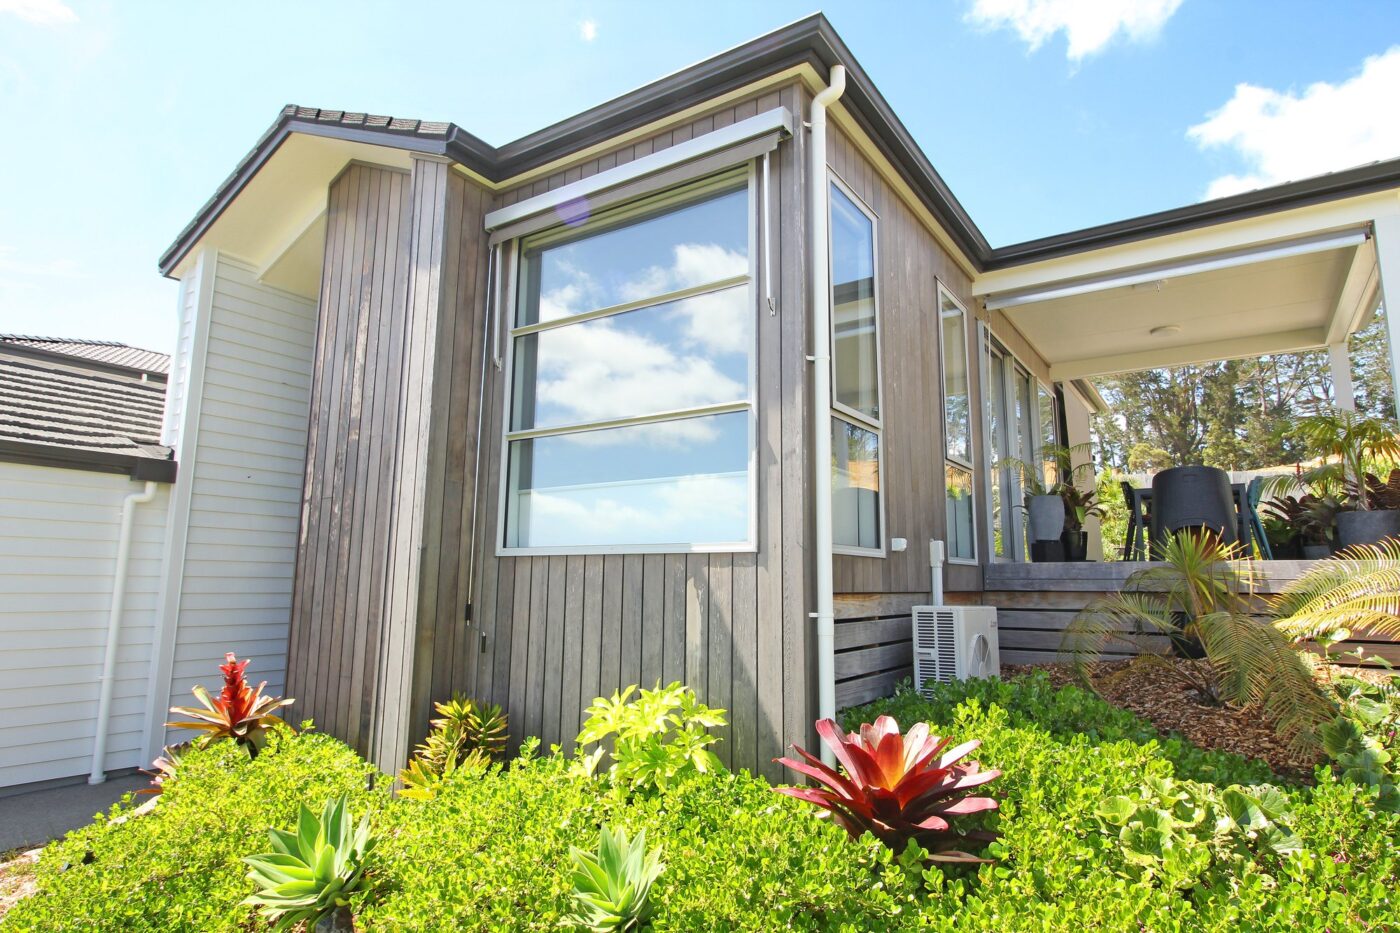
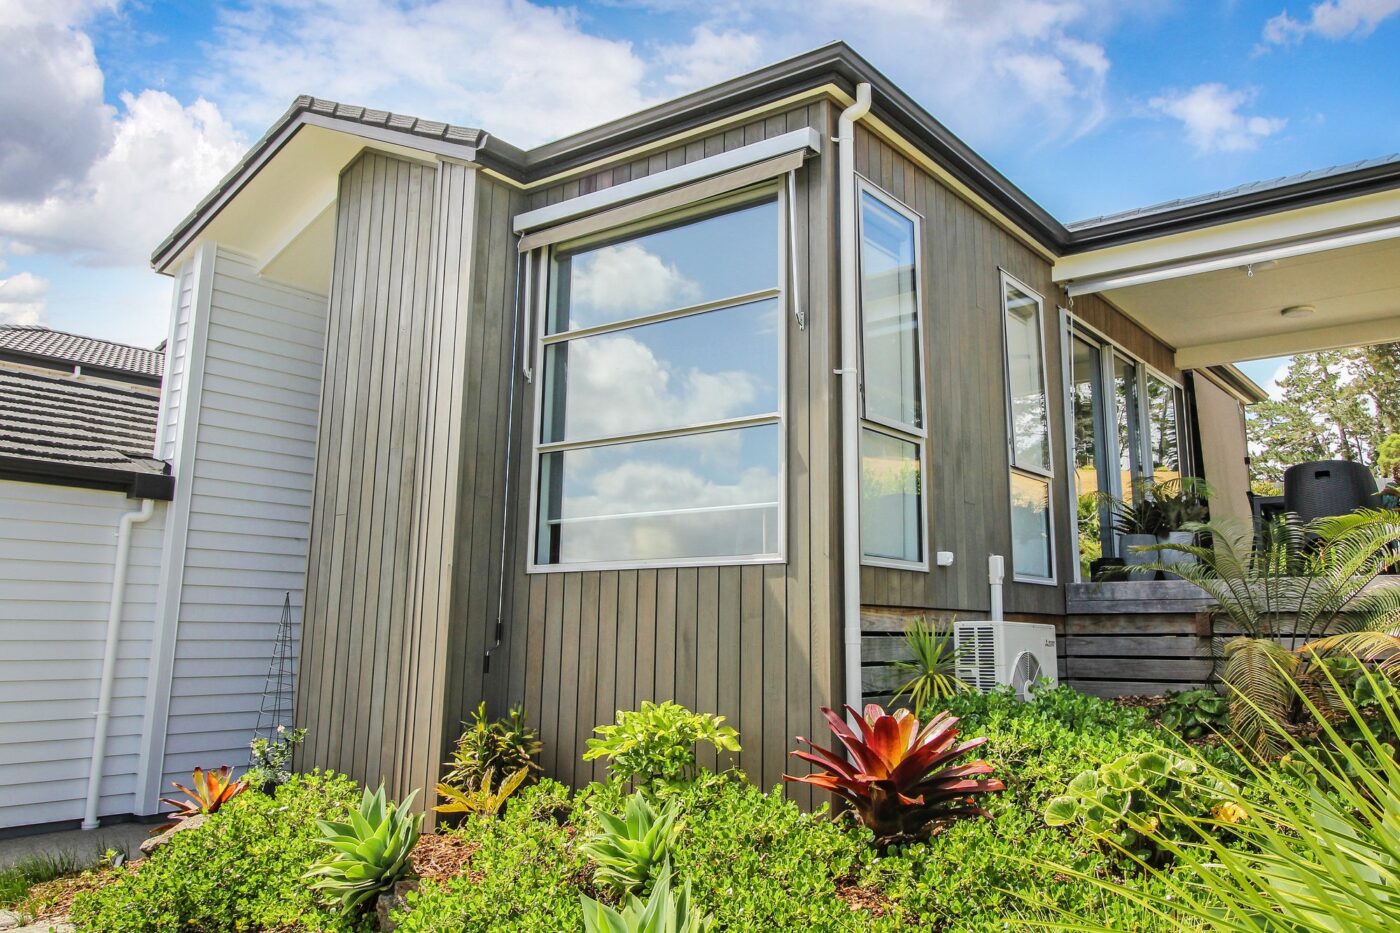
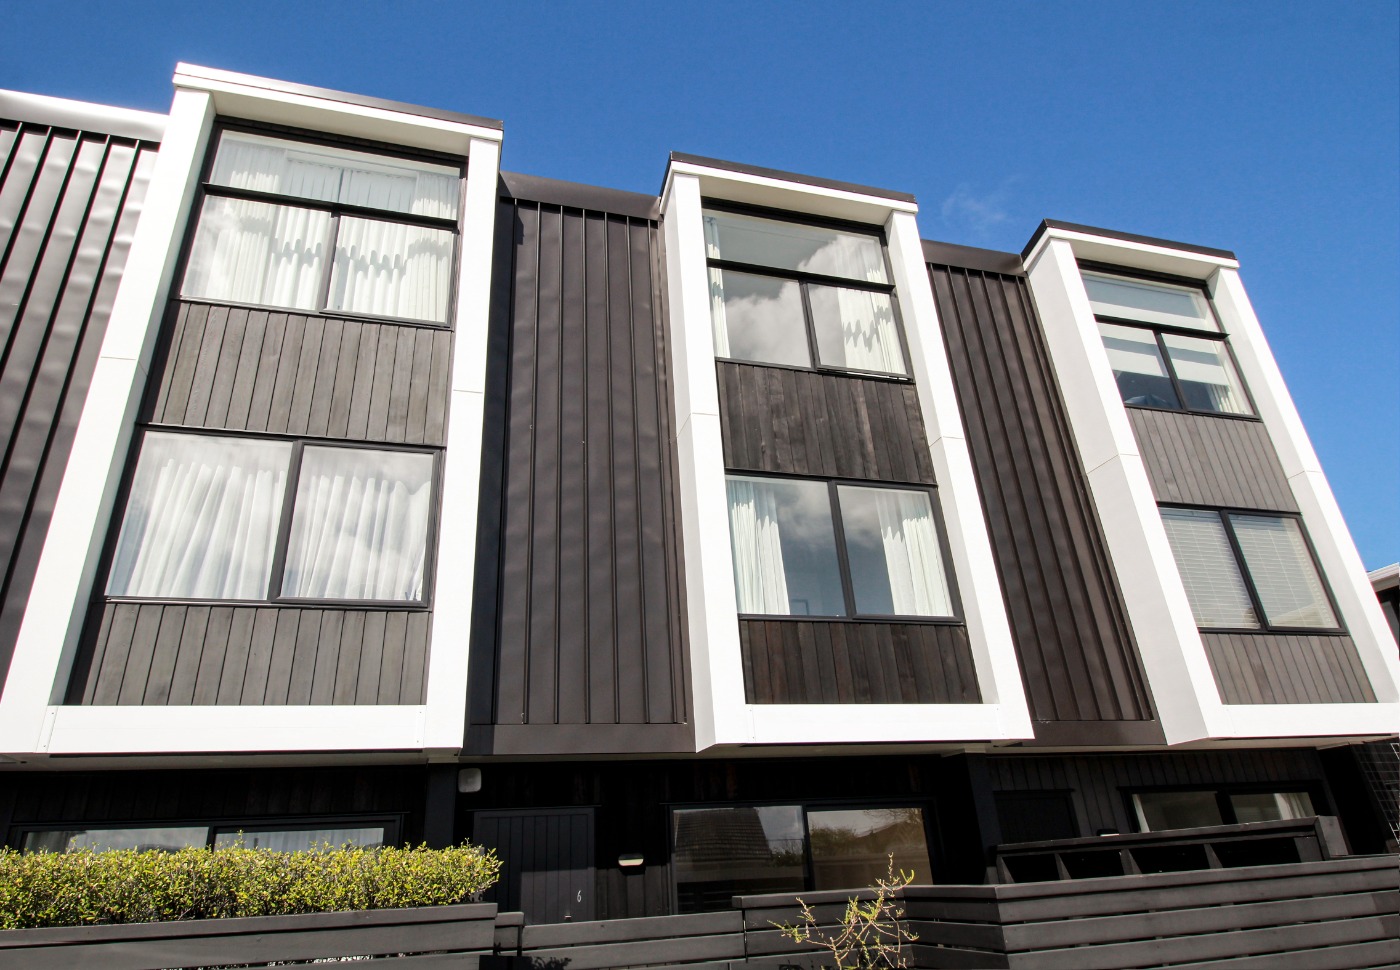
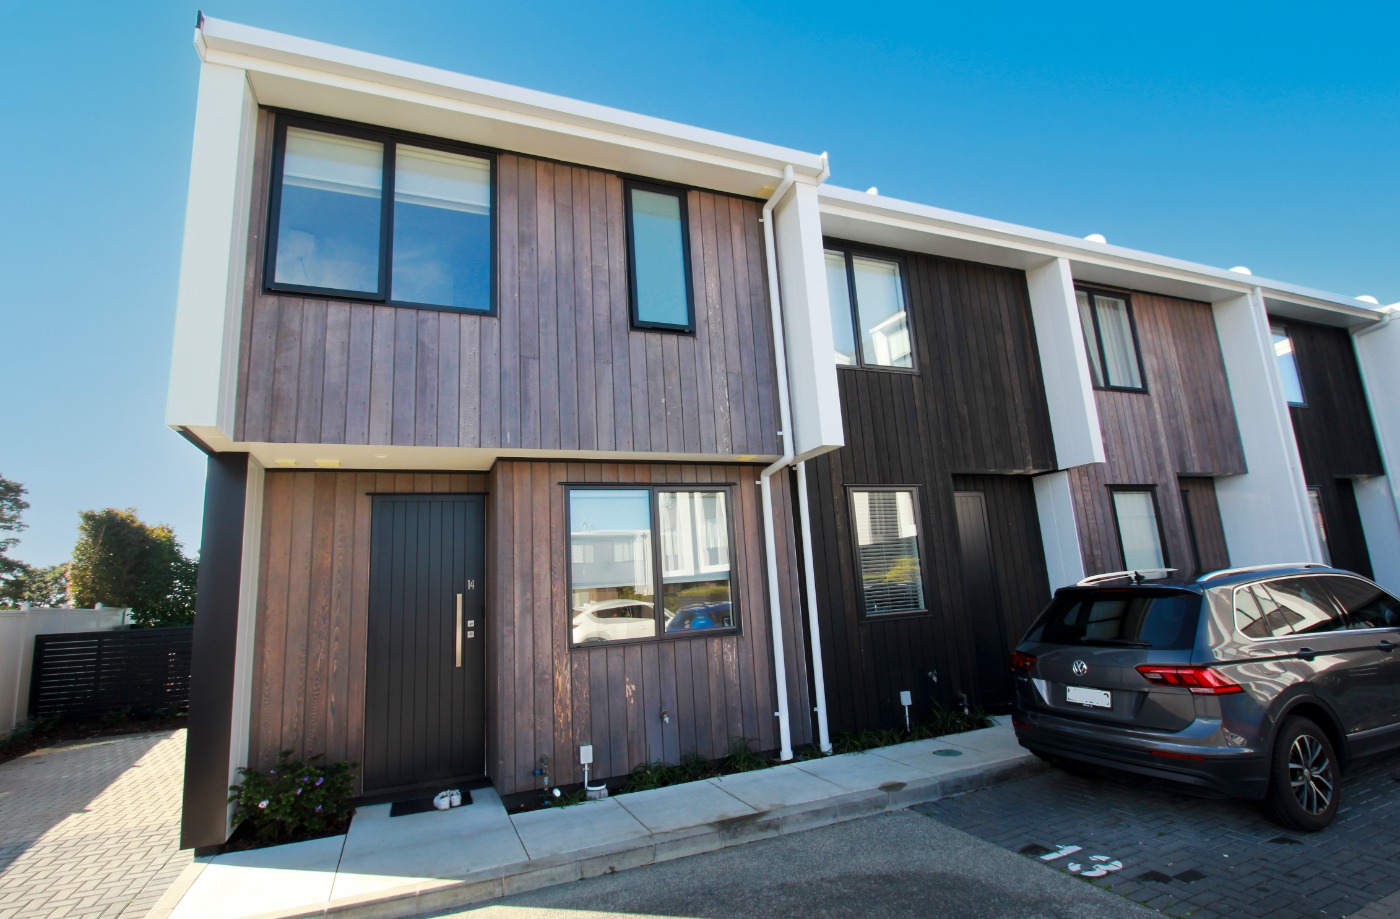
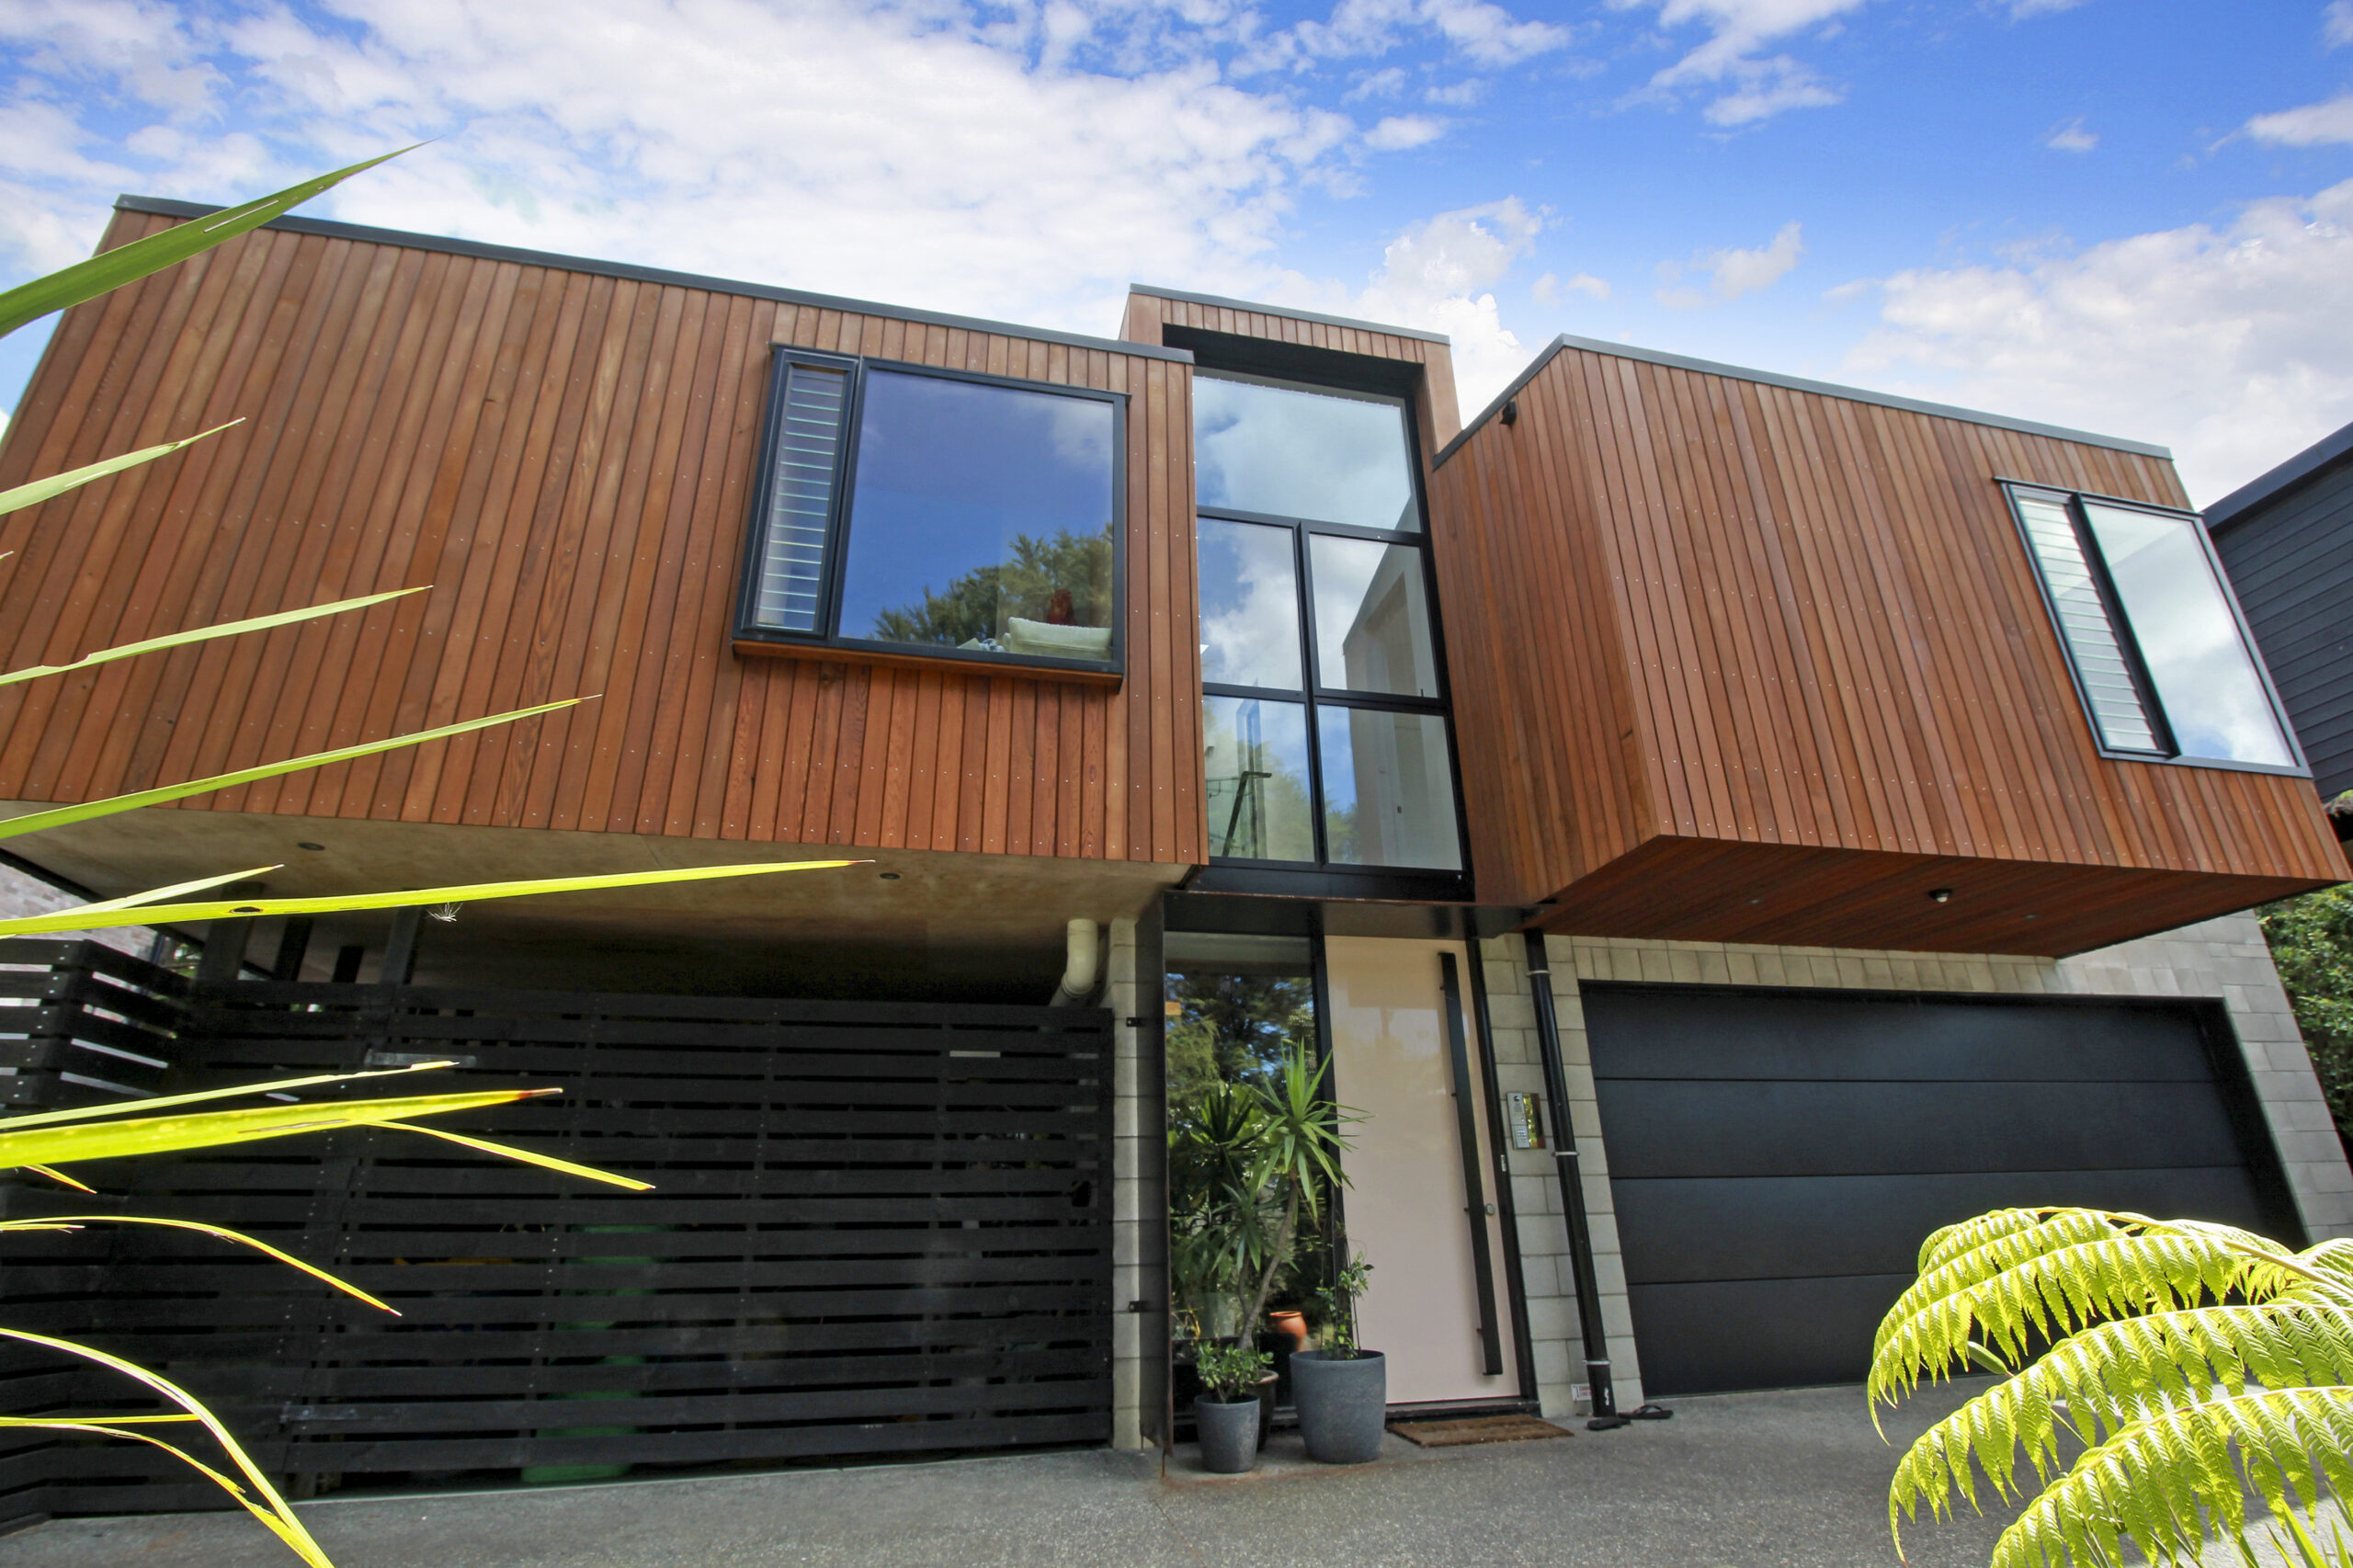
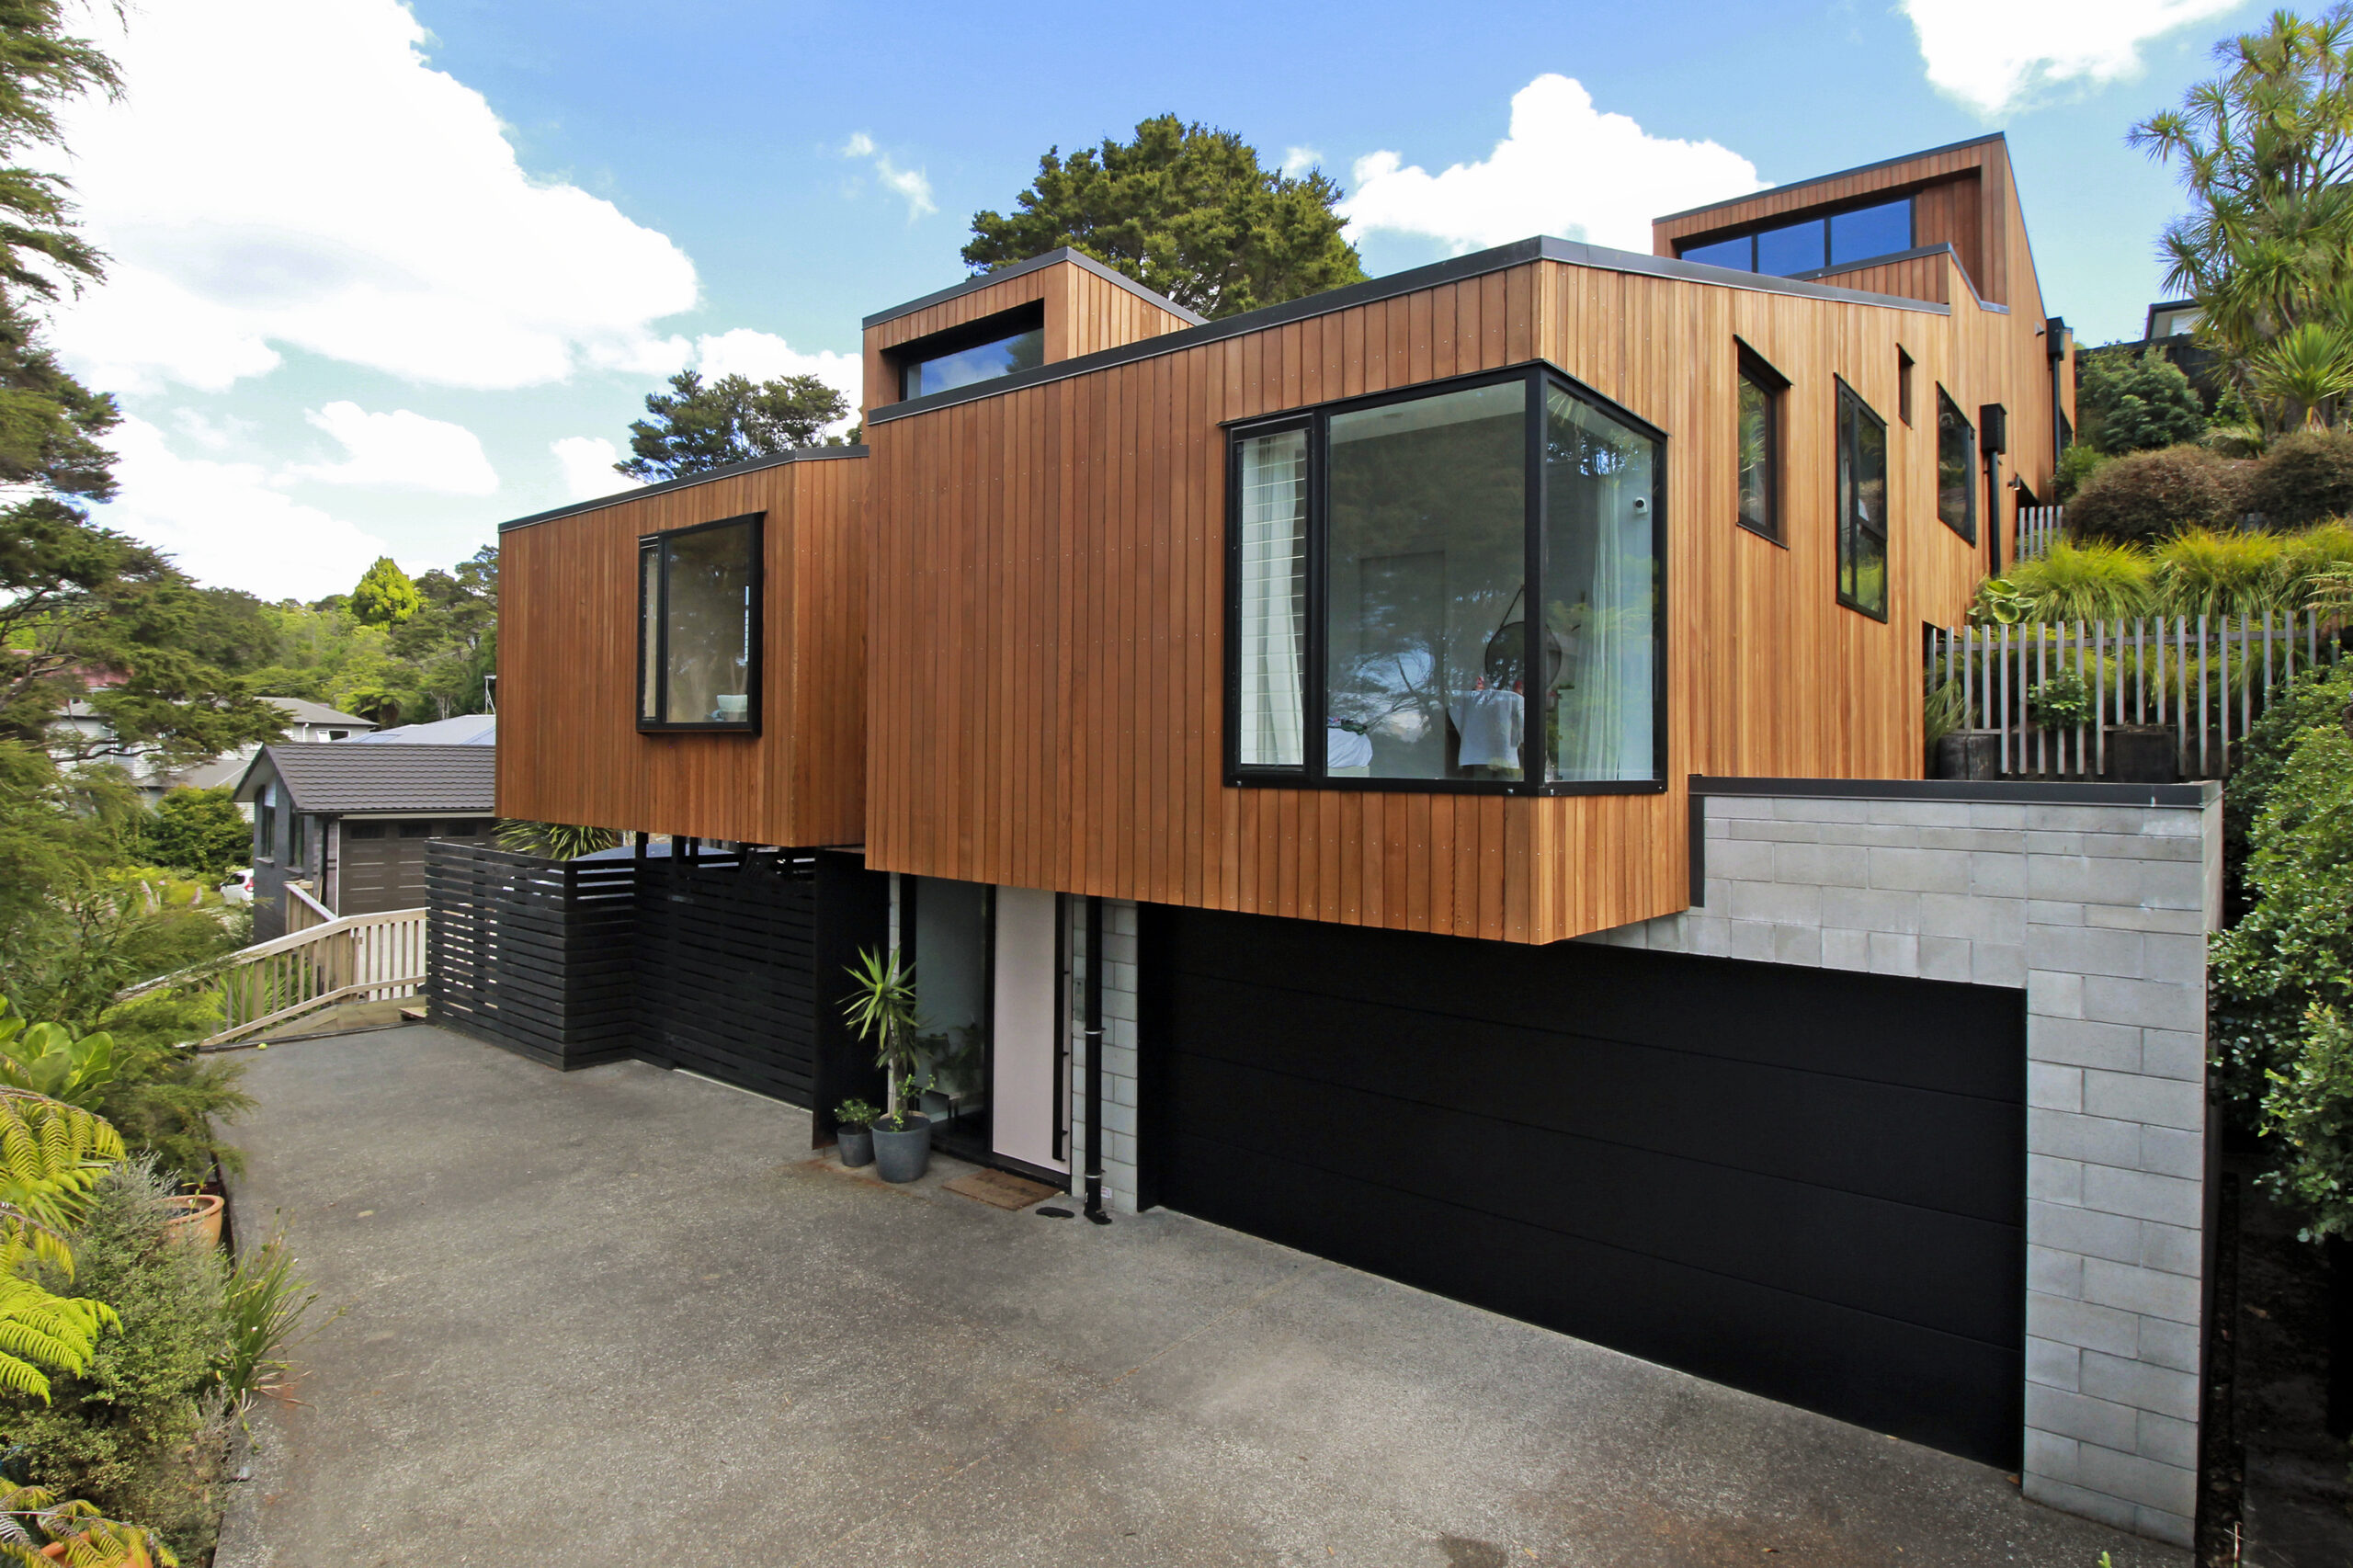
The final outcome was an outstanding transformation. The Cedar has a smooth, even finish that is free of mould and still retains the natural textures that make Cedar look unique.
We are very proud of the restoration work done by our team, but the highest praise came from the customer, who sent us an email soon after the work was completed:
“I wanted to let you know how pleased I am with the work completed at my property, it’s now looking fab. I was particularly impressed by the team, they did a fantastic and thorough job, they demonstrated an excellent work ethic and they were very easy and trustworthy to have around. I’d like to schedule regular maintenance for the cedar – please let me know what I need to do to lock this in. Thanks again for all the hard work – excellent job!”
– Jannette