

Timbertech Cedar Maintenance

The Right Way to Wash Cedar (And What Not to Do)

The Right Way to Wash Cedar (And What Not to Do)

26 Aug 2026
The right way to wash cedar 8 (Large)

A regular wash is one of the simplest, cheapest things you can do to extend the life of your Cedar. It’s also one of the most misunderstood, with homeowners either avoiding it altogether or approaching it the wrong way. 

Done properly, washing protects your coating, keeps mould at bay, and pushes out the time between recoats. Here’s how to get it right, and when it’s worth calling in the professionals. 

How Often Should You Wash? 

If your Cedar isn’t due for a recoat, a light wash once a year is the general rule. It’s what we recommend to our own maintenance clients, and we’ll often suggest it ourselves when we check in on a property a year after coating. 

Your environment matters too. Damp, bush-covered sections are more prone to mould, and coastal homes build up salt on the boards. Both benefit from washing more than once a year.

Cedar can be left for up to 4-6 weeks between washing and coating, at no detriment to the timber. If surface dust or pollen has landed on the Cedar in the interim, just brush it off before applying the coating.

Wash or Recoat? How to Tell 

Look at the coating, not just what’s sitting on top of it. 

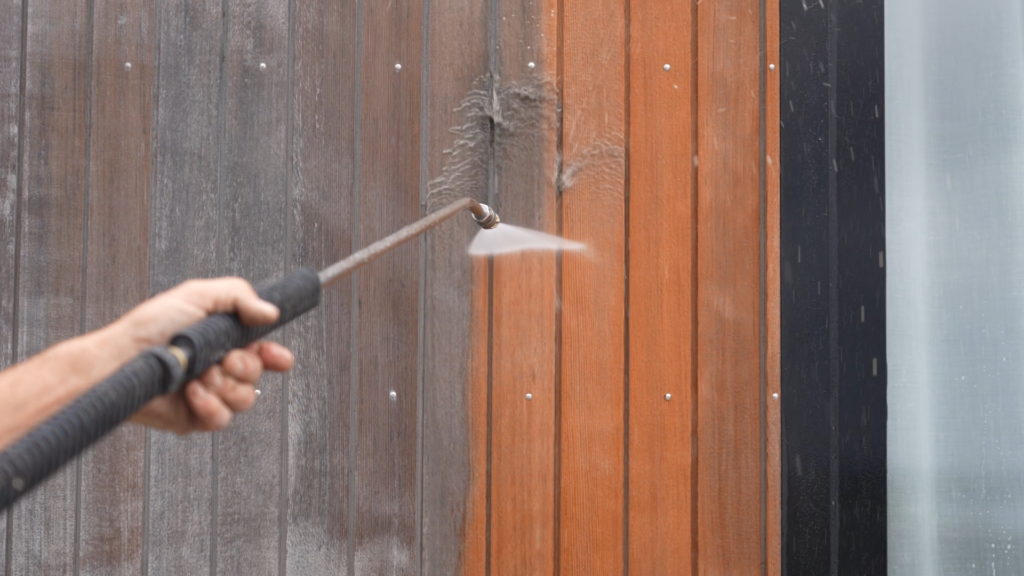
Grime or early mould on top of an intact coating? Just wash it. Getting that build-up off stops it eating into the coating and helps it last longer. 
 

The right way to wash cedar 1 (Large)


Bare patches, or the coating looking worn and discoloured through to the timber? That’s exposed timber, and a wash alone won’t fix it. You’re looking at a recoat. 

There’s no real situation where we’d tell you not to wash your Cedar. Even freshly coated boards can usually handle a wash within a month, once the oil has soaked in and the surface has dried. The real risk isn’t timing, it’s technique. 

Light Wash vs Deep Clean 

Not every wash needs the same amount of pressure. If the coating is in reasonable shape, a light wash paired with a recoat is usually enough. Where it’s broken down badly, or you’re dealing with bare, patchy timber, it needs a heavier wash to properly prepare the boards for coating.

Knowing which one a property needs takes experience, and it’s something we assess on site every time.  

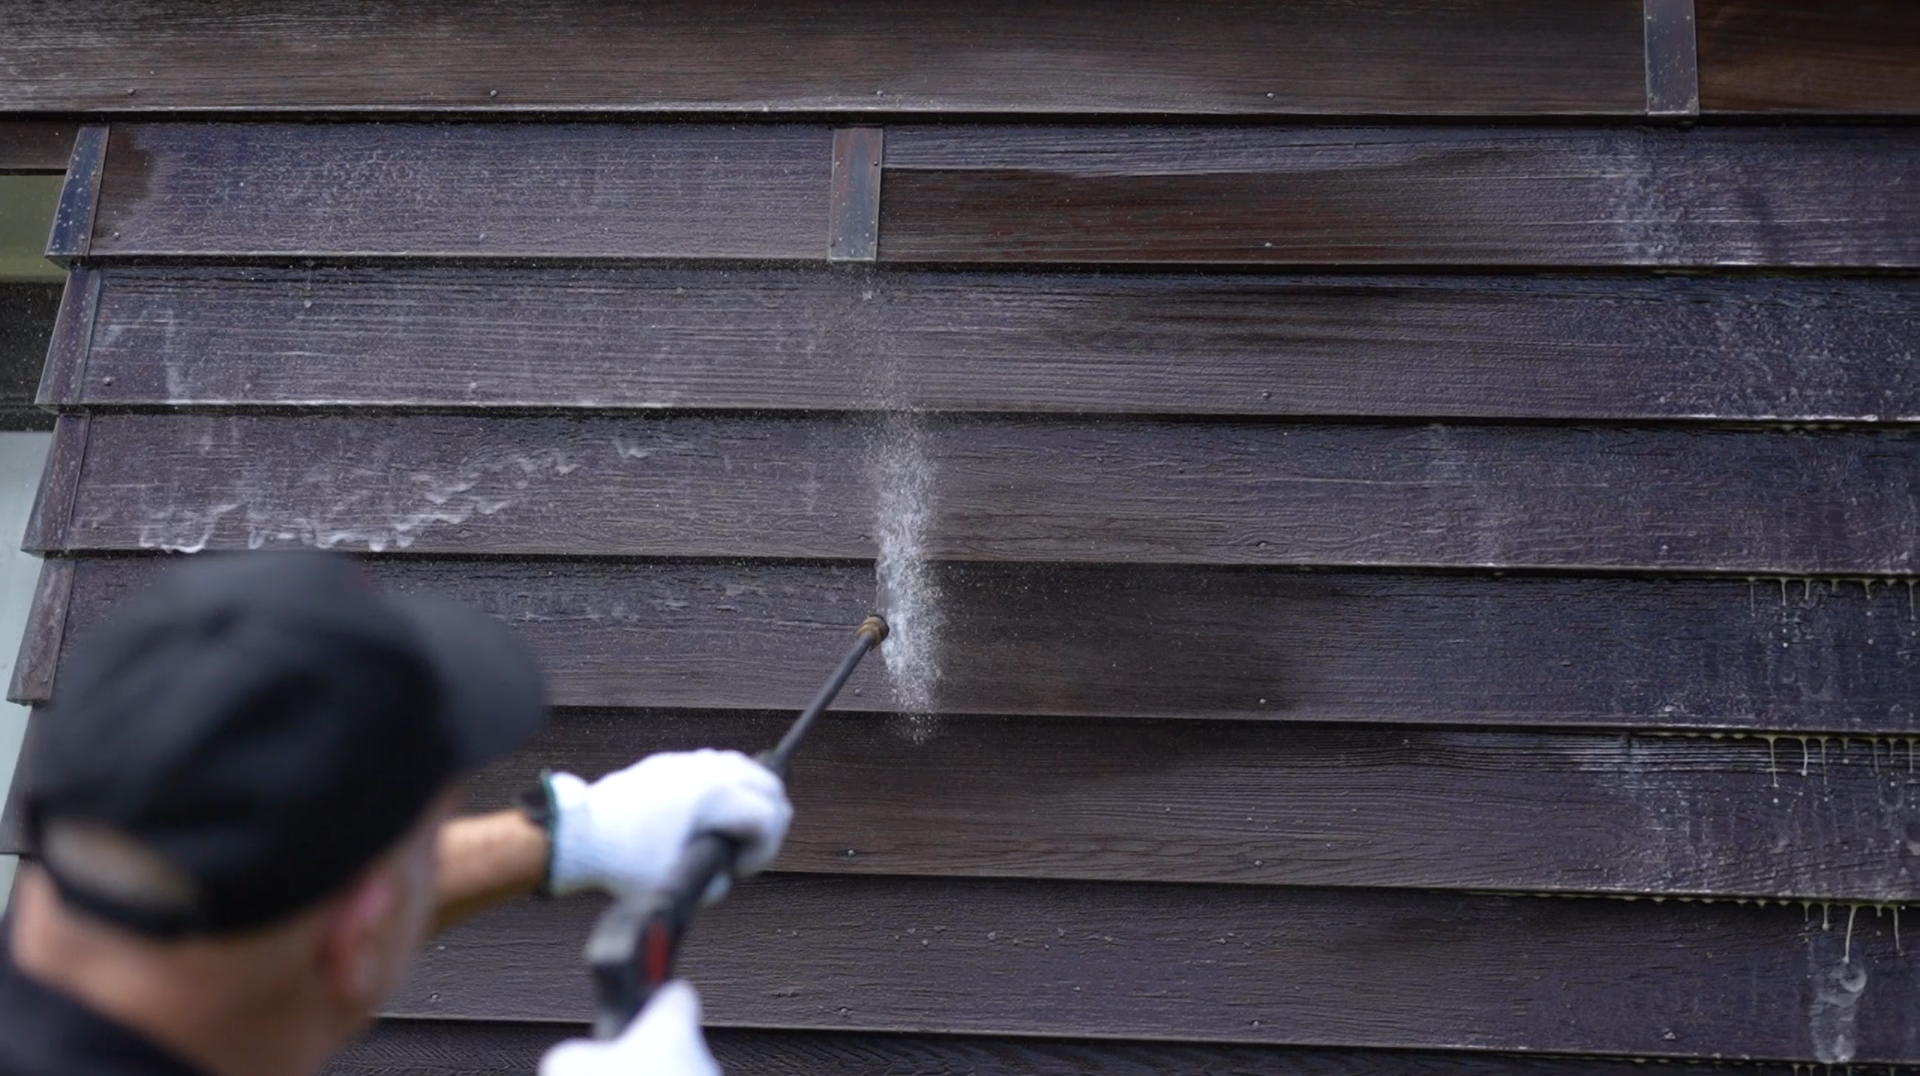
We do wash using low pressure water blasters, but the machine is the smallest part of the job. Our machines run at around 2,000 to 2,500 PSI, but by the time the water reaches the boards, from roughly a foot away and through a wide fan nozzle, the pressure hitting the timber is nowhere near that number. 
 

The right way to wash cedar 6 (Large)

The Technique That Keeps Cedar Safe 

Cedar is soft, and it can be damaged by water pressure in the wrong hands. We train our technicians specifically in how to wash Cedar, and that training is a big part of what sets us apart from a general house washing company. 

Three things matter most: 

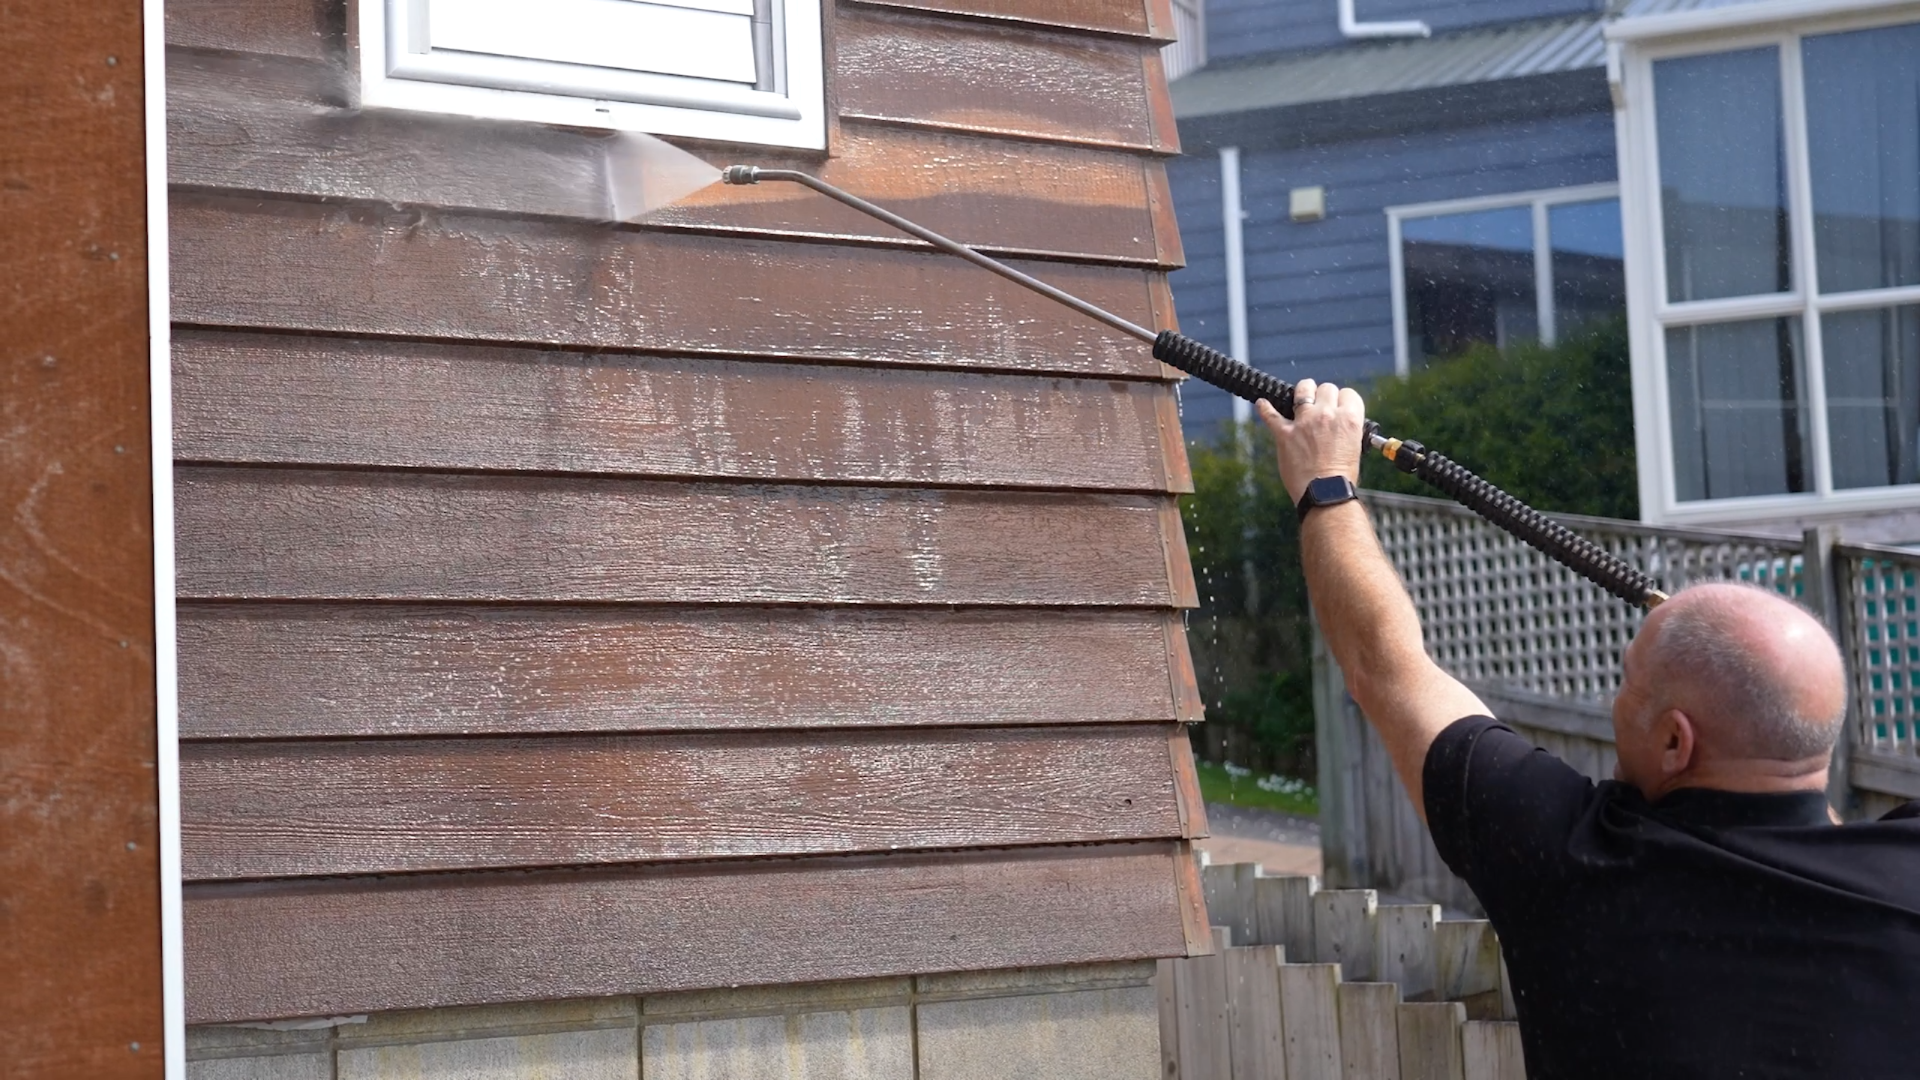
  • A wide fan. We wash with roughly a 25-degree fan tip, spreading the pressure out rather than concentrating it on one spot. 
  • The right distance. Keep the spray about a board’s width from the surface, then adjust closer or further depending on how much clean the area needs. 
  • Never stop and go back. This is the biggest mistake people make. Pause mid-pass and go back over a spot, and you’ll leave a stop mark that’s hard to remove. Keep moving instead, fanning out at each end of your pass.
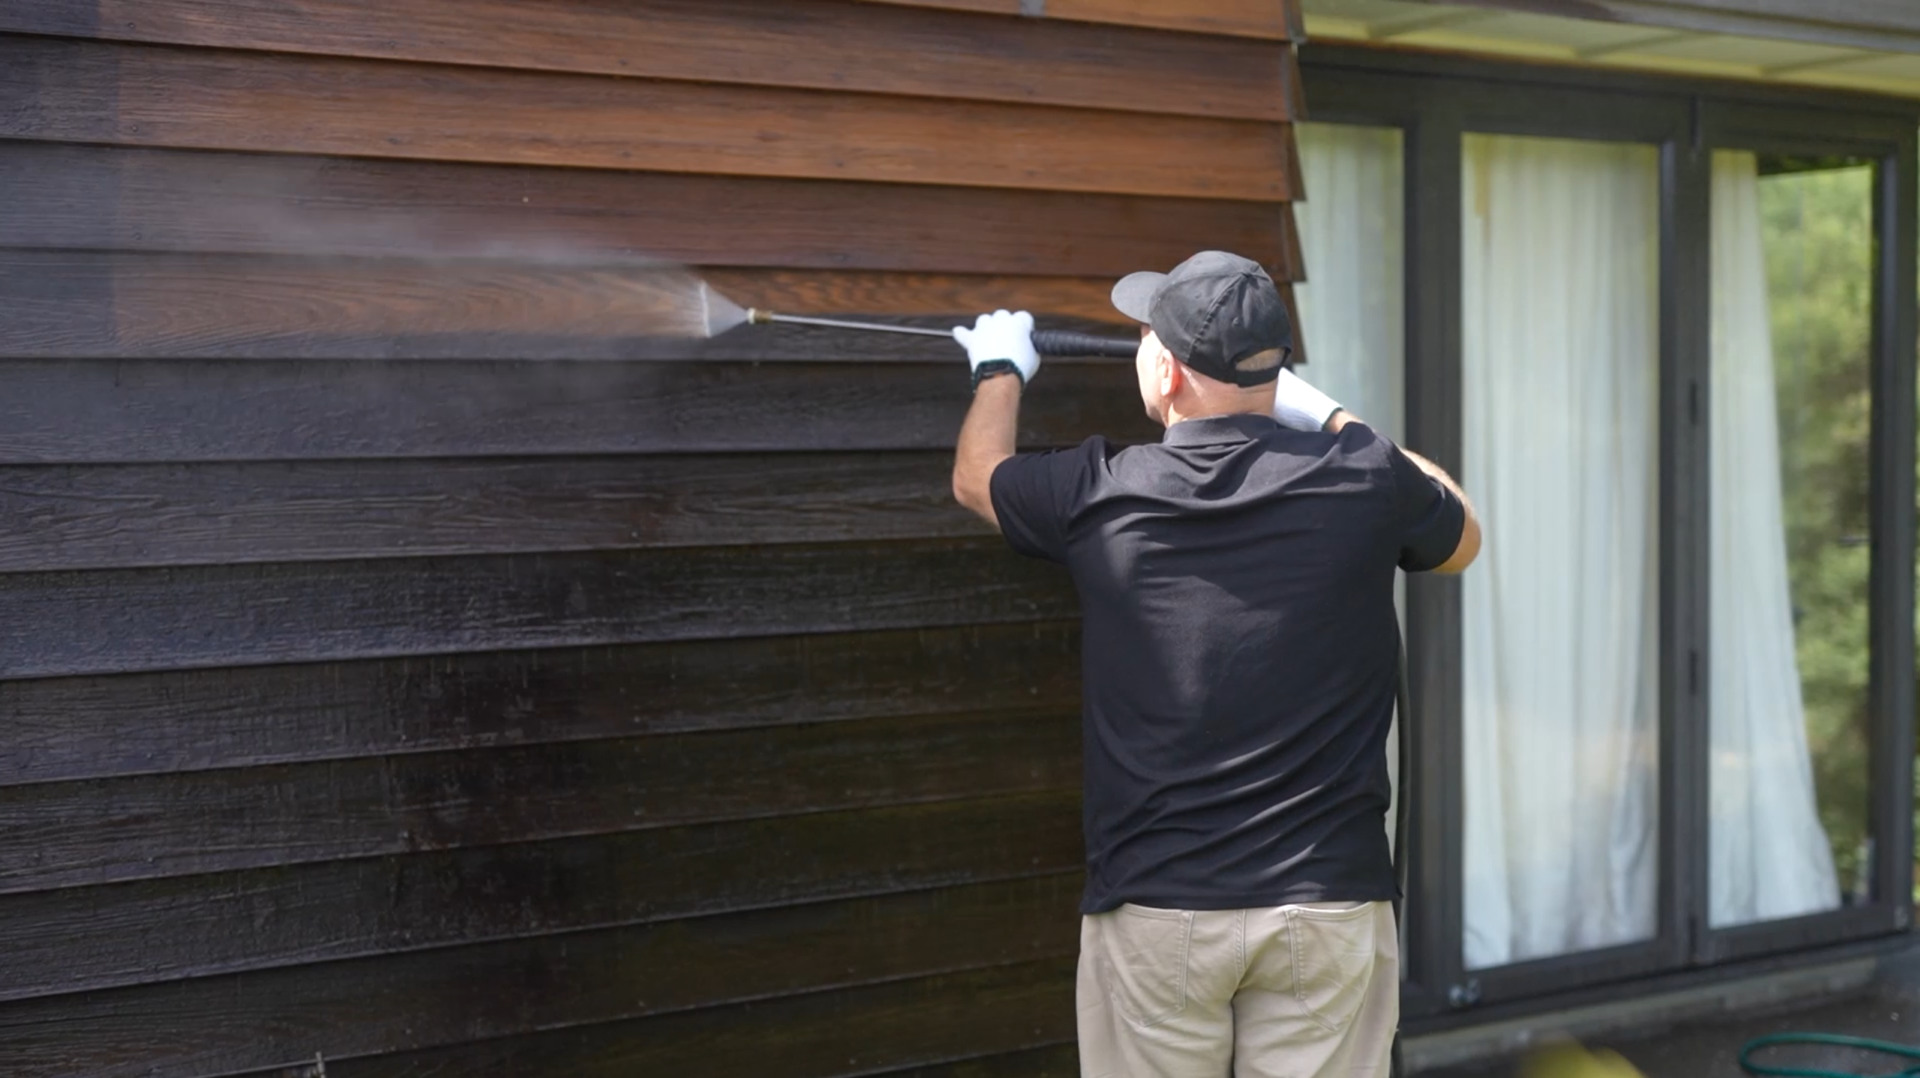
The right way to wash cedar 3 (Large)


General upkeep and recoat prep also call for different approaches. For upkeep, you just want dirt and mould off the surface, without touching the coating underneath. For recoat prep, you can afford to take more of the old, oxidised tint off, since it’s all getting covered again.  

Mixing the two up is where homeowners run into trouble: wash too close or too hard on boards that don’t need recoating, and you can strip enough tint to expose bare timber, creating a job that didn’t need to exist.

What We Use as a Surfactant 

Before washing, we apply a surfactant, a biodegradable detergent mixed with water, sprayed onto the boards. It’s safe around plants and won’t damage windows, decks or joinery, so we don’t usually need to take any special precautions. 

The one exception: on tank water properties, we isolate the water supply or disconnect the downpipes before washing above the roofline, so nothing runs into the drinking water. 

We leave the surfactant on for three to five minutes minimum, ideally still wet when we come to wash it off, mixing it stronger for particularly dirty properties.  

Once washed, the timber needs to dry completely before oiling. Cedar is light and dries fast, sometimes within an hour or two on a sunny north face. We generally wash one day and coat the next, though same-day turnarounds aren’t unusual in summer. 

What Incorrect Washing Looks Like 

At the mild end, poor preparation means not enough of the old coating has come off for a fresh coat to bond properly. At the more serious end, you get actual gouges or scarring in the timber, or the stop marks mentioned above. 
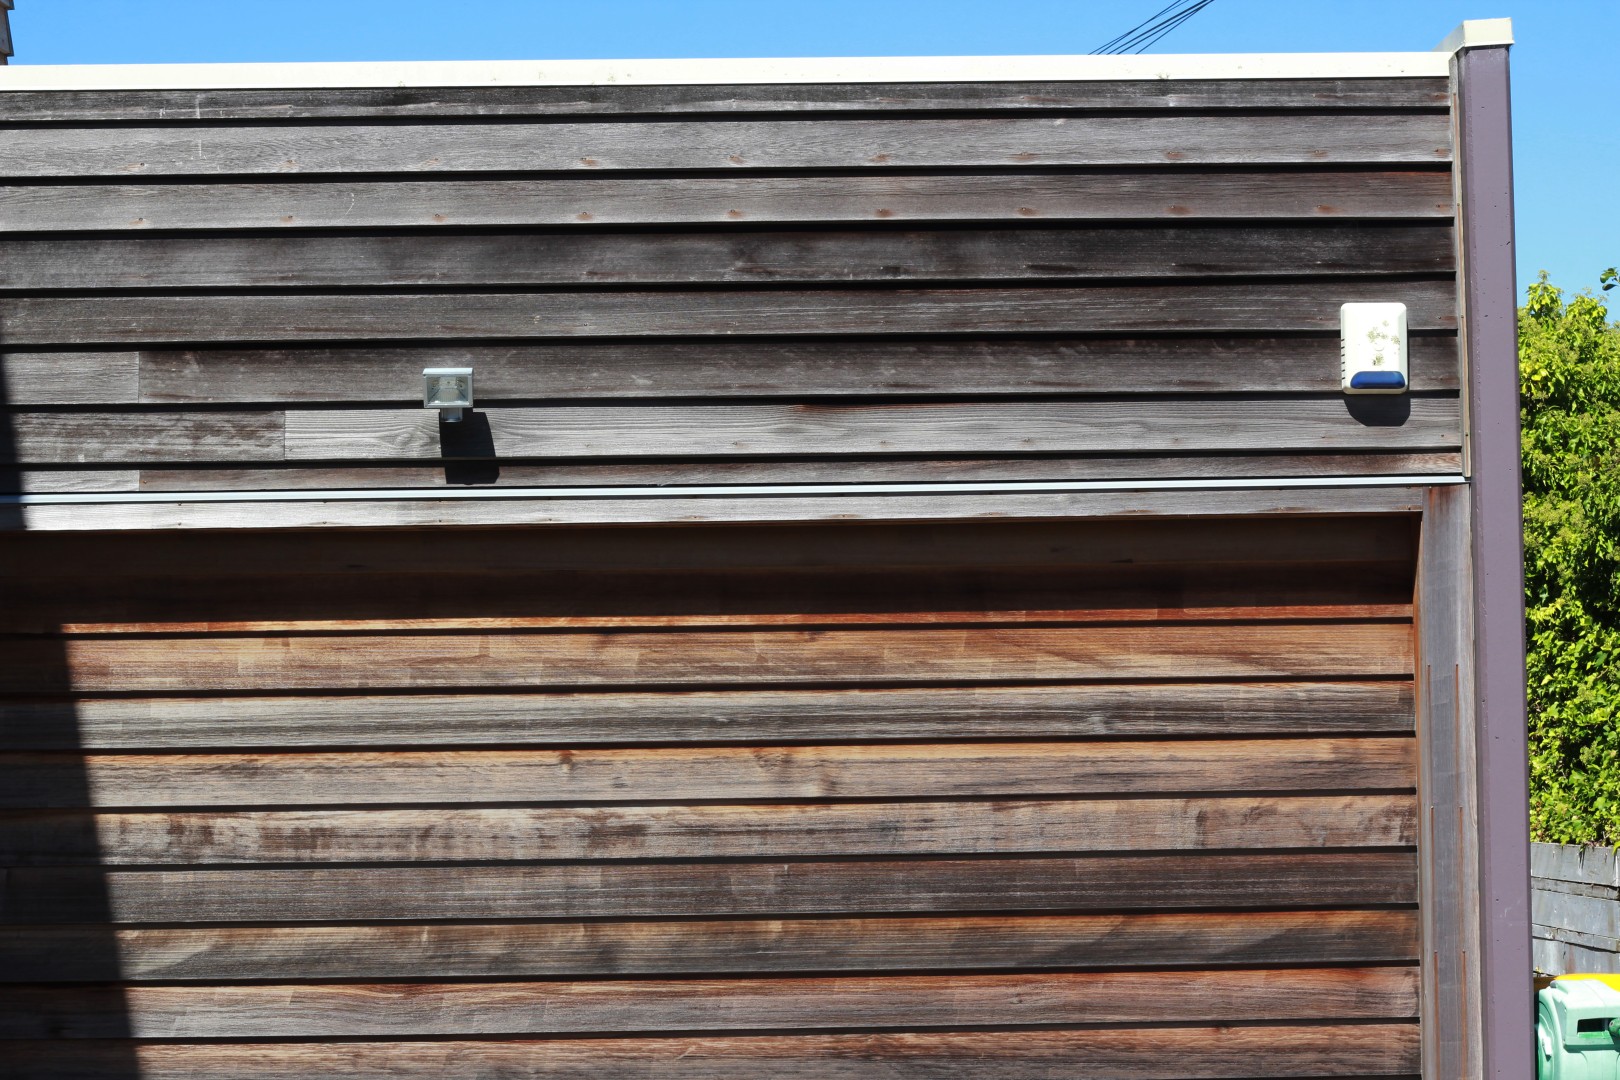
 

IMG 8809 (Large)


Some of this can be fixed. Badly scored timber usually can’t be. Sanding it back just leaves a fainter impression of the same mark, since you’re left with a flat board and an indentation in it.
 

This is why we’re cautious about recommending homeowners attempt heavier prep washes themselves, even though a light annual rinse is well within most people’s ability. 

Should You Wash It Yourself? 

If you’re comfortable doing it, an annual clean is a job you can happily take on yourself. 

Before a recoat, we’d always recommend a specialist. Preparing Cedar properly is a different skill set to a standard house wash, and it’s exactly what we specialise in. General house washing companies tend to steer clear of Cedar for this reason. 

Final Thoughts 
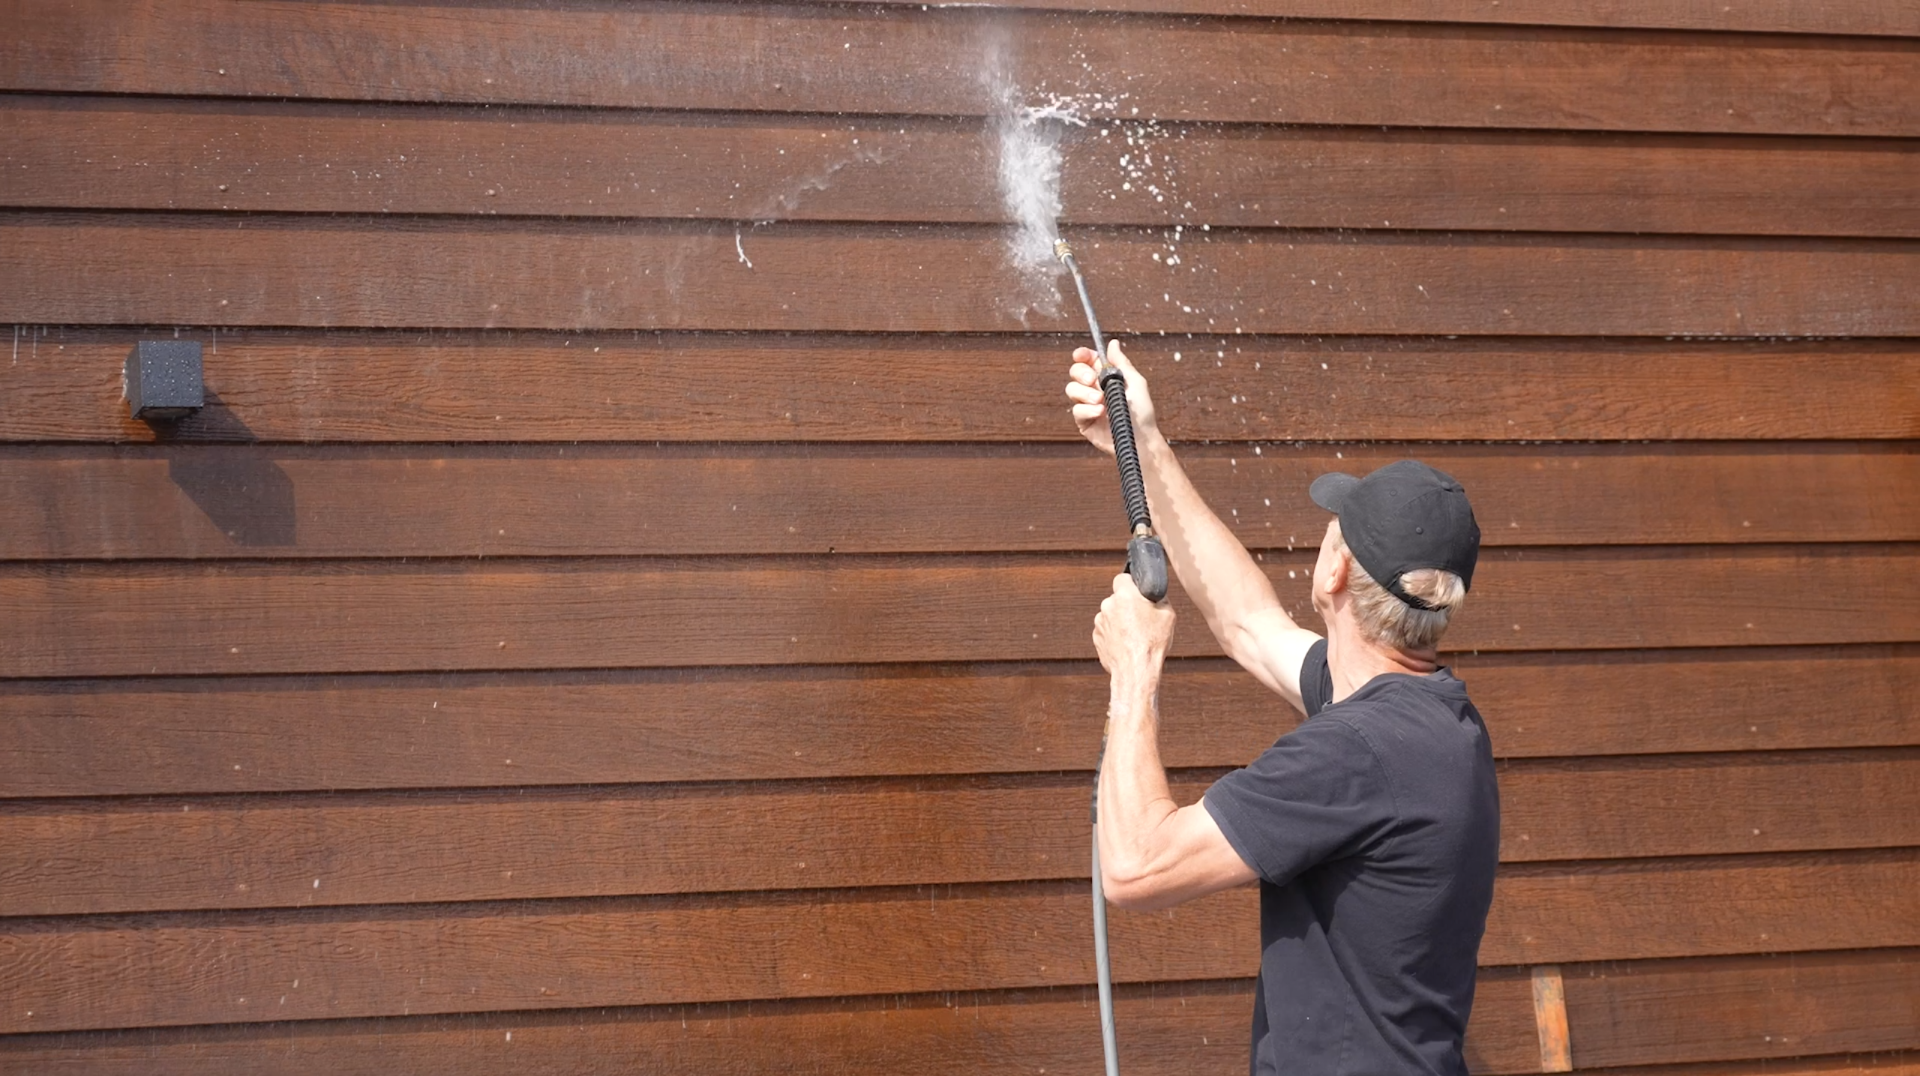
The right way to wash cedar 4 (Large)


A regular wash does more than keep your Cedar looking tidy. On shaded, damp faces where mould takes hold, it protects the coating underneath and helps it last as long as possible.  

Sun-exposed north faces are a different story. They take the brunt of New Zealand’s UV and need recoating every 2-3 summers regardless of how well they’re washed, since it’s the sun doing the damage there, not the dirt. 

Not sure whether your Cedar needs a wash or something more? Our Free Cedar Assessment will give you a clear, honest answer either way.


Does Your Cedar Need Help?

Our Free Cedar Assessment will assess the health of your timber and give expert advise on how to keep it looking beautiful for years to come.

Cedar stain to oil after

Read More Articles

15 Apr 2024
In this article, we are looking at how to protect the value of your Cedar home - often your biggest asset - especially when the market is so volatile and uncertain.

The benefits of Cedar maintenance fall into two main categories: beautification and protection.

Beautification means making your Cedar look beautiful all year round. If sun exposed areas are left without replenishing the oils, the Cedar can start to look worn and tired. By adding oil back into Cedar, you are protecting it from the harsh New Zealand sun and restoring the natural vibrance of the timber. 

Protection means maintaining the integrity of the timber, so you don’t have to replace the Cedar in the future. Protection can also mean protecting your investment, both to maintain the value of what you just bought, or to improve the asking price if you are about to sell. 

In this article, we are looking at how to protect the value of your Cedar home – often your biggest asset – especially when the market is so volatile and uncertain. 

For some additional insight into the housing market, we are joined by Rachel Readhead from Barfoot & Thompson. 

Why Protect Your Cedar

People often think that if their Cedar looks tired, it needs to be maintained or restored, but that is not necessarily true. Cedar is a very resilient timber.

If not maintained in the short term, sun exposed areas will get damaged by the harsh UV rays and end up looking rather shabby. Not ideal, but not the end of the world either. 

If not maintained in the long term – we are talking 20+ years here – the Cedar may cup or warp, no longer protecting the outside of the house. The ultimate cost will be to replace the Cedar cladding on sun exposed faces, which is considerably more expensive than regular maintenance. 

“If the Cedar has started to warp or crack, it will raise red flags when the property report gets done. When doing a CMA [comparative market analysis] on the property, everything is taken into account,” said Rachel.

Return on Investment

When considering the cost of Cedar maintenance or restoration, there are two questions you need to consider.

  1. What do I have to spend so that I never have to replace my Cedar?
  2. Do I also want the Cedar to look beautiful all year round?

The average restoration price for a 3-bedroom home is $6.5k. After the initial restoration, sun exposed areas need recoating every 2-3 summers. The cost of regular maintenance comes down to around $2.5-5k, depending on the house size and build. 

If your Cedar is already in good condition and you want to maintain the value over the long term, you will need to recoat sun exposed areas every 2-3 summers. 

If your Cedar hasn’t been maintained in some time and you want to restore the timber before you sell the house, you will be looking at anywhere between $6.5-15k.

On houses we have worked on in the past, the valuations were around 6 times higher after we did the work. So, for an investment of $4.5k (the average price of a restoration in the past) the valuation was $24k higher.

Thinking of Selling?

If you are planning on selling your home soon, you can potentially increase the selling price by sprucing up the cladding.

At a minimum, you can stay firm on your asking price and stop people knocking you down on price due to additional work. 

“First impressions count, and the condition of the cladding is usually the first thing people see when looking at a property. A lot of buyers will ask for a price reduction if there is work to be done on the exterior of a house,” said Rachel. 

If you have been maintaining the Cedar regularly, you may not need to do any maintenance at all, or just some light maintenance to tidy up the sun exposed faces.

Stand Out in a Crowded Market

When the housing market slows down, buyers have more houses to choose from and have more room for negotiation.

Rachel says, “Houses are not moving as fast as in previous years, especially in the townhouse and apartment market. A good house in a good location always sells, but by keeping your house maintained you can stand out from other properties and get a better sale price – especially if it sells in auction.” 

Having a record of maintenance also gives prospective buyers confidence that the timber has been looked after and won’t require work anytime soon.  

Rachel added, “Many people still do not understand how affordable it is to look after a Cedar home and mistake it for painting, which can often be more expensive. Having documentation of previous work shows prospective buyers the cost of maintenance over the long term and helps to ease any concerns.” 

Protect Your Biggest Asset

By investing in the maintenance of your Cedar, you are investing in the long-term value of your home.

And by regularly maintaining your home, you are spreading this cost out over many years, instead of getting lumped with a large bill when it comes time to sell. Regular maintenance also has the benefit of being able to enjoy the natural beauty of the Cedar while you are still living there! 

Protecting your investment starts with a conversation. Our team can help to identify what your goals are, then put together a plan to protect your Cedar over the long term. 

Rachel Readhead helps homeowners buy and sell homes throughout North Shore and Rodney. You can reach her on 027 333 4484. 

15 Feb 2024
Cedar is a miracle timber if ever there was one. It’s a better insulator than brick or concrete, it keeps noise out, is highly durable and - as every Cedar homeowner can attest - it looks stunning and unique.

Cedar is a miracle timber if ever there was one. It’s a better insulator than brick or concrete, it keeps noise out, is highly durable and – as every Cedar homeowner can attest – it looks stunning and unique. 

At TimberTech, we genuinely believe that Cedar is a remarkable cladding material. 

In this article, we want to share what makes Cedar such an effective cladding, and highlight some little-known facts about this amazing timber. 

If you own a Cedar home, or are looking to buy a Cedar home, rest assured that Cedar is one of the best claddings around. 

1. Cellular Structure 

Cedar is designed to move, with deep pores that allow moisture in and out without damaging the stability of the timber. 

This means that in the summer, when the hot sun is sucking moisture from the timber and causing it to contract, Cedar can move with minimal cracking. 

And in the winter, when Cedar gets wet and starts to expand again, it does so without cupping and warping, which are problems that come with other timbers. 

2. Deep Pores

Those deep pores we mentioned, they are also genius at holding stains and oils. 

This is important for extending the life of the timber and keeping it looking fresh and vibrant. 

New Zealand has strong UV rays that will break down any type of coating applied to a house and suck out the natural oils, eventually drying out the timber and leading to roughening of the surface and fine cracks (which is called “surface checking” in the industry). 

Regular oiling will prolong the beautiful look and weather resistance of your Cedar by penetrating deeply through the Cedar’s open cellular structure and replacing the natural oils lost over time. 

3. Ease of Maintenance 

Like any building material exposed to the elements, Cedar needs maintenance both to protect the internal structure of the house, and to keep it looking cosmetically beautiful. 

This isn’t a downside, just an unavoidable part of owning a house. 

With Cedar you don’t have to constantly maintain the whole house, just the areas that are exposed to the sun. 

For most Cedar homes, this means recoating sun-exposed areas every 2-3 summers. The sheltered faces of a Cedar home are very low-maintenance and will only need recoating 2-3 times over a 15-year period. 

4. Durability & Insulation 

Cedar is a superior insulator compared to other weatherboards, letting the house breath over summer, and keeping the warmth in over winter. It also dries very quickly because the timber is so porous and rich with pores. 

On a side note, regularly maintaining your Cedar will help improve the energy efficiency of your home. Adding oil to the boards keeps them flat and stops the cold getting in, and the heat getting out. Boards that have been oiled will also cause rain to bead from the surface and keep the internal structure of the house dry. 

Cedar also has its own mould and fungal inhibitors within the timber to stop rot and nasties from getting established. 

5. Cedar Just Looks Stunning 

Let’s put the amazing properties of Cedar to one side and talk about how good it looks.  

A well-maintained Cedar home has a timeless look. As the timber ages, it will naturally weather, getting etched by the sun, rain and elements to have a beautiful rustic look. 

Colour wise, Cedar can be anything from blonde-yellow to deep Mahagony red, which lends itself to a unique aesthetic quality. There are no two Cedar weather boards that are the same. Some have lots of grain, some are very plain, but when oiled, each will have a different appearance. 

Because the oil is translucent, it works with the underlying tones of the Cedar. And because stains and oil come in different colours, the final colour is always a unique blend, and always interesting to look at. 

Want to Know More?

To learn more about Cedar, visit our Knowledge Hub. This is a free resource for homeowners, with expert advice on Cedar protection, maintenance and restoration. 

If you would like to see more beautiful Cedar homes, view Our Work.

And if you have any questions, please reach out. We are always happy to help!

15 Nov 2023
Let's get to the point. Is DIY Cedar maintenance possible? Absolutely. Furthermore, the process is relatively straightforward. But there are some factors to consider before attempting DIY.

Let’s get to the point. Is DIY Cedar maintenance possible?

Absolutely. Furthermore, the process is relatively straightforward.

Cedar maintenance is all about protecting the timber from the elements, most importantly, the harsh New Zealand sun. If you have a long, hot summer, the natural oils in the boards will be sucked out by the sun.

Your job is to replace the oil that the sun is extracting. Without oil replenishment, the boards will dry out over time and begin cupping.

A general DIY Cedar maintenance plan would involve soft washing your house once every few years and applying a coat of oil to sun-exposed faces every 2-3 summers.

Seems straightforward, right?

So is changing the oil on your car, but very few people have the time or are willing to get their hands dirty. The same goes for Cedar.

Here are some factors to consider before attempting DIY maintenance.

1. Convenience

We have a customer in Northland who is 83 years old and had previously maintained the Cedar on his family home for decades – and did a great job of it. Now that he can’t get up the ladder like he used to, he came to us for help.

Anybody can learn how to maintain their own Cedar, but not everybody has the inclination. Maintaining Cedar is physically demanding, often working at heights, using bulky equipment, in a wet and mucky environment.

Hiring a professional means you don’t have to worry about anything. They will bring all their own equipment, have experience working at heights and clean up after themselves, leaving nothing but a beautifully maintained house.

2. Property Access

Accessing the different areas of your house can be tricky, and potentially dangerous.

Even on a flat property, there are always parts of a house that are difficult to reach. The job gets even more complicated if the ground is uneven.

Double story house can be quite daunting. Some houses require scaffolding, but most houses can be accessed with a ladder.

If you are not comfortable working on a ladder, or the ground around your house is uneven, it is usually safer to hire a professional who is experienced working at heights.

If your house does require scaffolding, a professional Cedar maintenance company will often have their own scaffolding and manage the whole process, saving you time, headaches and money.

3. Risk of Damaging the Cedar

The surface of a Cedar weatherboard can be easily damaged. The water blaster should be set at a low pressure and moved across the boards in a steady motion without pausing.

Water blasting at a high pressure can strip away too much of the soft tissue in the timber, leaving it streaky and unsightly.

This is often when we get called, only now the customer is paying for remedial work to restore the damage rather than just maintenance.

Your home is usually your most valuable investment. By hiring a professional, you are removing the risk of damaging the timber and ultimately, adding value to your investment.

4. Preparing the Cedar for application

Cleaning and preparing the Cedar is the most important part of getting a satisfactory finish.

People can be so scared of damaging the timber, that they use a water pressure that is too low or don’t scrub sufficiently to properly clean the Cedar.

If you do not remove all the built-up organic matter, whatever you put on the surface will then be compromised.

To prepare your Cedar with a water blaster, make sure you wash it at the right pressure, or scrub the boards with an appropriate brush, making sure the boards are free of any timber fibres, oxidised tint, dirt, mould, lichen and moss.

Once all that is gone, you need to make sure any stain on the boards is evenly removed. You don’t want the boards under the soffit left a different colour.

5. Consistent application of the product

Applying a stain is simple, you move the brush from one side to the other keeping an even coverage and a wet edge.

But getting an even finish across the boards takes time and practice. If the stain dries before you finish, there will be lines in it.

We have also seen DIY oiling attempts that only go 3/4 of the way up the wall because they couldn’t reach any higher, or thought the Cedar was protected by the soffits of the house.

Trying to blend that in after the event is very difficult and always ends up costing more in the long run.

Thinking Twice About DIY?

Anyone can learn how to maintain their Cedar, but it probably looks easier than it is and is fraught with little problems that when added together, become bigger issues.

If you require expert advice, call us on 0800 298 298. Our friendly team is always ready to help.

Read More Articles

Showing 1 - 10 of 19

Subscribe

Sign up to our quarterly newsletter for all the latest Cedar tips and expert advice.