

Timbertech Cedar Maintenance

The Right Way to Wash Cedar (And What Not to Do)

The Right Way to Wash Cedar (And What Not to Do)

26 Aug 2026
The right way to wash cedar 8 (Large)

A regular wash is one of the simplest, cheapest things you can do to extend the life of your Cedar. It’s also one of the most misunderstood, with homeowners either avoiding it altogether or approaching it the wrong way. 

Done properly, washing protects your coating, keeps mould at bay, and pushes out the time between recoats. Here’s how to get it right, and when it’s worth calling in the professionals. 

How Often Should You Wash? 

If your Cedar isn’t due for a recoat, a light wash once a year is the general rule. It’s what we recommend to our own maintenance clients, and we’ll often suggest it ourselves when we check in on a property a year after coating. 

Your environment matters too. Damp, bush-covered sections are more prone to mould, and coastal homes build up salt on the boards. Both benefit from washing more than once a year.

Cedar can be left for up to 4-6 weeks between washing and coating, at no detriment to the timber. If surface dust or pollen has landed on the Cedar in the interim, just brush it off before applying the coating.

Wash or Recoat? How to Tell 

Look at the coating, not just what’s sitting on top of it. 

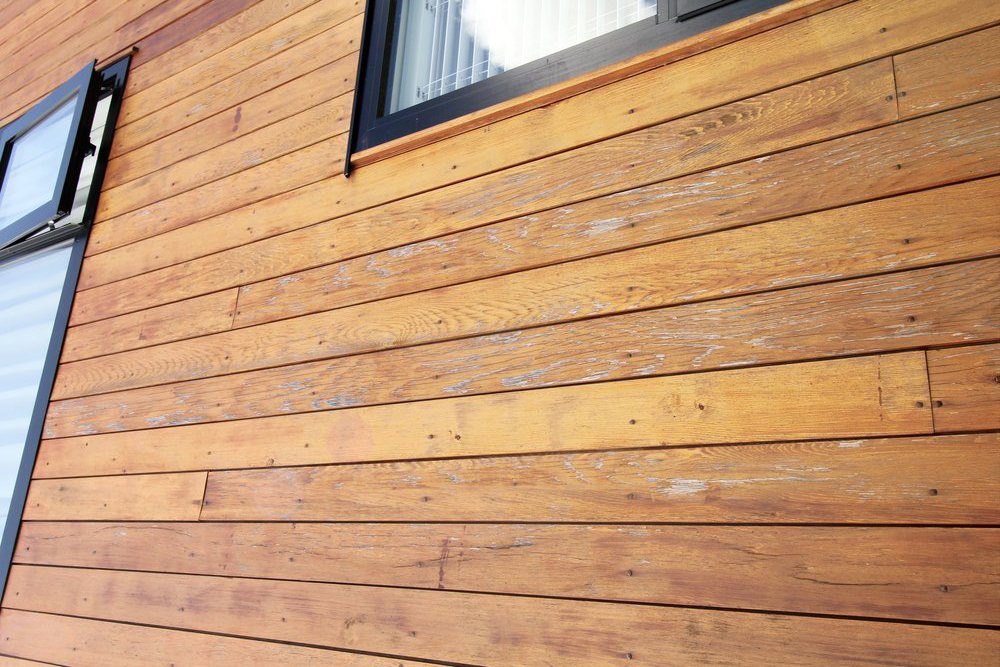
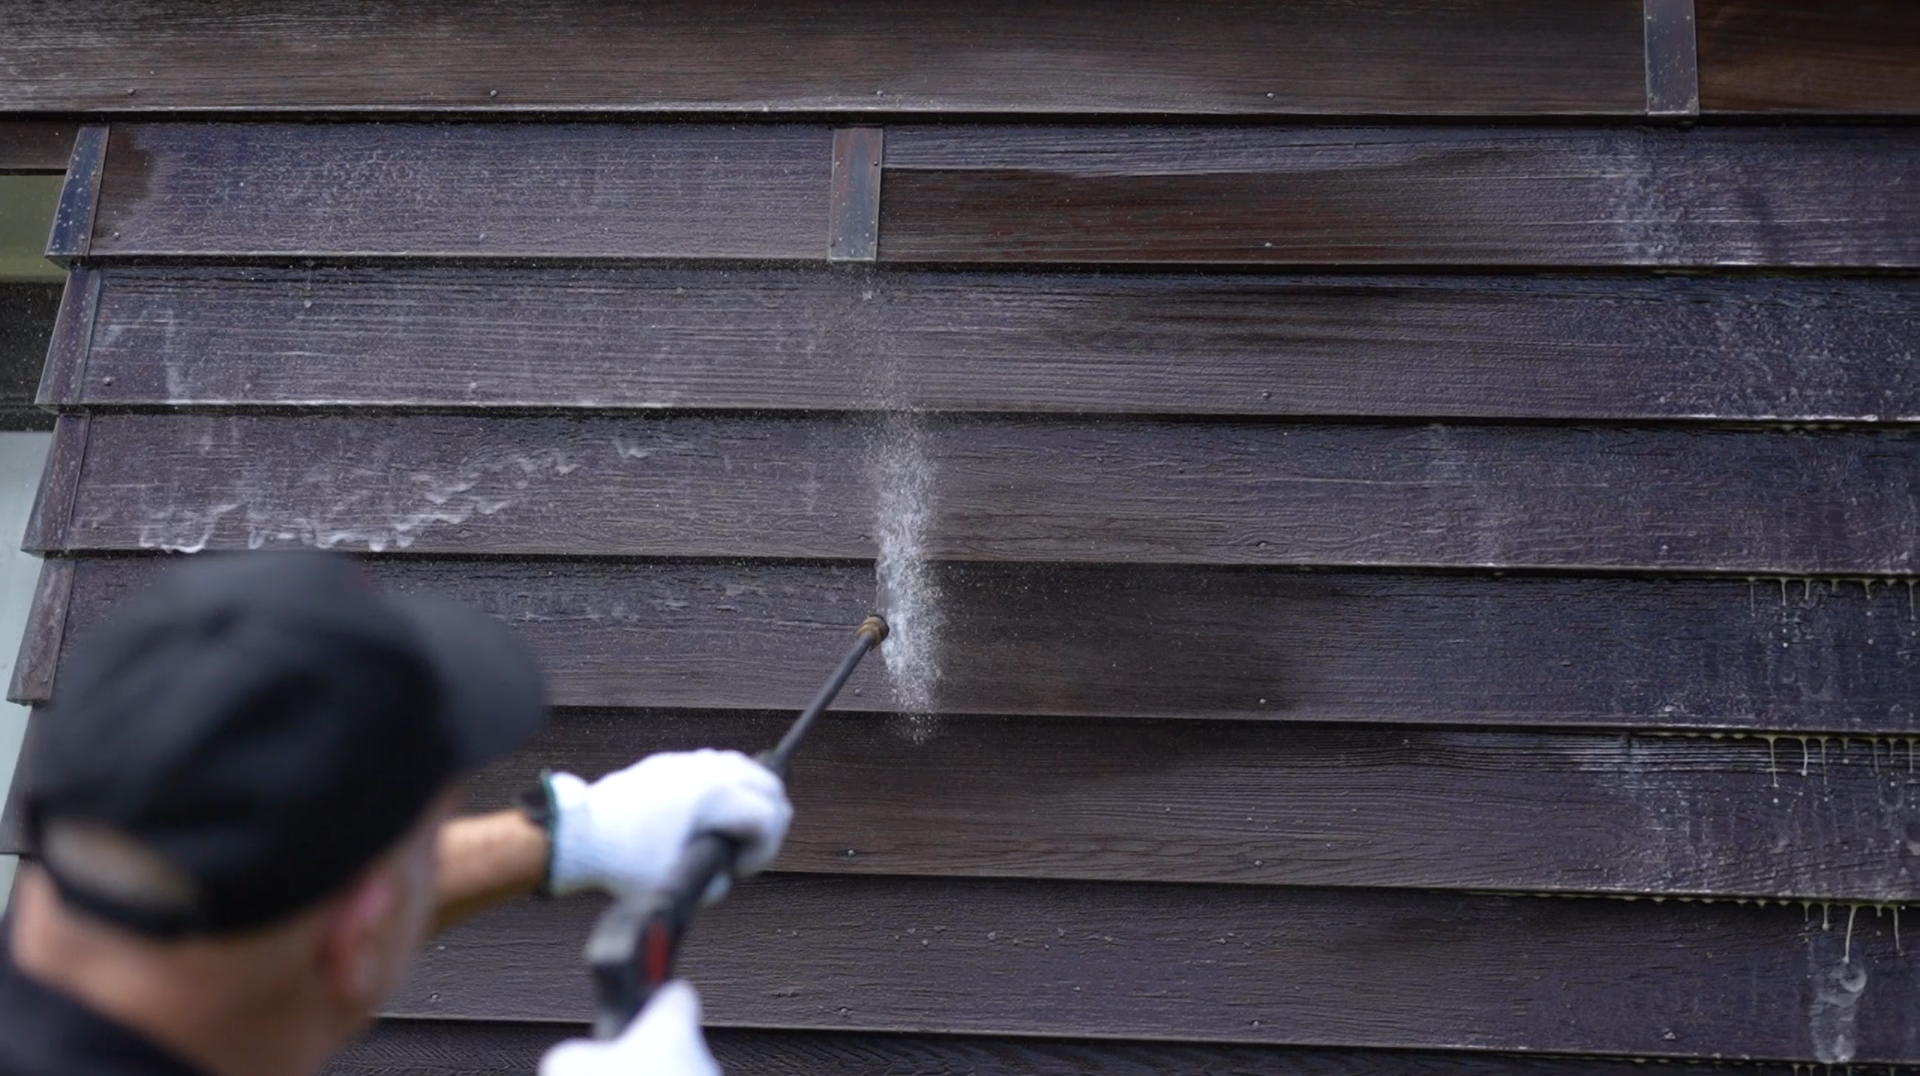
Grime or early mould on top of an intact coating? Just wash it. Getting that build-up off stops it eating into the coating and helps it last longer. 
 

The right way to wash cedar 1 (Large)


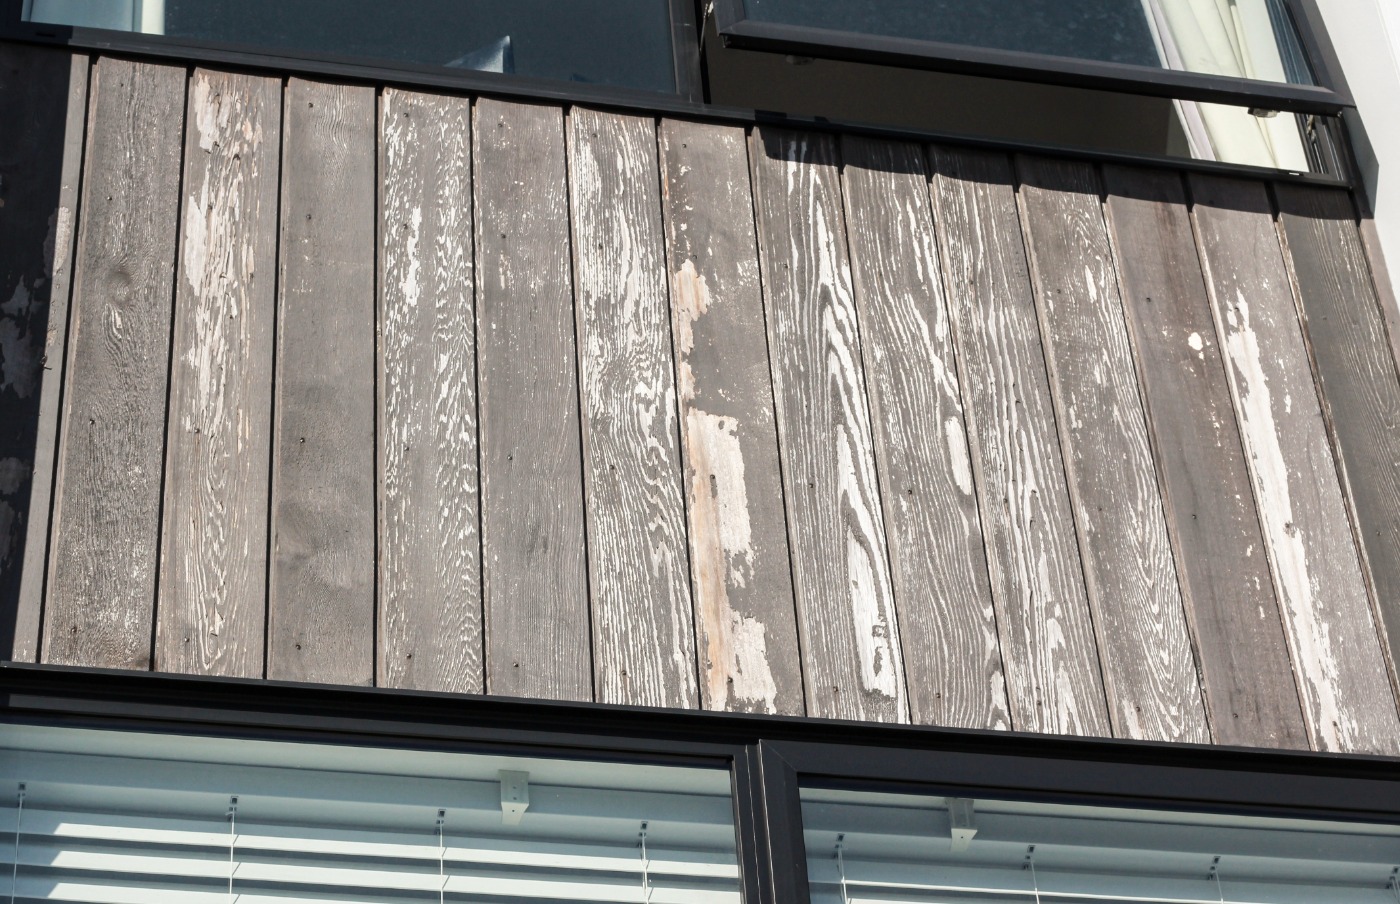
Bare patches, or the coating looking worn and discoloured through to the timber? That’s exposed timber, and a wash alone won’t fix it. You’re looking at a recoat. 

There’s no real situation where we’d tell you not to wash your Cedar. Even freshly coated boards can usually handle a wash within a month, once the oil has soaked in and the surface has dried. The real risk isn’t timing, it’s technique. 

Light Wash vs Deep Clean 

Not every wash needs the same amount of pressure. If the coating is in reasonable shape, a light wash paired with a recoat is usually enough. Where it’s broken down badly, or you’re dealing with bare, patchy timber, it needs a heavier wash to properly prepare the boards for coating.

Knowing which one a property needs takes experience, and it’s something we assess on site every time.  

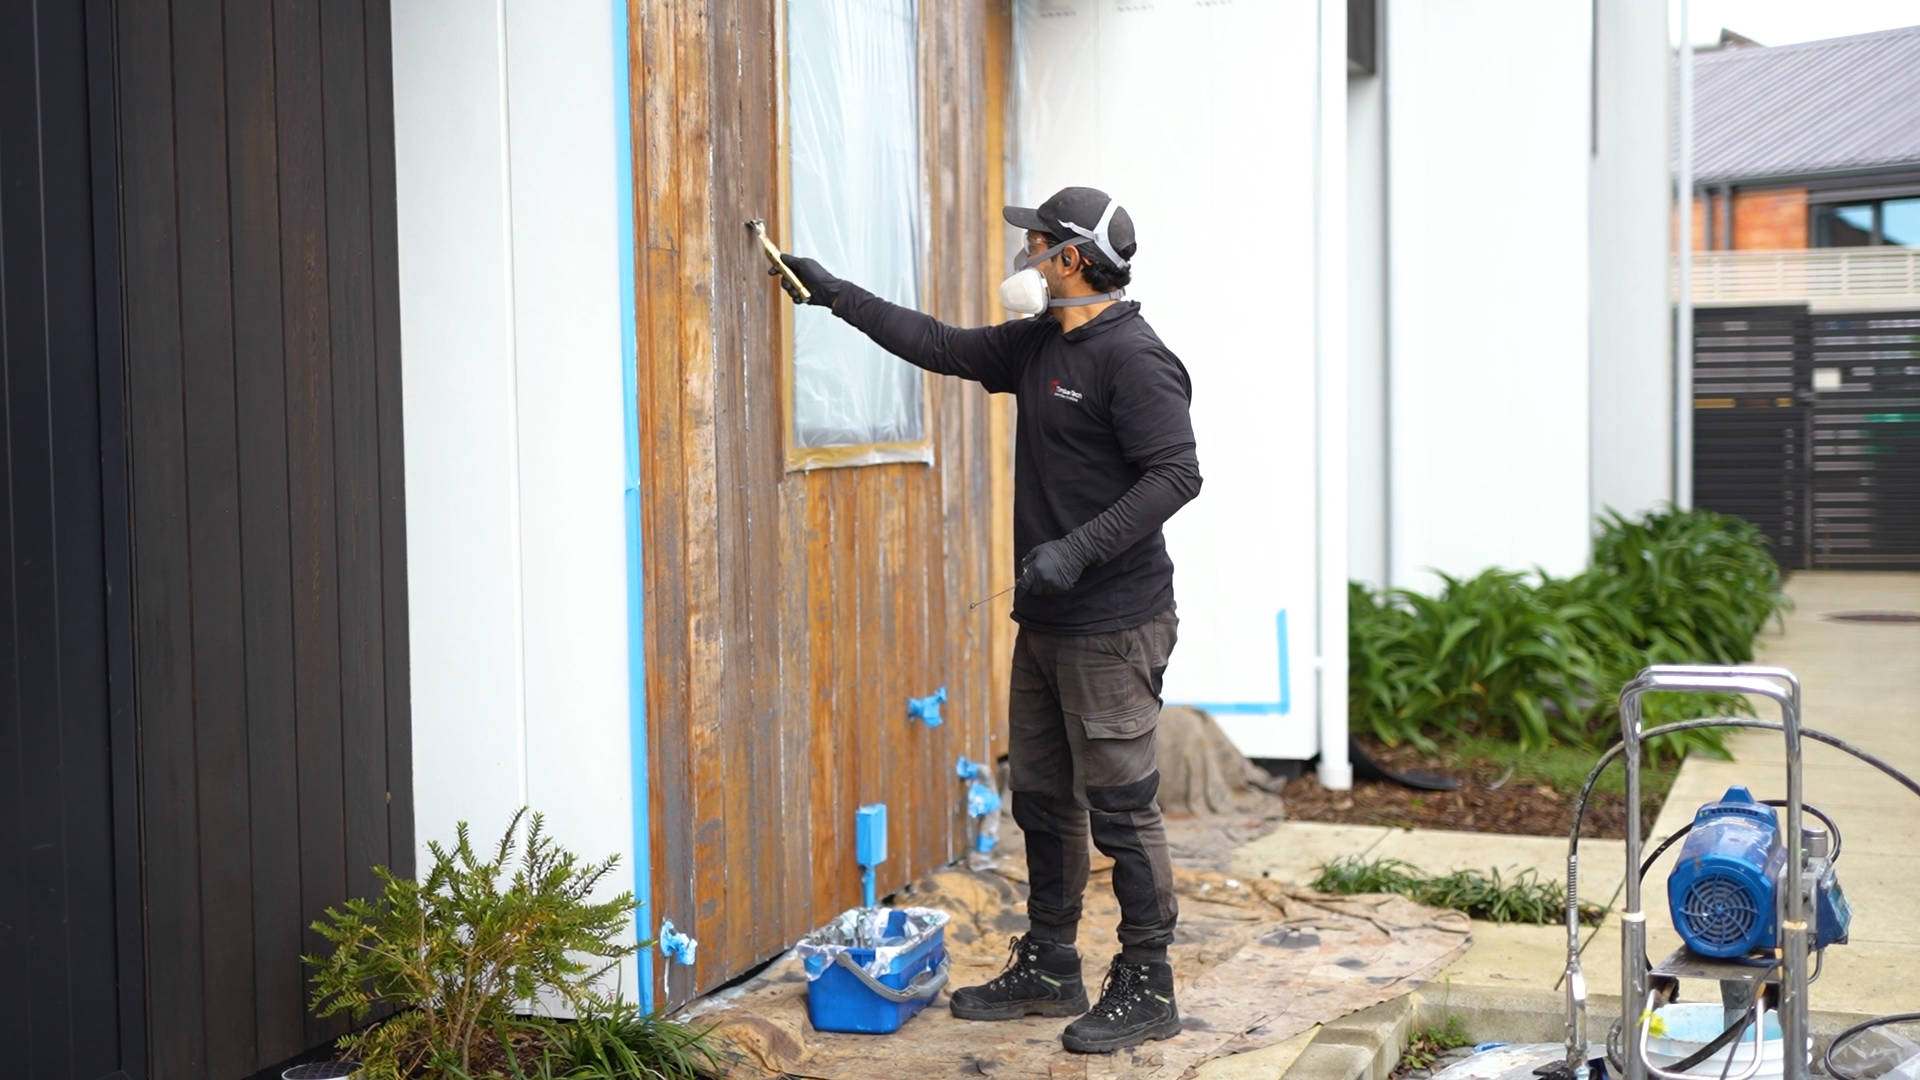
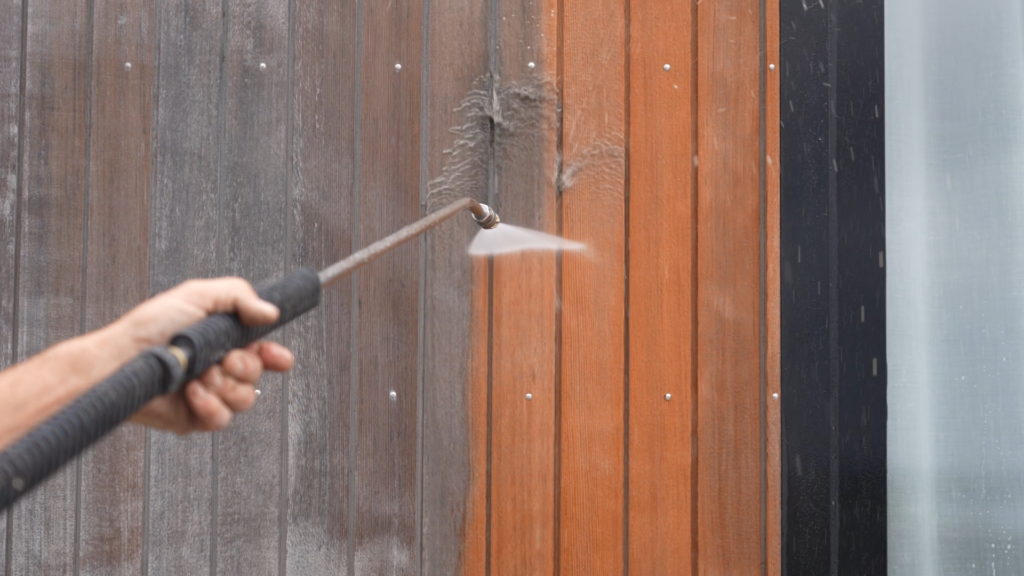
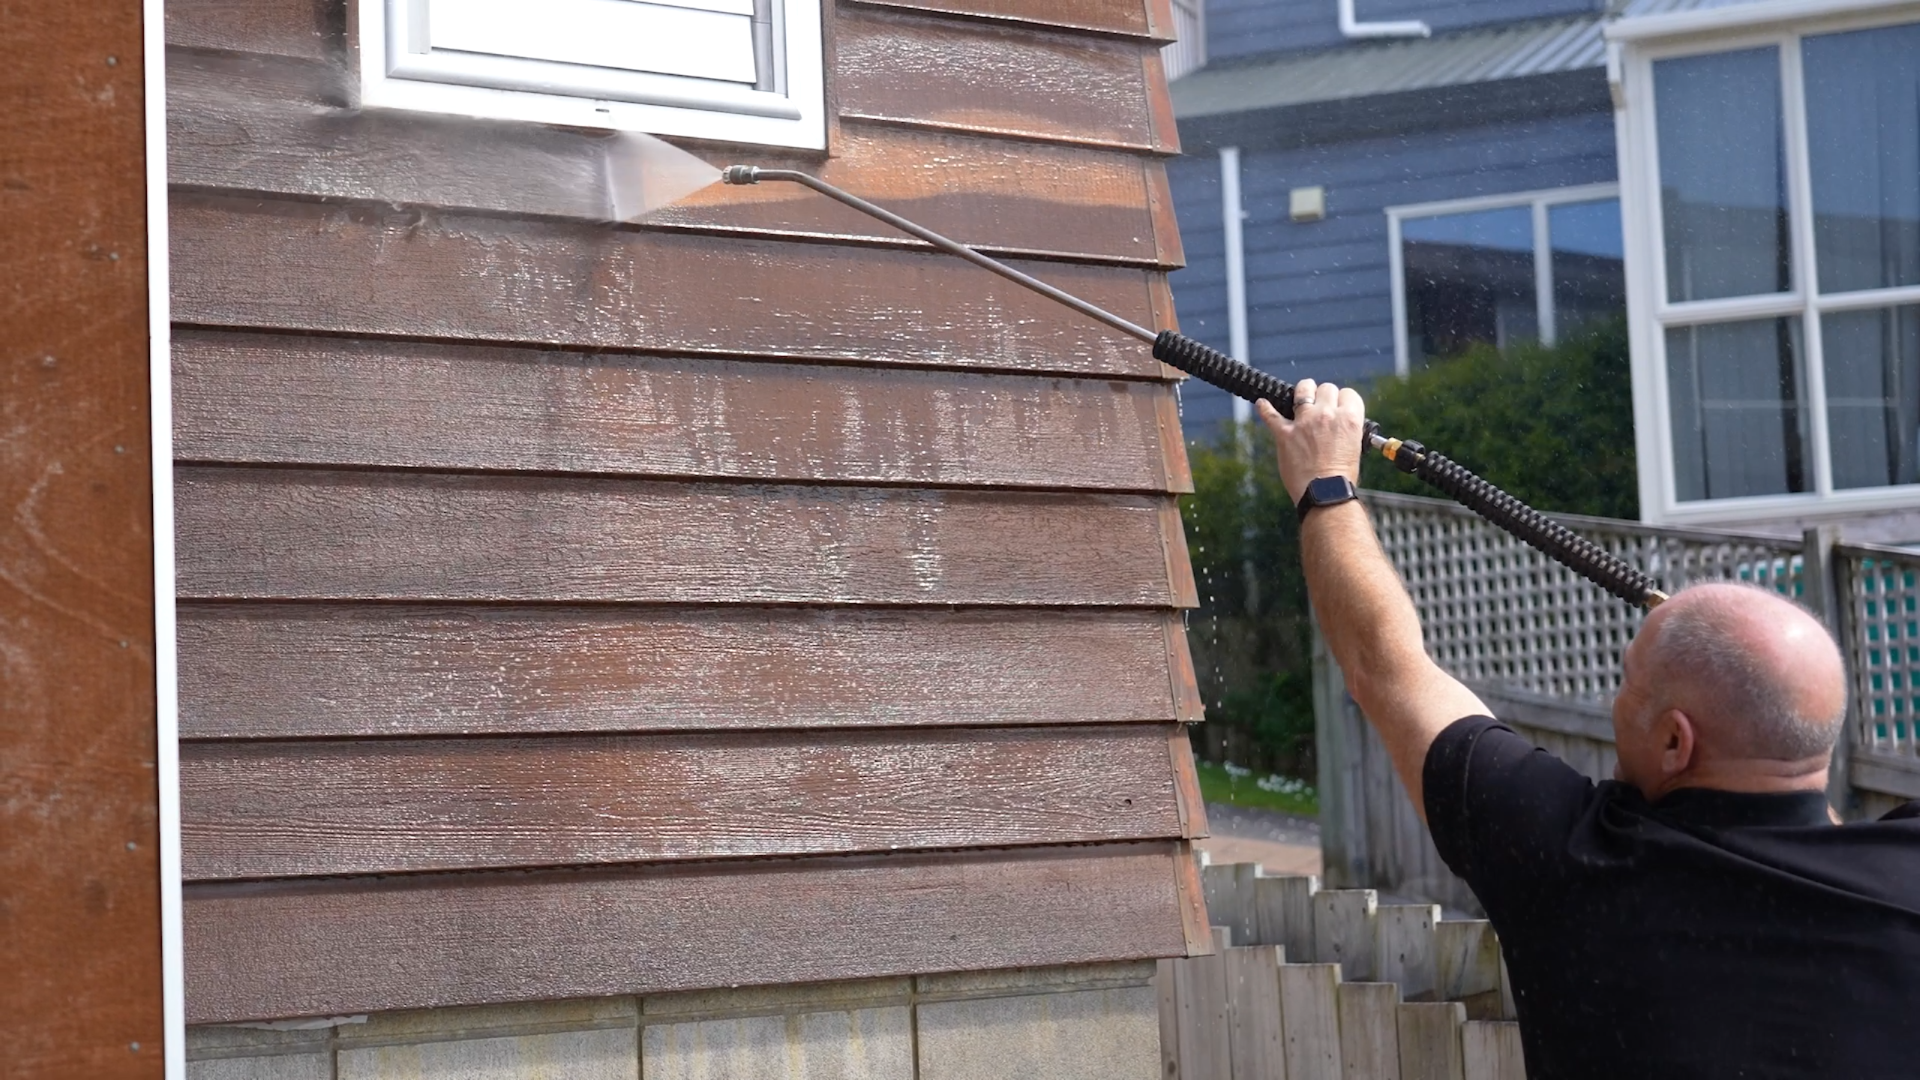
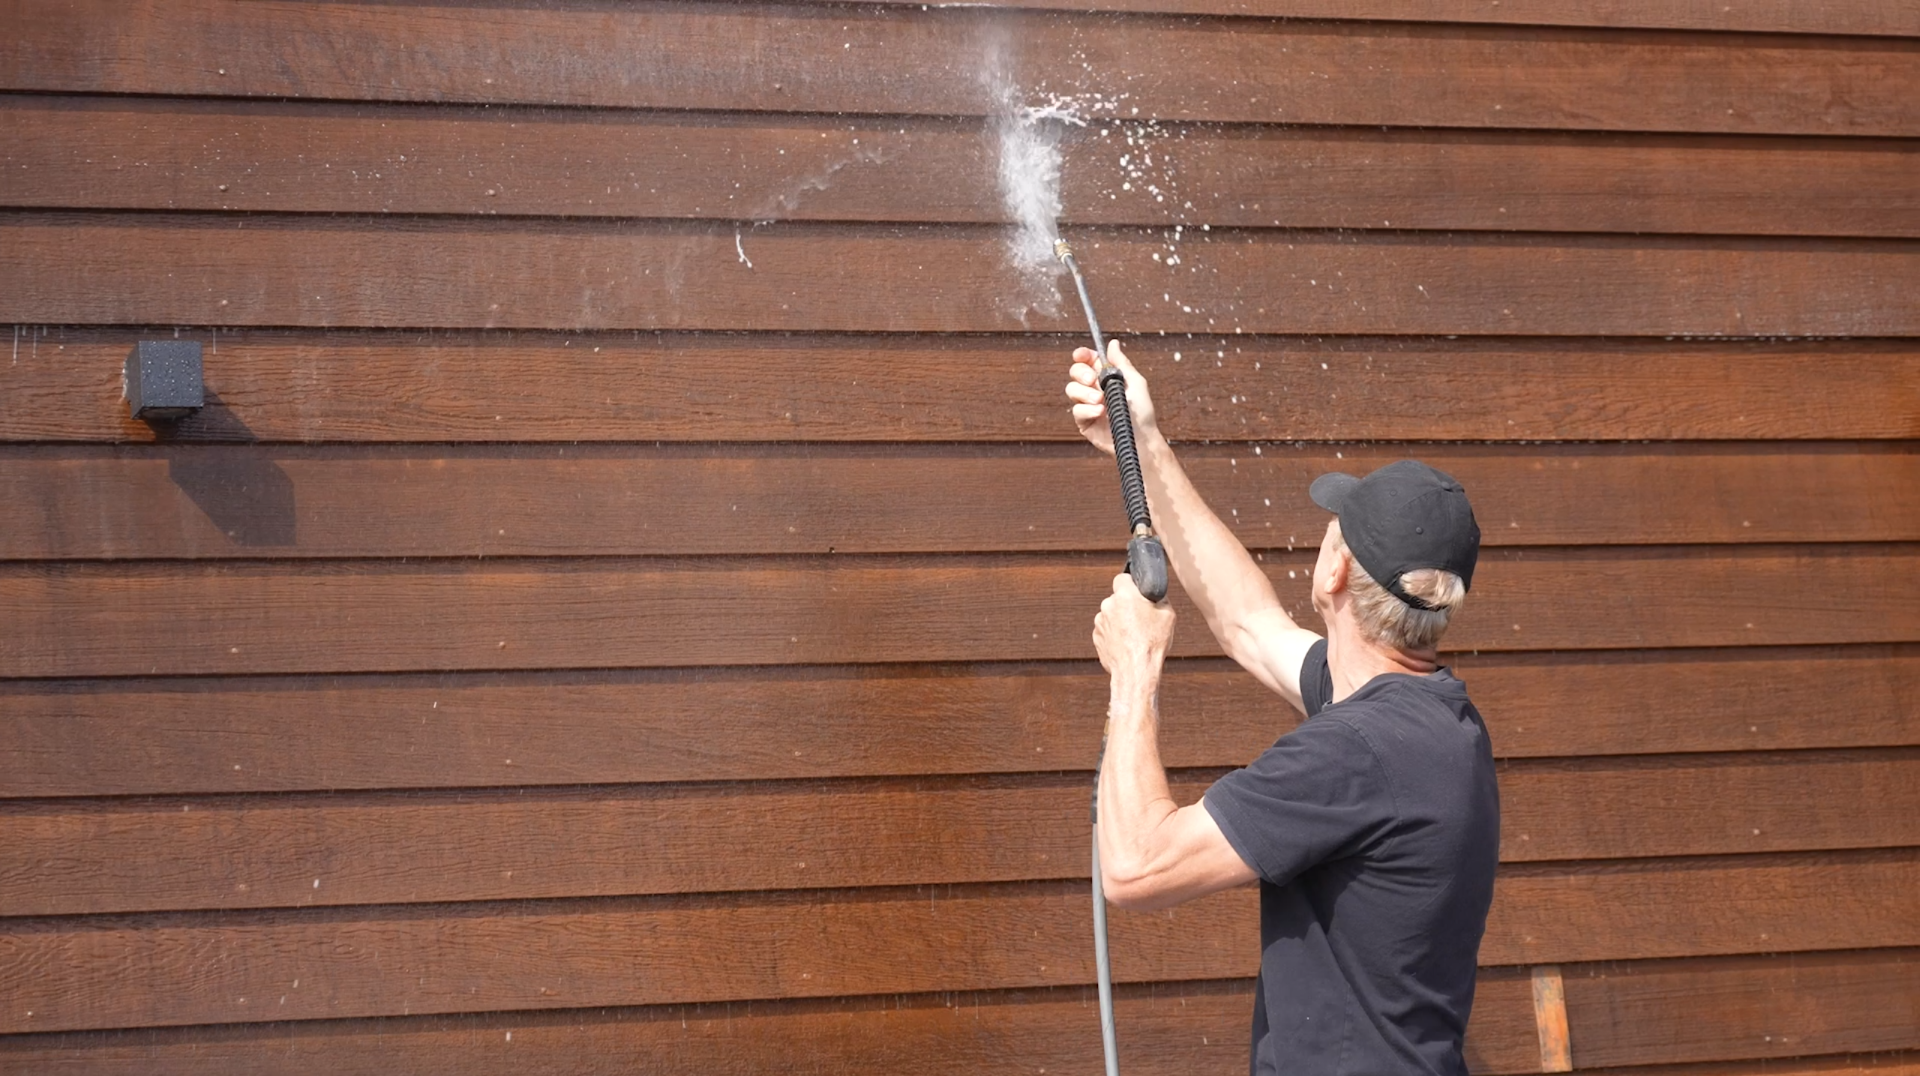
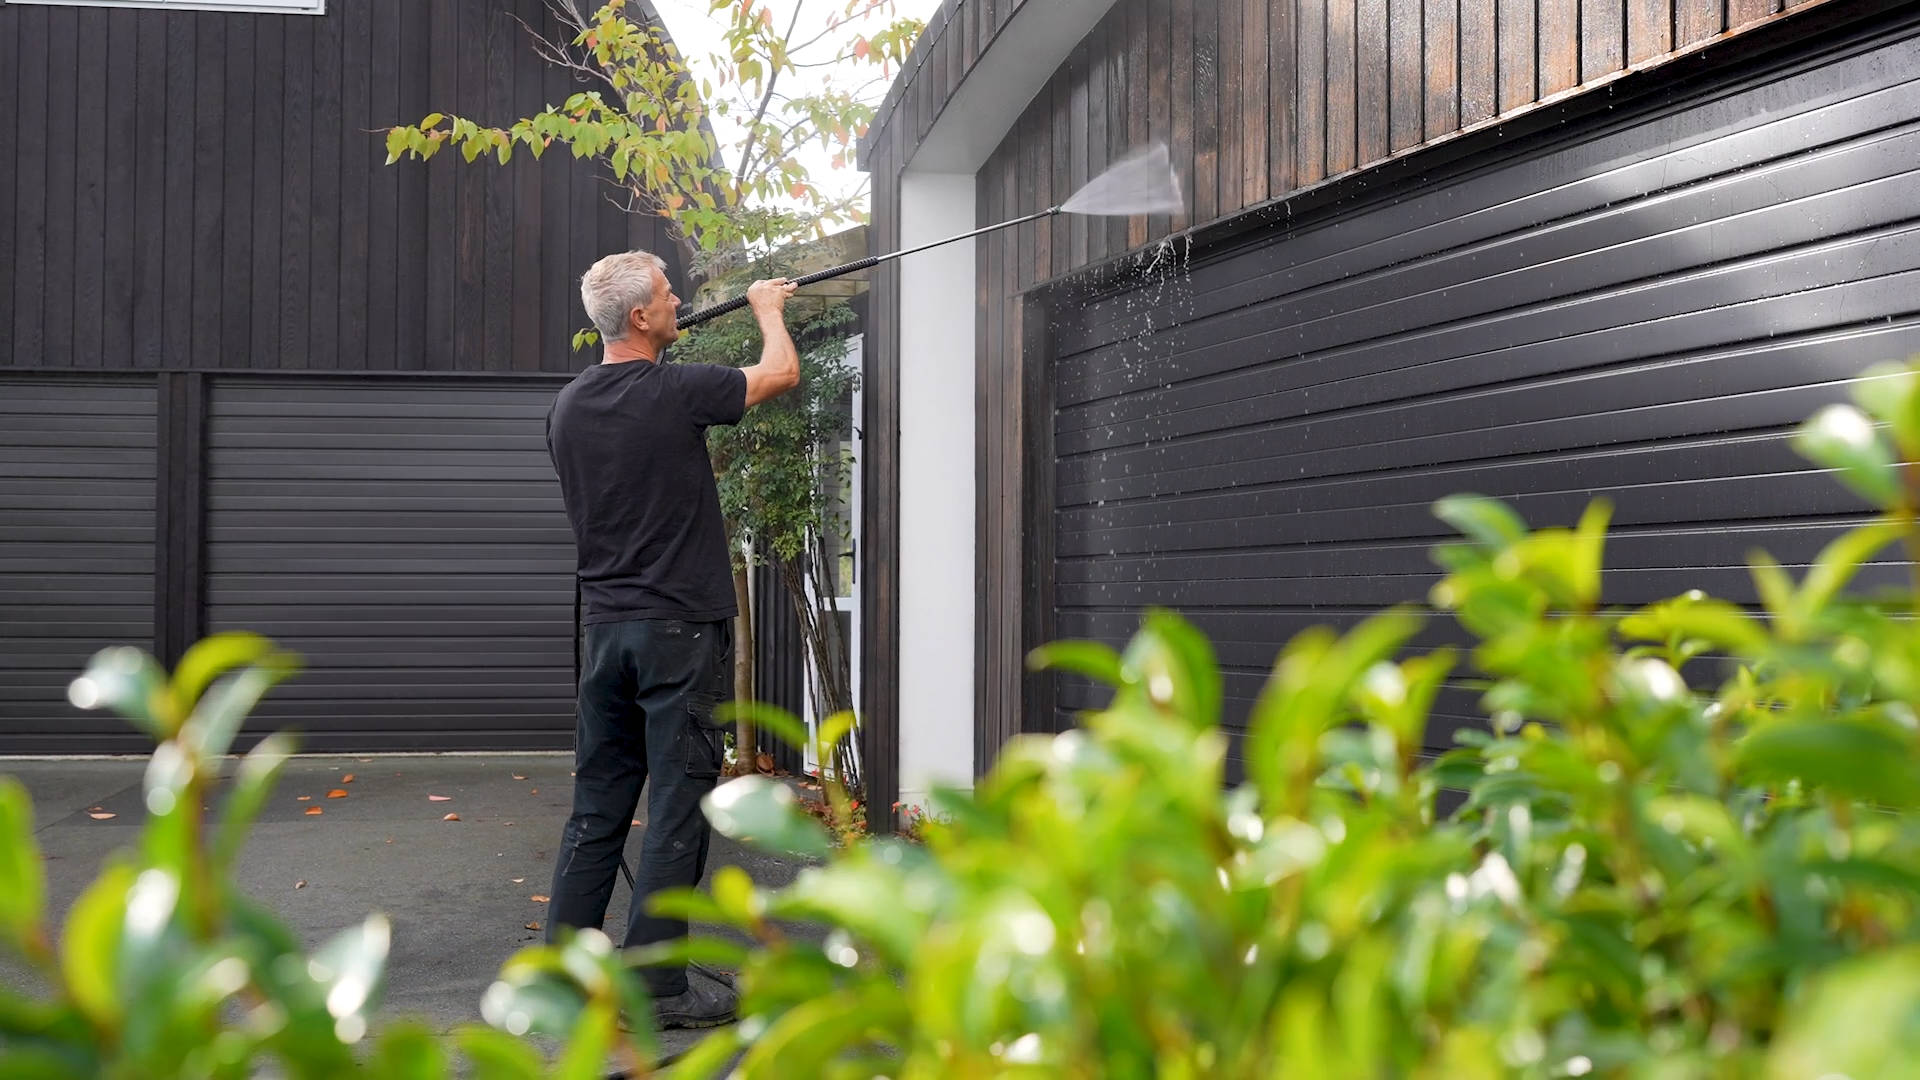
We do wash using low pressure water blasters, but the machine is the smallest part of the job. Our machines run at around 2,000 to 2,500 PSI, but by the time the water reaches the boards, from roughly a foot away and through a wide fan nozzle, the pressure hitting the timber is nowhere near that number. 
 

The right way to wash cedar 6 (Large)

The Technique That Keeps Cedar Safe 

Cedar is soft, and it can be damaged by water pressure in the wrong hands. We train our technicians specifically in how to wash Cedar, and that training is a big part of what sets us apart from a general house washing company. 

Three things matter most: 

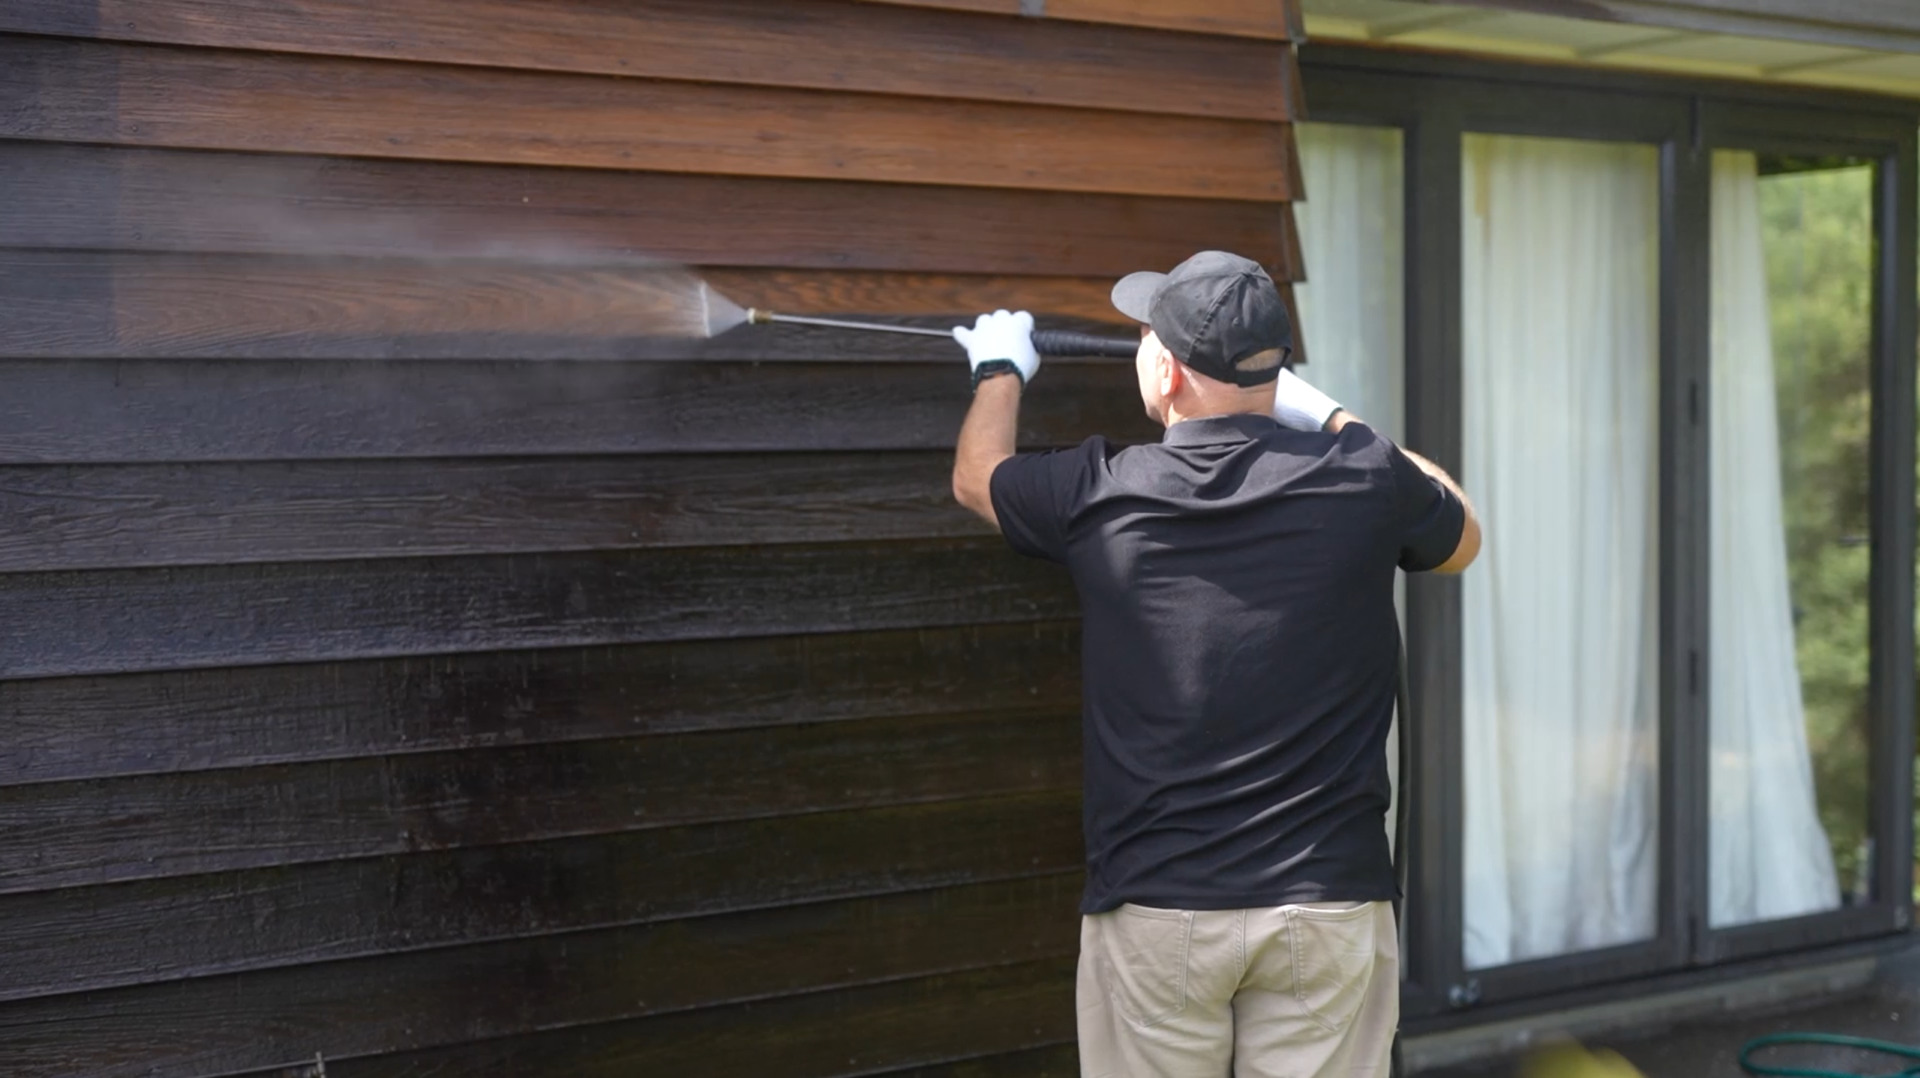
  • A wide fan. We wash with roughly a 25-degree fan tip, spreading the pressure out rather than concentrating it on one spot. 
  • The right distance. Keep the spray about a board’s width from the surface, then adjust closer or further depending on how much clean the area needs. 
  • Never stop and go back. This is the biggest mistake people make. Pause mid-pass and go back over a spot, and you’ll leave a stop mark that’s hard to remove. Keep moving instead, fanning out at each end of your pass.
The right way to wash cedar 3 (Large)


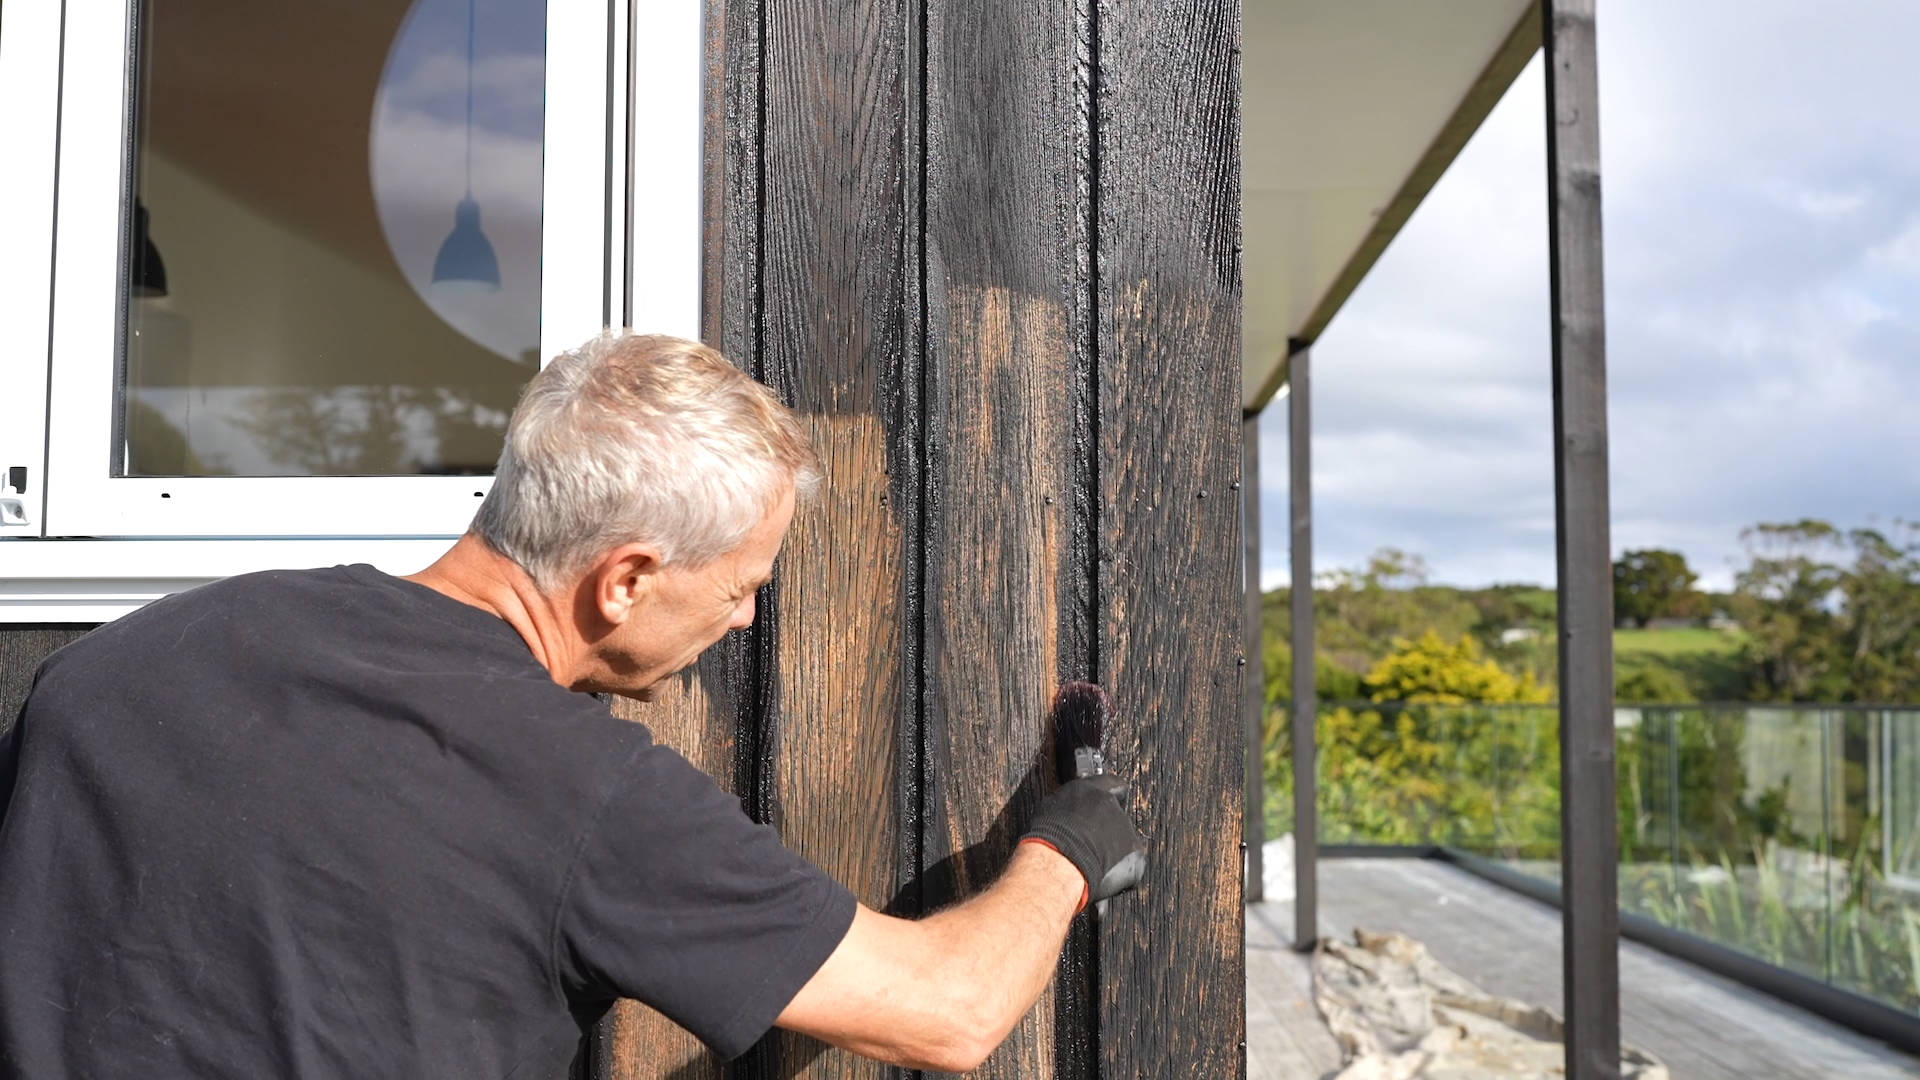
General upkeep and recoat prep also call for different approaches. For upkeep, you just want dirt and mould off the surface, without touching the coating underneath. For recoat prep, you can afford to take more of the old, oxidised tint off, since it’s all getting covered again.  

Mixing the two up is where homeowners run into trouble: wash too close or too hard on boards that don’t need recoating, and you can strip enough tint to expose bare timber, creating a job that didn’t need to exist.

What We Use as a Surfactant 

Before washing, we apply a surfactant, a biodegradable detergent mixed with water, sprayed onto the boards. It’s safe around plants and won’t damage windows, decks or joinery, so we don’t usually need to take any special precautions. 

The one exception: on tank water properties, we isolate the water supply or disconnect the downpipes before washing above the roofline, so nothing runs into the drinking water. 

We leave the surfactant on for three to five minutes minimum, ideally still wet when we come to wash it off, mixing it stronger for particularly dirty properties.  

Once washed, the timber needs to dry completely before oiling. Cedar is light and dries fast, sometimes within an hour or two on a sunny north face. We generally wash one day and coat the next, though same-day turnarounds aren’t unusual in summer. 

What Incorrect Washing Looks Like 

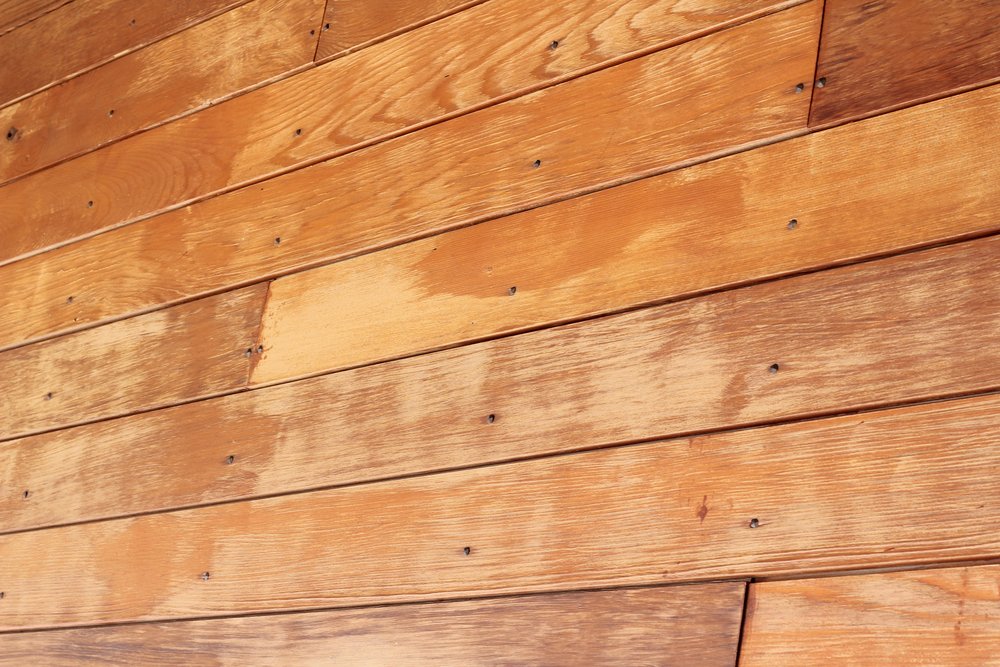
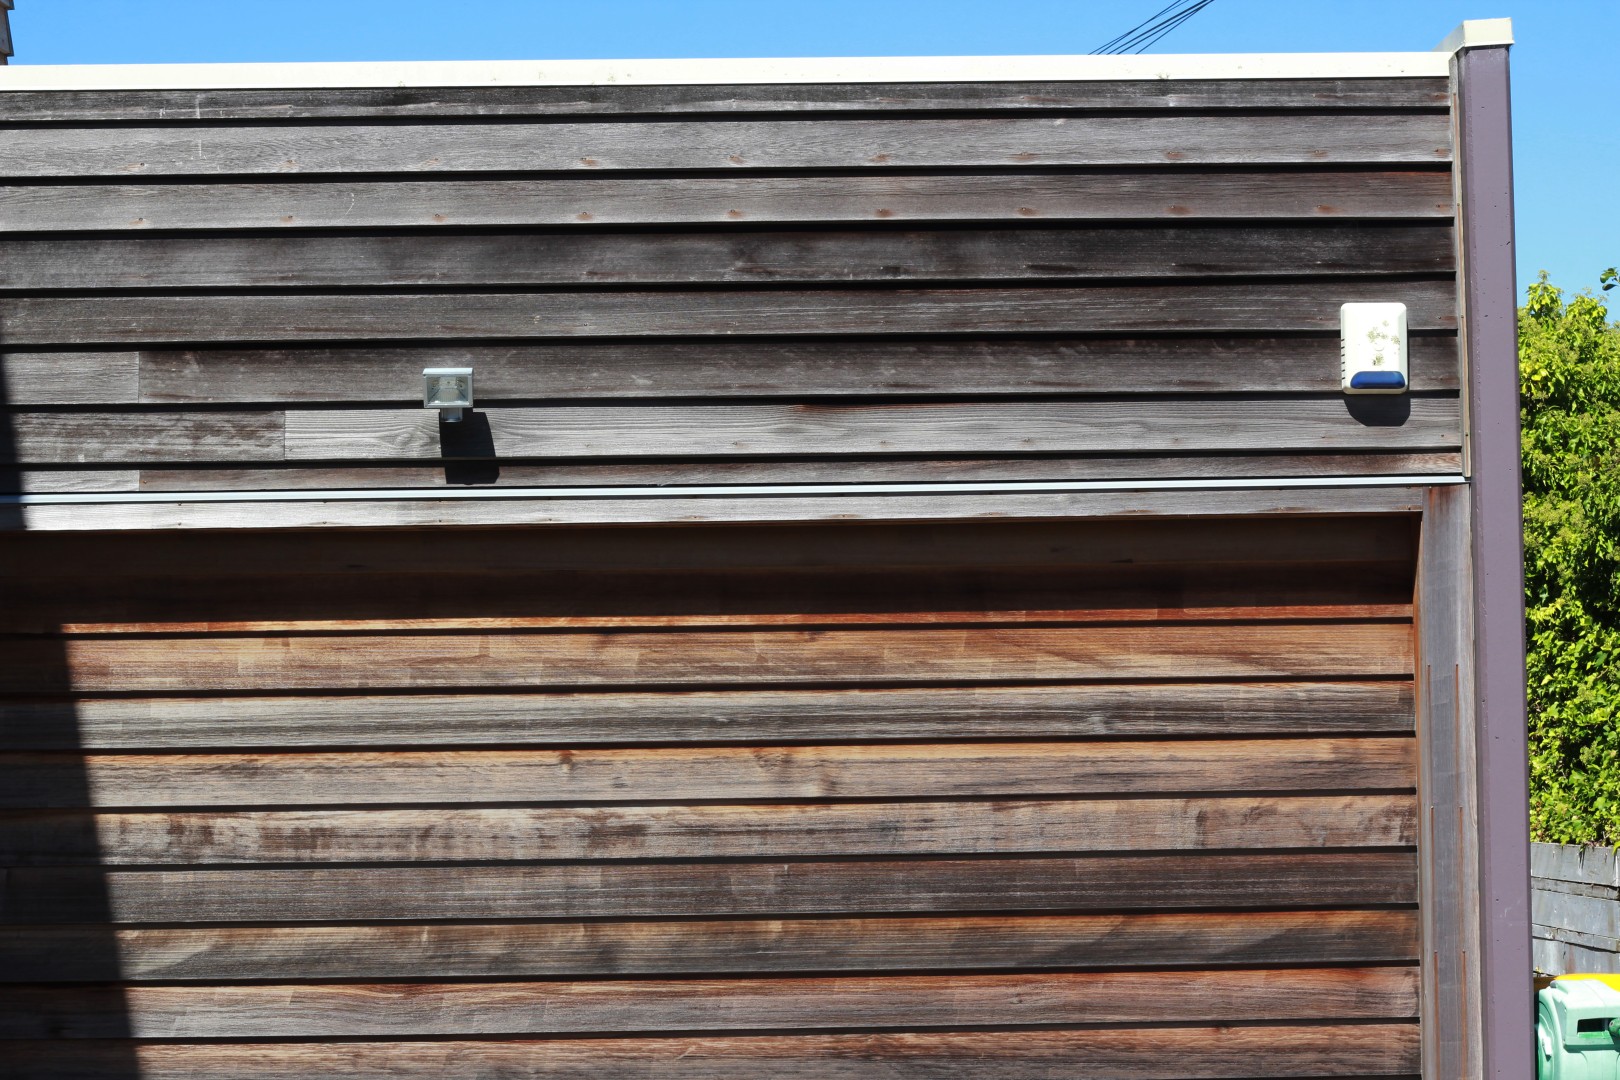
At the mild end, poor preparation means not enough of the old coating has come off for a fresh coat to bond properly. At the more serious end, you get actual gouges or scarring in the timber, or the stop marks mentioned above. 
 

IMG 8809 (Large)


Some of this can be fixed. Badly scored timber usually can’t be. Sanding it back just leaves a fainter impression of the same mark, since you’re left with a flat board and an indentation in it.
 

This is why we’re cautious about recommending homeowners attempt heavier prep washes themselves, even though a light annual rinse is well within most people’s ability. 

Should You Wash It Yourself? 

If you’re comfortable doing it, an annual clean is a job you can happily take on yourself. 

Before a recoat, we’d always recommend a specialist. Preparing Cedar properly is a different skill set to a standard house wash, and it’s exactly what we specialise in. General house washing companies tend to steer clear of Cedar for this reason. 

Final Thoughts 
The right way to wash cedar 4 (Large)


A regular wash does more than keep your Cedar looking tidy. On shaded, damp faces where mould takes hold, it protects the coating underneath and helps it last as long as possible.  

Sun-exposed north faces are a different story. They take the brunt of New Zealand’s UV and need recoating every 2-3 summers regardless of how well they’re washed, since it’s the sun doing the damage there, not the dirt. 

Not sure whether your Cedar needs a wash or something more? Our Free Cedar Assessment will give you a clear, honest answer either way.

Does Your Cedar Need Help?

Our Free Cedar Assessment will assess the health of your timber and give expert advise on how to keep it looking beautiful for years to come.

Cedar stain to oil after

Read More Articles

25 May 2026
Waiting for the "perfect" season to protect your Cedar often does more harm than good. In this article, we dismantle the four most common myths surrounding Cedar care and wet weather, giving you the facts you need to protect your investment year-round.

As the cooler, damper months roll in, many homeowners take one look at their Cedar cladding and decide to put off maintenance until summer. It is a natural reaction. We are conditioned to believe that outdoor home maintenance – especially involving coatings – is strictly a warm-weather task.

The reality is quite different. When we look at actual climate data, the perception of winter as a non-stop deluge is quickly debunked. On average, a typical summer month might see about 8 fully wet days, while a winter month averages around 15. While that is roughly double, it still leaves at least 15 perfectly dry, workable days every single month.

Waiting for the “perfect” season to protect your Cedar often does more harm than good. In this article, we dismantle the four most common myths surrounding Cedar care and wet weather, giving you the facts you need to protect your investment year-round.

Myth 1: “Cedar oil behaves just like paint, so it won’t dry or cure in the cold.”

The Preconception:

Homeowners often treat paint and wood oil as identical products. Because acrylic paints and film-forming stains require a strict, warm temperature window to dry and cure properly, people assume Cedar oil suffers from the same limitations in winter.

The Facts:

Paint and oil are fundamentally different chemical formulations, and they protect wood in entirely different ways:

  • Paint Cures, Oil Absorbs: Paint must dry on the surface to form a solid, protective film. If it is too cold or damp, this curing process fails, leading to peeling, cracking, or poor adhesion. Premium Cedar oils (such as Wood-X) do not “cure” or form a surface film at all. Instead, they penetrate deep into the cellular structure of the timber.

  • Wider Temperature Tolerances: Because oil relies on absorption rather than evaporation and chemical curing, it is incredibly forgiving. While oil absorption does slow down slightly in cold temperatures, the final appearance and protective qualities of the finish remain completely unaffected by the lower temperatures.

  • Timber Thirst Dictates the Speed: The age and condition of your Cedar play a big role in how fast the oil is taken up. If you are oiling highly weathered Cedar, the dry, porous wood is so thirsty that it absorbs the oil almost instantly, drying to the touch almost immediately even on a brisk winter day. Newer cladding takes slightly longer to absorb, but the oil still makes its way safely into the timber without needing heat to set.

Myth 2: “You can’t coat Cedar if rain is forecasted.”

The Preconception:

There is a widespread belief that the mere threat of a shower means Cedar maintenance must be ground to a halt.  Homeowners worry that a sudden downpour will wash the product away or trap moisture under the finish.

The Facts:

While we absolutely do not apply oil during heavy, persistent rain, our teams easily navigate sporadic winter weather through smart planning and technical tools:

  • Cedar Dries Exceptionally Fast: Cedar is a lightweight, highly porous timber. Unlike dense hardwoods, as soon as a rain shower passes and a bit of wind or sun hits the boards, they dry out incredibly quickly.

  • The Hour Window: Once applied, oil only needs about an hour of dry weather to soak safely into the wood fibers. Once it has absorbed, even direct rainfall shortly afterward will not ruin the protective application or damage the cladding.

  • Micro-Climate Scheduling: Our teams don’t just look at the sky; they look at the wind direction and the layout of your home. If there are sporadic showers, we adapt by working on the sheltered sides of the house, letting the weather blow past while keeping the job moving along.

Myth 3: “If you wash my house but wait a few days to oil it, the Cedar will get dirty again.”

The Preconception:

The standard restoration process requires washing the Cedar first to clean it, followed by applying the oil. Homeowners are often nervous if there is a gap of a few days or even up to two weeks between these two stages, fearing that dust or light rain in the interim will ruin the final finish.

The Facts:

Managing workflows by separating the washing and oiling stages is a standard, highly effective practice – especially in winter. It allows us to keep jobs moving along and make the best use of dry weather windows.

  • Targeted Deep Cleaning: The initial wash we perform is not a superficial rinse. It is designed to kill and extract deeply ingrained mold, fungi, organic spores, and stubborn environmental grime. Once these elements are chemically treated and washed away, they do not return overnight.

  • Surface Dust is Easily Managed: If a week passes between the wash and the coat, some light environmental surface dust might settle on the timber. This is entirely normal. Before we begin oiling, our team performs a quick, dry brush-down of the surface. This instantly removes any loose dust, leaving a perfectly clean slate for the oil.

Myth 4: “My Cedar will warp if there is a delay between washing and coating.”

The Preconception:

A highly specific concern that occasionally crops up is the fear that leaving washed, un-oiled Cedar exposed to winter elements for a week or two will cause the timber boards to cup, twist, or warp.

The Facts:

While timber movement is a real physical process, it does not happen overnight, nor does it happen over the course of a couple of weeks.

  • A Long-Term Process: Cedar warping is the result of years – often a decade or more – of cumulative neglect. It occurs when entirely unprotected timber is repeatedly saturated by winter rain and then baked dry by intense summer sun. This constant, extreme cycle of expansion and contraction over 10 to 15 years eventually breaks down the cellular structure of the wood, leading to cupping and warping.

  • Two Weeks is Harmless: A temporary delay of a few days or a couple of weeks between washing and coating has absolutely zero impact on the physical stability of the wood. The timber will not warp, degrade, or shift in that brief window. It is a completely safe operational timeframe.

Conclusion: The Best Time to Protect Your Cedar is Now

When it comes to Cedar maintenance, there is one golden rule: the best time to protect your timber is always right now. Waiting for the “perfect” summer season to address dry, fading, or silvering Cedar simply leaves your home exposed to harsh winter moisture for longer than necessary.

Our specialist teams work successfully all year round. Equipped with technical expertise, moisture meters, flexible scheduling, and high-performance penetrating oils like Wood-X, we know exactly how to safely restore and protect your Cedar in any season.

Don’t let seasonal myths leave your home unprotected!

17 Feb 2026
We regularly see the results of both proactive care and long-term neglect. While Cedar is incredibly resilient, there is a definitive tipping point where a simple maintenance coat turns into an expensive restoration - or worse, a total reclad.

We understand the temptation to “wait just one more year” before investing in Cedar maintenance. Whether it’s budget-related or just a busy schedule, many homeowners try to push the limits of their cladding.

We regularly see the results of both proactive care and long-term neglect. While Cedar is incredibly resilient, there is a definitive tipping point where a simple maintenance coat turns into an expensive restoration – or worse, a total reclad.

Here is a breakdown of the Cedar timeline and how to know if you’ve gone too far.

The Three-Summer Rule

We recommend having the sun-exposed faces of your Cedar recoated every 2-3 summers.

The “danger zone” usually begins after the third summer. However, not all sides of your house age at the same rate.

North-Facing (the sunny side):

After three summers of UV exposure, maintenance is officially overdue. You’ll notice the oil’s tint beginning to discolour and areas of bare timber becoming exposed.

Without oil, the Cedar loses its ability to repel water. It absorbs moisture during rain and then gets baked dry by the sun. This rapid swelling and shrinking is what starts the deterioration process.

South-Facing (the sheltered side):

You can often get away with three summers or longer here, but you aren’t out of the woods. While UV isn’t the enemy, dampness is.

High-quality Cedar oils contain fungicides that prevent organic growth. As the oil dries out, these fungicides disappear and you’ll see mould and lichen developing.

The Downward Spiral: 4 to 6 Years

If you push past the four-year mark without treatment, the life begins to leave the boards.

Around the 4-year mark, you will likely see mould developing on sheltered, damp faces. On the sunny side, the boards will begin to warp or crack as they lose their internal moisture.

At 5–6 years, maintenance now becomes urgent. At this stage, the weaker parts of the Cedar boards (the thinner overlap points) will start to bend and cup. Gaps will appear between boards, which can lead to serious waterproofing issues for your home’s structure.

Can Your Cedar Be Saved?

The good news is that in most cases, Cedar can be saved – but it comes at a cost.

If you’ve waited 5 or 6 years, a standard house wash and recoat often won’t cut it. Restoration at this stage requires a deep chemical clean to strip back dead fibres and mould, followed by multiple applications of oil to quench the thirsty timber.

The hard truth is that while re-oiling helps return flexibility to the wood and releases surface tension, it cannot un-warp a board completely.

Once a board has significantly cupped, the damage is largely irreparable. You can halt the process and protect the wood from further degradation, but you cannot return the board to its original, flat state.

Factors That Speed Up the Clock

The “three-summer rule” is a guide, but your specific environment might move the needle:

  • Foliage: Trees or bushes touching the Cedar trap moisture and cause mould.
  • Dirt & Splashback: Proximity to garden beds or dirt can lead to ground-level rot.
  • Micro-climates: Coastal salt spray or high-humidity bush settings can accelerate the breakdown

Regularly washing your house will often remove these contaminants and should be part of your regular maintenance plan.

Regardless, the longer you wait, the more life you are taking out of the boards. Delaying maintenance might save a bit of money this year, but it effectively shortens the total lifespan of your home’s cladding.

On a sunny face, you aren’t just skipping a service, you’re allowing permanent damage to the surface of the Cedar that can’t be undone later.

Final thoughts…

If in doubt, you always ask us to pop around for a free Cedar assessment. Very often it’s only the sun exposed faces that need maintaining, and it doesn’t cost as much as people might think.

15 Nov 2025
Yes, transitioning Cedar from stain to oil is possible, but it's not a process to be undertaken lightly. There can also be 3-9 month transition period where the Cedar will have a shiny-flat-shiny-flat appearance. However, the end result is Cedar that looks stunning and is protected against the UV rays.

Yes, transitioning Cedar from stain to oil is possible, but it’s not a process to be undertaken lightly. Removing stain requires a chemical stripper to remove the broken-down stain, and perhaps even some sanding to remove any stubborn remnants.

There can also be a 3-9 month transition period where the Cedar will have a shiny-flat-shiny-flat (or “patchy”) appearance. However, the end result is Cedar that looks stunning and is protected against the UV rays.

How Stained Cedar Ends Up Looking Unsightly

Treating Cedar with stain isn’t usually an informed choice by the homeowner.

Often, the previous owner has done a quick fix and used stain to make the Cedar look pretty before selling, or the current homeowner has stained over a poorly prepared stain without stripping back the boards.

Stains are translucent, so even though they have some opacity, you can still see through them and unless the preparation is done well, stains don’t hide imperfections.

Eventually the stain will delaminate in the harsh UV, giving a camouflaged look with light and dark shades that are often patchy and uneven.

Why Transition From Stain to Oil?

No matter how much stain you put on the surface of the timber, 5-10 years of sun exposure on a northern face will deplete the natural oils of the Cedar and cause the boards to dry out, cup, then ultimately split.

This doesn’t just look bad, it threatens the integrity of your home to withstand the elements and if the damage continues, you may need to replace the cladding altogether.

Img 9433 Cc2

Unlike stain, oil soaks into the pores of the timber leaving only a thin film on the surface, so it does not break down or flake off. The oil then replaces the natural oils depleted by the sun and protects the timber against surface tension and cracks.

Oil is also easier to maintain and as you only need to recoat exposed faces every 2-3 summers, the maintenance will be more cost-effective over the long term.

The Transition Process from Stain to Oil

First, we do a site visit to look at the current state of the boards. 

In the best-case scenario, the weatherboards will have had an even exposure to the sun. We then use a stripper to lift the broken-down stain, followed by a deep clean to remove anything which is loose.  

The heavy wash will give us a good look at the condition of the boards below. If there is any stain remaining on the surface, we might need to sand or strip the boards back to their virgin state before applying the oil. 

If the boards have received partial shade cover, such as nearby trees or soffits that have only protected the upper areas, they need to be stripped. You can’t just oil over the top and hope that it’s going to match the weatherboards below.  

This adds a lot of cost to the process and if the homeowner isn’t willing to spend that much money, we may recommend applying another coat of stain to provide at least some protection against UV and keep the house looking tidy. 

Be Prepared for the Patchy Look

One of the biggest downsides of moving from stain to oil is a 3-9 month transition period where your Cedar will have a shiny-flat-shiny-flat (or “patchy”) look.

This happens when oil is applied to any surface that still has stain remnants. The oil cannot soak through the non-porous stain, so it sits around the surface area where the oil has soaked in, giving the shiny-flat-shiny-flat look.

cedar-stain-to-oil-before-1 cedar-stain-to-oil-after-1

In the sunlight, the shiny-flat-shiny-flat look is not pretty. However, this effect is only temporary and eventually the oil will soak in and delaminate any remaining stain.

After 3-9 months, we come back and give the boards another deep clean, sand back any remaining stain and apply another coat of oil. 9-12 months later we repeat the same process.

After 12-24 months the transition will be complete and the Cedar will move into a regular maintenance schedule, with sun exposed areas being treated every 2-3 summers.

What Costs Are Involved?

Cost is the final hurdle for many Cedar homeowners. Stripping off stain is an expensive process and if your current home is not your forever home, the costs might be prohibitive.

However, if you are planning to stay in your current home for the foreseeable future, the costs become an investment that will pay for itself. Over time, oil is much easier to apply than stain, provides superior protection against the elements and increases the lifespan of your Cedar.

In broad terms, it comes down to this: do you want to spend the extra 10k to remove the stain and give yourself an easy to maintain finish, or deduct the 10k from the cost of replacing the cladding in the not-to-distant future?

By investing in the health of your Cedar now, you will save money on long-term maintenance, and your cladding will look amazing.

Get An Expert Opinion!

As you can see, there are a lot of variables when considering the transition from stain to oil.

For a Free Cedar Assessment, get in touch by calling 0800 298 298.

There is no obligation and our goal is always to look after the best interests of our customers over the lifecycle of their homes.

Read More Articles

Showing 1 - 10 of 19

Subscribe

Sign up to our quarterly newsletter for all the latest Cedar tips and expert advice.